Table of Contents
![]() About the Author
About the Author
![]() Reviews and Awards
Reviews and Awards
- Video Recovery
- SD Card Recovery
- Recycle Bin Recovery
- Recover Data from USB
- Recover Deleted Emails
- Hard Drive Not Showing Up in Windows
- Recover Unsaved Word Documents
- Recover Deleted Files
- Recover Files from Virus Infected Hard Drive
- Best Free Photo Recovery Software
- Recover Files from Formatted Hard Drive
The persistent issue of "Memory Integrity can't be turned on" can be a daunting obstacle, especially if you want to enhance the security of your Windows systems.
In this comprehensive guide, we tackle the details of Memory Integrity activation issues, providing insights into the potential roadblocks you may face. As we explore reasons ranging from hardware compatibility to antivirus attacks, you'll gain the knowledge to troubleshoot and resolve this issue effectively.
How to Fix the Memory Integrity Can't Be Turned On
A common issue that can present itself to a Windows user is the one where the error of Memory Integrity can't be turned on, and it is accompanied by an error message "Memory Integrity can't be turned on," or that "Memory Integrity is off".
Memory Integrity is a critical Windows security component that protects your system from malware violations and kernel-level attacks.
Here are the 7 methods for you to solve this problem.
- Fix 1. Clean Install Windows
- Fix 2. Check for Memory Problems via the Registry Editor
- Fix 3. Update Windows USB Drivers
- Fix 4. Factory Reset Windows
- Fix 5. Scan Windows Memory for Malware
- Fix 6. Utilize the System File Checker Tool
- Fix 7. Start Windows in Safe Mode
On the other hand, while Memory Integrity is turned on, it monitors and protects the system memory actively, making it a valuable defender against advanced threats.
Fix 1. Clean Install Windows
If you encounter the "Memory Integrity can't be turned on" issue, opting for a clean installation might be necessary. It's essential to note that this method will remove all your applications, personal files, and data. To perform a clean installation on Windows 11 using a USB drive, here's what to do:
Step 1. Start the computer, ensuring that the USB drive is connected.
Step 2. Select any key to initiate the boot from the USB device when prompted.
Step 3. On the "Windows Setup" screen, click "Next."

Step 4. Select "Install now."

Step 5. If it's a reinstallation and you don't have a product key, choose "I don't have a product key" and click "Next."

Step 6. If applicable, choose the "Windows 11" edition that your license key activates.
Step 7. Click "I accept the license terms" and choose "Next."
Step 8. Opt for "Custom: Install Windows only (Advanced)" for a clean installation.

Step 9. Choose the partition with the existing installation (typically "Drive 0") and click "Delete."
Step 10. Select the empty drive ("Drive 0 Unallocated Space") and click "Next."

Fix 2. Check for Memory Problems via the Registry Editor
If the Memory Integrity feature continues in a disabled state, you can manually activate it using the Registry Editor.
Here's how to do it:
Step 1. Initiate the process by opening the "Start" menu, typing Registry Editor, and selecting "Run as administrator."

Step 2. Confirm by selecting "Yes" in the prompt.
Step 3. In the top address bar of the Registry Editor, enter the following address:
HKEY_LOCAL_MACHINE\SYSTEM\CurrentControlSet\ControlDeviceGuard\Scenarios\HypervisorEnforcedCodeIntegrity
Step 4. Locate and double-click the "Enabled" key, input 1 in the "Value Data" field, and press "OK."

After completing these steps, reboot your system to implement the changes. Following the restart, any issues related to the Memory Integrity feature should be effectively addressed on your PC.
If you find this information helpful, please share it with others on social media to assist them in overcoming this common challenge.
Fix 3. Update Windows USB Drivers
Updating your USB drivers is a straightforward process, and the following steps guide you through resolving issues related to outdated drivers, preventing any disruptions.
Here's a manual approach for updating USB drivers on Windows 11:
Step 1. Press the "Windows key + X," then choose "Device Manager" from the menu.

Step 2. Navigate to the specific USB device for which you intend to update the driver.
Step 3. Right-click on the USB device to open additional options.
Step 4. After that, right-click on the device's name and opt for the "Update Driver" selection from the context menu.

Step 5. Select "Search automatically for updated driver software."

Step 6. Windows will promptly initiate a search for an updated driver version and install it automatically if there's any.
Fix 4. Factory Reset Windows
If you encounter an unusual issue with your Windows 11 PC that remains unresolved, or if Windows has accumulated excessive clutter over time, or perhaps you've encountered registry mishaps with no straightforward solution, initiating a factory reset could be the key.
This option allows you to refresh or reinstall Windows 11 without losing any installed applications or files.
How to Recover Files after Reinstalling Windows 11
Here, follow the three effective ways to recover files after Windows reinstall, clean install, reset, or automatic update. Read more >>
To carry out a factory reset on your Windows 11 laptop or desktop while retaining your files, follow these steps:
Step 1. Click the "Windows key + I" keys to open "Settings."

Step 2. Navigate to "Update & Security."

Step 3. Select the "Recovery" option.

Step 4. Under the "Reset this PC" or "Reset PC" section, click on "Get Started."

Step 5. Opt to "Remove everything."

Step 6. Choose between "Local reinstall" or "Cloud download" to reinstall the system.

Step 7. Click "Next" if Windows warns about the inability to revert to a prior OS version.

Step 8. Confirm the reset by clicking "Reset" when prompted. Windows will then restart, requiring several minutes to complete the reset process.
Fix 5. Scan Windows Memory for Malware
If your computer is experiencing issues such as the Memory Integrity being turned off error, malware infections could be a potential cause.
Checking for malware using Windows Security or a reliable third-party antivirus tool is essential. To conduct a malware scan using Windows Security, adhere to the following steps:
Step 1. Initiate the process by tapping the "Start" key and typing Windows Security into the search bar.
Step 2. Select the "Windows Security" app from the search results.

Step 3. Within the app, navigate to "Virus & threat protection."

Step 4. Click on Scan options."

Step 5. Opt for a "Full scan" and proceed by clicking "Scan now."

Step 6. Stick to the on-screen instructions to complete the scan.
Step 7. After that, restart your computer once the scan is finished.
This comprehensive malware scan can uncover and eliminate potential threats, address issues related to memory integrity, and enhance the overall security of your Windows system.
Fix 6. Utilize the System File Checker Tool
To address the memory integrity error potentially caused by corrupted system files, apply the System File Checker (SFC) tool using the following steps:
Step 1. Choose the "Windows" button on your keyboard.
Step 2. Then, input Command Prompt and select "Run as administrator."

Step 3. Input the command: sfc /scannow and press "Enter:"

Once the scan is complete, restart your Windows system.
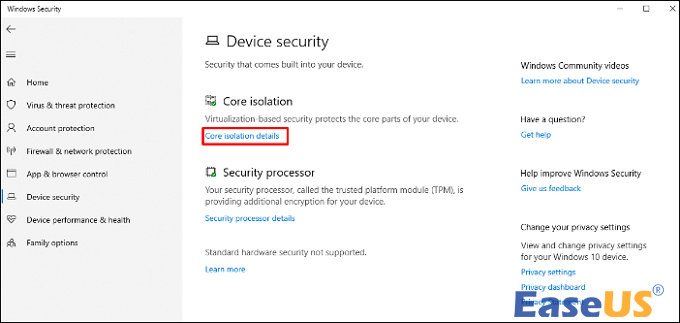
Try to activate memory integrity by:
Step 1. Navigating to "Windows Security."
Step 2. Click on "Device security."

Step 3. Lastly, choose "Core isolation details."
If issues persist after scanning and repairing system files or drivers, proceed to the following troubleshooting method.
Fix 7. Start Windows in Safe Mode
For troubleshooting and addressing issues such as the "Memory Integrity can't be turned on" error, using Safe Mode in Windows can be a valuable strategy.
Here's a guide on how to start Windows 11 in Safe Mode:
Step 1. Click the "Start" button found in the bottom left corner of your Windows screen.
Step 2. Navigate to the "Power" icon and simultaneously hold down your keyboard's "Shift" key.
![]()
Step 3. While still holding the "Shift" key, select "Restart."

Step 4. Allow your Windows system to restart. Next, choose the "Safe Mode" option from the provided menu to initiate the boot into Safe Mode.
Following these steps creates an environment where only essential system processes are active, facilitating effective troubleshooting and potential resolution of the Memory Integrity error.
Recover Lost Data Due to Memory Integrity Error on Windows
When the Memory Integrity issue strikes, it often brings along the unfortunate consequence of data loss.
Files may become inaccessible or seemingly disappear, leaving users challenging. To prevent this risk and ensure the safety of your data, employing a reliable data recovery tool like EaseUS Data Recovery Wizard becomes crucial.
This software is specifically designed to assist users in recovering files after factory reset Windows 10, system crashes, and unintentional file deletions.
Plus, the tool can recover deleted file types, such as documents, videos, photos, audio files, and more.
Many Windows 10/11 users have proven the tool's efficacy. If you want to resolve the file recovery, share it on Facebook, Twitter, Instagram, and other social media platforms!
Why Can't I Turn Memory Integrity On
If you struggle with the "Memory Integrity can't be turned on," you're not alone. This obstacle can leave you feeling frustrated and concerned about the security of your Windows system. In this section, we'll explore some reasons why Memory Integrity may refuse to turn on:
- 🖲️Outdated drivers: Obsolete or incompatible drivers can hinder the proper functioning of Memory Integrity. Windows relies on up-to-date and compatible drivers for various system components.
- ⚔️Antivirus interference: Certain antivirus or security software may interfere with the functioning of Memory Integrity. Real-time protection features might clash with Memory Integrity processes, leading to activation issues.
- ⚡Compatibility issues: One significant reason Memory Integrity might resist activation is compatibility issues with specific hardware or drivers.
- ⏰Windows update pending: Unfinished or pending Windows updates can affect the activation of Memory Integrity. Ensure that your system is up-to-date with the latest Windows updates to address any potential bugs or compatibility issues that might be hindering Memory Integrity activation.
LEARN MORE
Still curious? Click here to learn about [Solved] Your Computer Is Low on Memory Windows 7/8/10 in 8 Ways.
Final Thoughts
Navigating Memory Integrity or update challenges on Windows underscores the critical balance between security and functionality.
In this article, we've looked at the complexities behind Memory Integrity activation issues and emphasized the significance of safeguarding data with tools like EaseUS Data Recovery Wizard. In the digital landscape, where system hiccups are inevitable, the use of reliable data recovery software becomes a key strategy.
Memory Integrity Can't Be Turned On FAQs
To learn more, check out these questions and answers about the "Memory Integrity can't be turned on" error.
1. Is it bad if memory integrity is off?
Yes. Memory integrity is a vital defense against malicious code attacks, ensuring the trustworthiness of all device drivers installed on the operating system. This security feature is always on by default in Windows Security for every new Windows 11 device.
2. What is memory integrity on or off?
Memory integrity, on or off, determines the status of a security feature within core isolation. When turned on, it safeguards against unauthorized access by malicious code to high-security processes during potential cyber threats. When it's off, you run the risk of cyber attacks.
3. Should I turn on Windows 11 memory integrity?
Yes. This feature is essential in enhancing your computer's security, particularly in preventing kernel-level exploits attempting to execute malware with elevated privileges. It is advisable to activate memory integrity and establishing a backup plan for your critical data is advisable.
4. How do I fix Windows 11 memory integrity is off?
Here are some solutions to fix this problem:
- Clean install Windows
- Check for memory problems via Registry Editor
- Update Windows USB drivers
- Factory reset Windows
- Scan Windows memory for malware
- Utilize the System File Checker tool
- Start Windows in safe mode
Was This Page Helpful?
Jaden is one of the editors of EaseUS who lives and works in Chengdu, China. She focuses on topics concerning PCs and Mac data recovery. Jaden is committed to enhancing professional IT knowledge and writing abilities. She is always keen on new and intelligent products.
-
EaseUS Data Recovery Wizard is a powerful system recovery software, designed to enable you to recover files you’ve deleted accidentally, potentially lost to malware or an entire hard drive partition.
Read More -
EaseUS Data Recovery Wizard is the best we have seen. It's far from perfect, partly because today's advanced disk technology makes data-recovery more difficult than it was with the simpler technology of the past.
Read More -
EaseUS Data Recovery Wizard Pro has a reputation as one of the best data recovery software programs on the market. It comes with a selection of advanced features, including partition recovery, formatted drive restoration, and corrupted file repair.
Read More
Related Articles
-
Top 6 Best Data Recovery Services
![author icon]() Brithny/2023/11/08
Brithny/2023/11/08 -
What Is GPT Disk? How to Recover GPT Partition Data
![author icon]() Daisy/2023/11/28
Daisy/2023/11/28 -
League of Legends Account Recovery: How to Get Riot Account Back
![author icon]() Cedric/2024/01/11
Cedric/2024/01/11 -
Locked Out of Windows 11 | How to Unlock the Account in Windows 11
![author icon]() Jaden/2023/12/04
Jaden/2023/12/04