Fix Files Not Showing on Desktop Mac | Best 5 Methods
Finley updated on Nov 28, 2024 to Files Repair & Photo Restoration Guides | How-to Articles
Have you ever encountered files not showing on desktop Mac error when you searched everywhere but could not locate your newly created files? Do not worry, this post will help you show your files again.
For Mac users, the desktop is the default location for saving screenshots and allowing hassle-free access to files. But it is also possible that your files not showing on desktop Mac for some specific reasons. This post will give you a few workable ways to solve this error and locate your files again. Keep reading till the end to get solutions for your problem.
If your files are corrupted or damaged for a specific reason, you may also encounter errors such as files not being visible or directly disappearing from your desktop. The most effective way to handle this is to use professional file repair software for Mac. EaseUS Fixo File Repair is your go-to choice that won't let you down.
This file repair software from EaseUS can also help when you can't open a file on a Mac, your account does not allow editing on Mac, or your Mac preview does not work. EaseUS Fixo File Repair will strive to save your problematic files.
Follow the detailed instructions here to repair corrupted files on Mac:
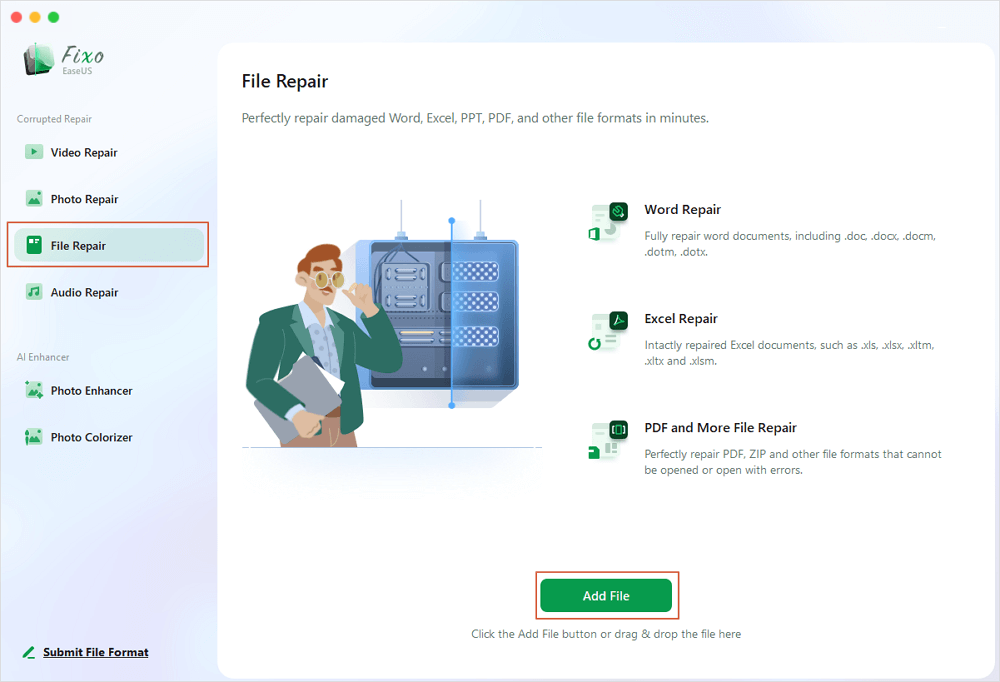
Step 1. Launch Document Repair Software
Run EaseUS Fixo Document Repair. Choose "File Repair" on the left panel. This software allows you to repair corrupted Office documents, including Word, Excel, PDF, and others.

Step 2. Choose and Repair Corrupted Document
Click "Repair All" to repair all the documents added. If you want to repair a single document, move the mouse pointer to the target document and click "Repair." To preview the repaired document, click the eye icon.
Step 3. Preview and Save the Repaired Document
When the repair process finishes, click "Save" to save a selected document. Also, you can click "Save All" to save all repaired documents. To locate the repaired folder, click "View Repaired".
It would be great if you shared this post with your friends or colleagues who are facing the same invisible files on your Mac desktop:
If you have accidentally hidden your files from the desktop, you may try to look for your files in the Terminal. Follow the steps here:
Step 1. Launch Terminal on your Mac, you can either locate it or use hotkeys "Command + T" to open it.
Step 2. Now type in the following path and hit Enter:
And you can see all your hidden files now.
You can also use Finder to locate your files on your Mac. Now, read the detailed instructions here:
Step 1. Open Finder and locate the folder and file you are searching for. Then, right-click on the file tab and choose "Get Info" from the menu.
Step 2. Now, choose "folder/file preview" from the top-left corner.
Step 3. Wait for the preview to be highlighted and hit backspace.
All files on your desktop and documents folders will be moved to iCloud Drive if you have enabled the "Desktop & Documents" option on the iCloud Drive of your Mac. So, you may try disabling the storage option and see if your files will be shown. Follow the steps here:
Step 1. Click on the Apple logo and choose "System Preferences" from the drop-down menu.
Step 2. Locate "iCloud" and choose "Options".
Step 3. Now, uncheck the "Desktop & Documents Folders" box. Tap on the "Done" button.
Mac has a desk stack feature that will automatically organize your desktop files to make your desktop look neater. In this case, the newly created files may be hidden among the stacked folders. You can do as following to rearrange your files:
Step 1. Click on the Apple logo, choose "View" from the menu, and tap "Use Stacks".
Step 2. Then, navigate to the "Group Stacks By" and choose according to your needs. For example, if you want to find the newly created files, choose "Date Created".
Step 3. Now, you can see the files are archived using your chosen method, and you can easily locate them.
Here, you can read some frequently asked questions that may better help solve your problems:
You may have changed the setting in your iCloud sync to sync the Desktop and Documents folders automatically. To do so, you just need to uncheck it in the iCloud option.
You may use the hotkeys - hold Command + Shift + . to show your hidden Mac files if your files are hidden.
This post from EaseUS has looked at how to fix files not showing on desktop Mac. You can either utilize Terminal to search for hidden files, use Fidner to locate your files, and disable specific options in iCloud. But if your files are not showing due to file corruption, EaseUS Fixo File Repair should be your first choice.
Related Articles
FaceTime Not Working on Mac | How to Fix
How to Fix YouTube Vanced Not Working | 2025
How to Fix MacBook HDMI No Sound | Best Methods
Fix WinRAR Says No File to Extract [100% Working]