PCTrans Online Help
This is a dedicated online help to assist you understand our product easily and quickly, for any questions and concerns not addressed on this page, please do not hesitate to contact and we will always be happy to help.
Todo PCTrans
- Transfer directly
- Transfer via backup
- Transfer via disk
- File Sharing
- System Cleanup
- Large File Cleanup
- App Management
- Product Key
Welcome
Thanks for using EaseUS Todo PCTrans. Usually, a new computer (PC) comes with faster processing, more memory, and enhanced graphics. After purchasing a new PC, one of the most daunting tasks is to figure out how to transfer the accounts, settings, programs, and data from the old PC to a new one and maintain routine jobs as usual.
Todo PCTrans is born to make the migration process easier for you. This powerful and cost-effective application is able to move all of your selected accounts, settings, applications, files, and folders between 2 computers in an easy and simple way, and it is also able to transfer programs and data from a smaller partition to a larger one for releasing space within a computer.
Todo PCTrans transfers your PC through the network connection (local area) or compressed image file, and both source and target computer require a client of Todo PCTrans installed. It is worth mentioning that the two computers can also be directly connected via an ethernet crossover cable when using the network connection method.
Glossary
The process of copying all of your selected accounts, applications, files, and settings from your "old" PC to your "new" PC.
Pre-Transfer Checklist
1. System Requirements
• Windows XP 32bit (Version 13.16)
• Windows Vista 32bit/64bit
• Windows 7 32bit/64bit
• Windows 8/8.1 32bit/64bit
• Windows 10 32bit/64bit
• Windows 11 32bit/64bit
• Windows Server 2003/2008/2012/2016/2019/2022
2. Operating System on the new PC must be equal or newer than the source PC. For example, the data and applications cannot be moved from Windows 7 to XP via the network connection transfer method.
3. Todo PCTrans has been installed on both PCs. Download link: pcmove.net
4. Keep network connection stable and unobstructed while transferring.
5. Disable anti-virus programs and firewall on source and target computer to ensure successful connection.
Activation
Different versions of EaseUS Todo PCTrans
Free version
♦ Software title reads EaseUS Todo PCTrans Free
♦ Allow users to transfer no more than 2 programs and 500MB files, disk junk cleanup no more than 500 MB files
Trial version
♦ Software title reads EaseUS Todo PCTrans Trial
♦ Allow users to view which programs, data, and the user account can be transferred, but it is not allowed to do a real transfer without a license code
How to activate
To enjoy all features on business use, please simply click Upgrade to Full Version to open the window for purchasing or entering the license code. You can also see the edition difference of Todo PCTrans.
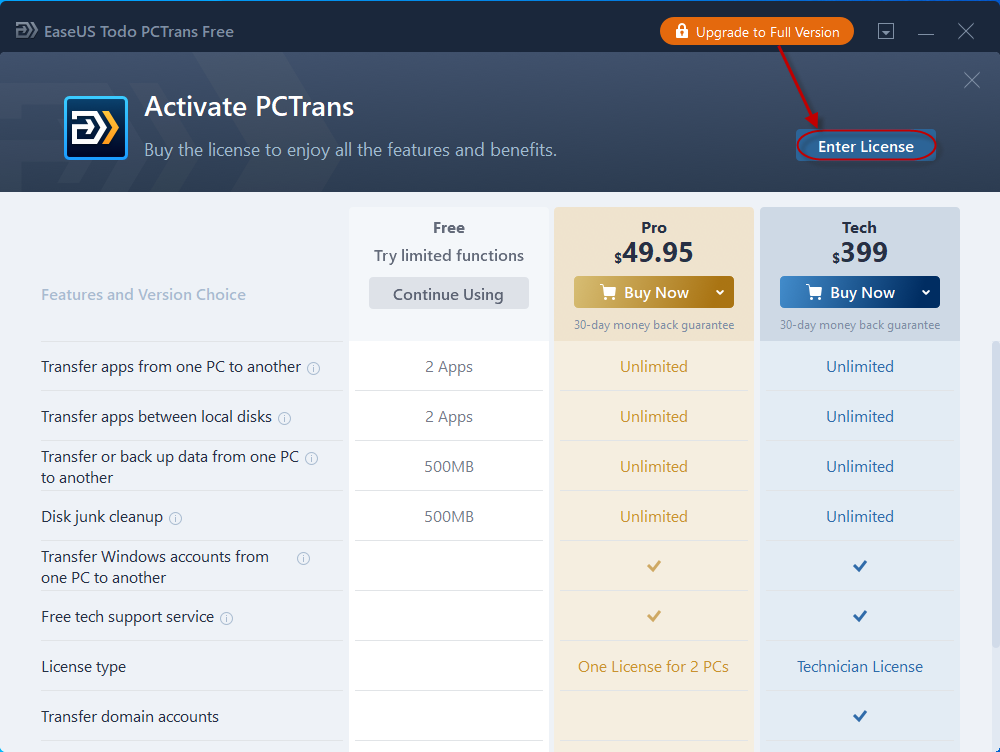
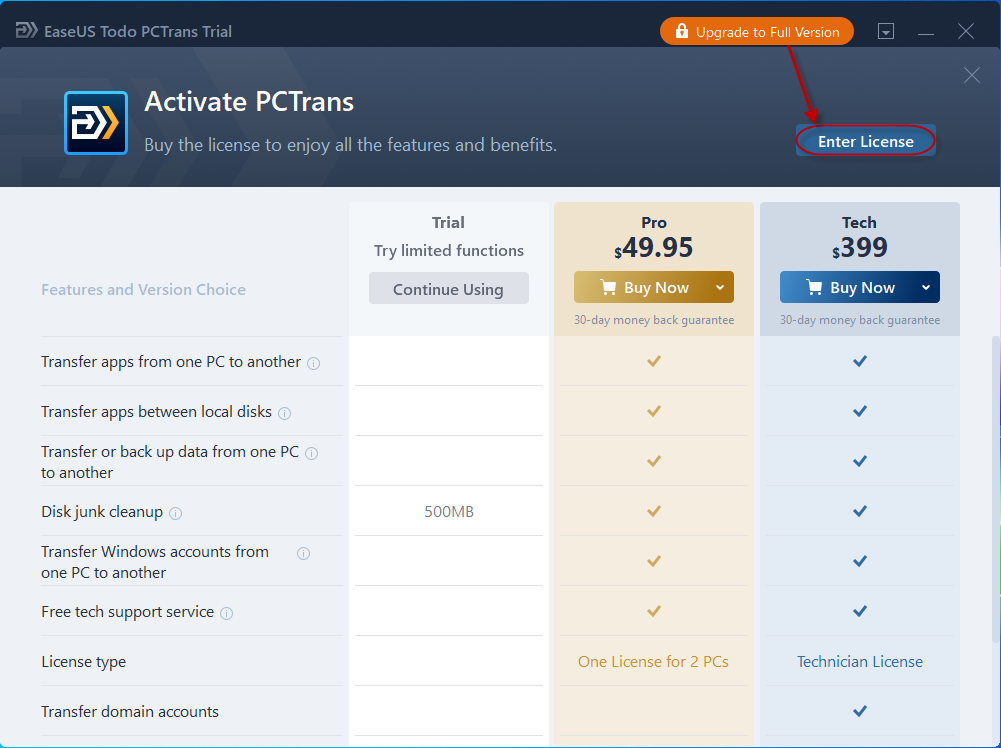
Press the Enter License button then copy and paste your license code to activate the software.
Once activated, the program title reads EaseUS Todo PCTrans Professional/Technician without further indication of Free or Trial.
And you can check your license code in “about” option.
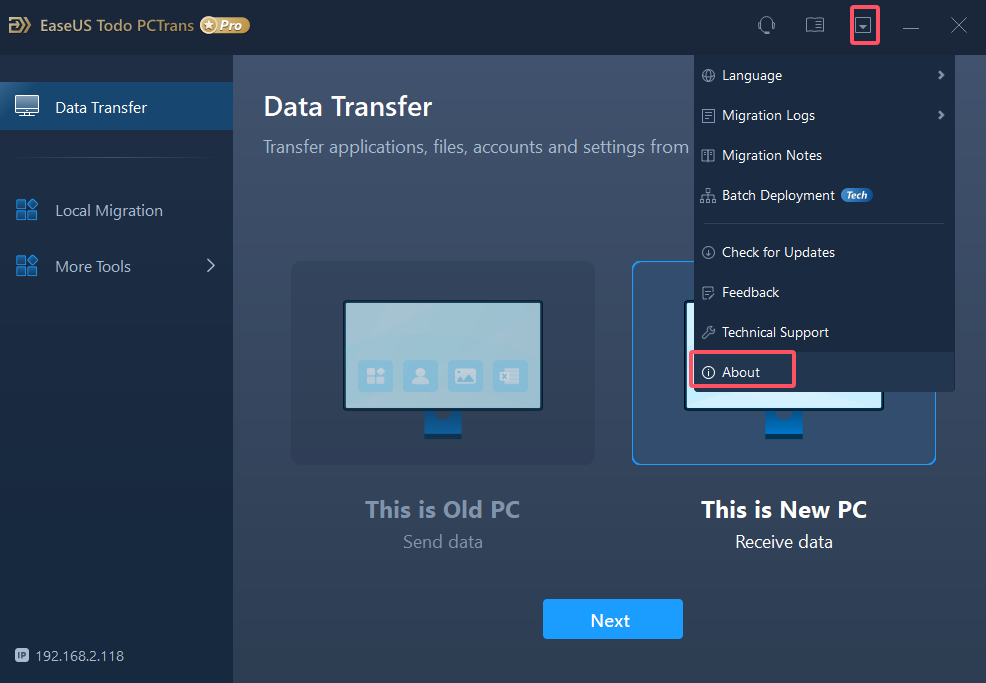
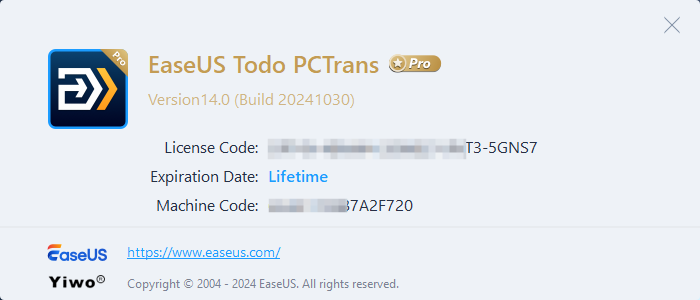
Data Transfer
Data Transfer(previously named “PC to PC”) is able to transfer applications, data, accounts, and settings between two PCs. There are three methods of transferring: Transfer directly/Transfer via backup/Transfer via disk.
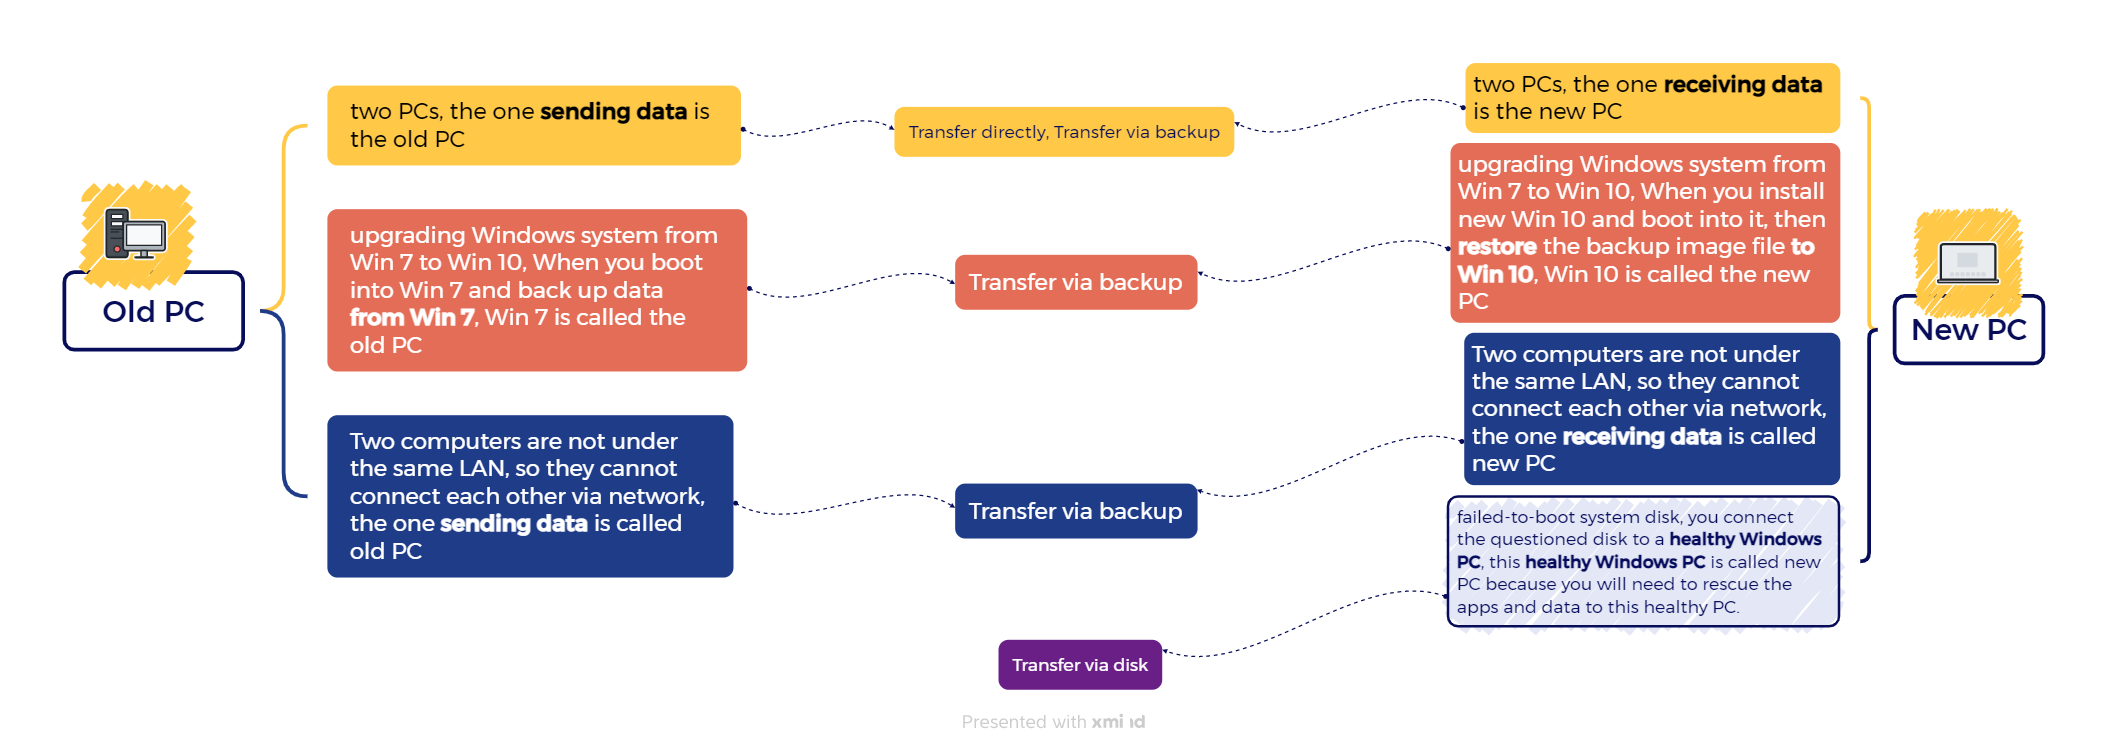
Before diving into the transfer process, we need to know when to choose the old PC and when to choose a new PC. Please check the mind map below.
Transfer directly
When you have the source computer and target computer connected to the same network, you can use this feature to establish connection between two computers and start transfer directly.
Connect old and new PC
On Old PC
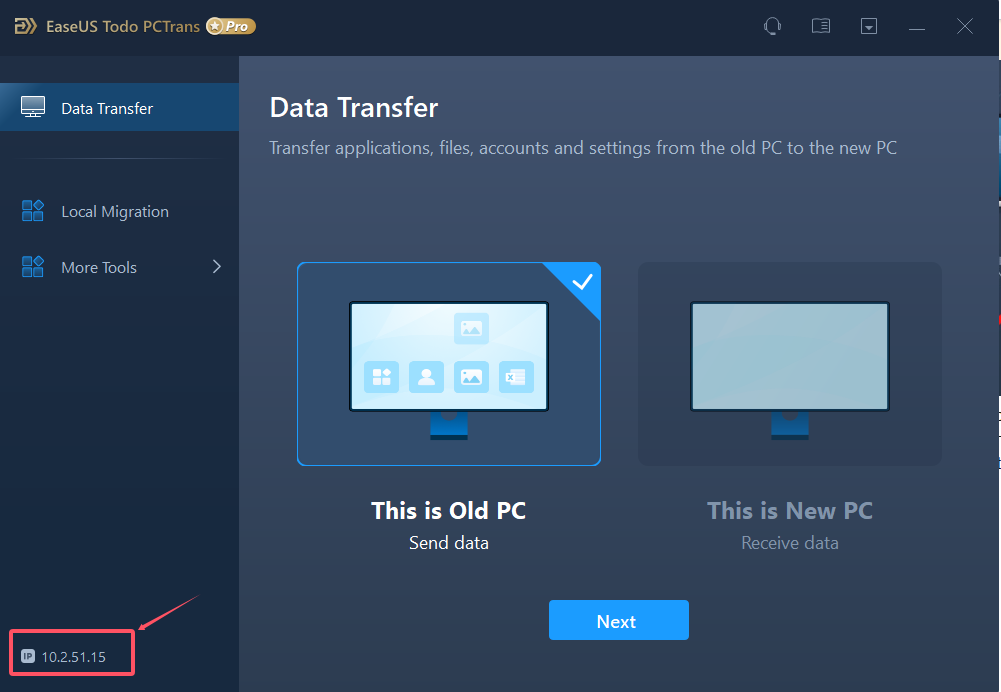
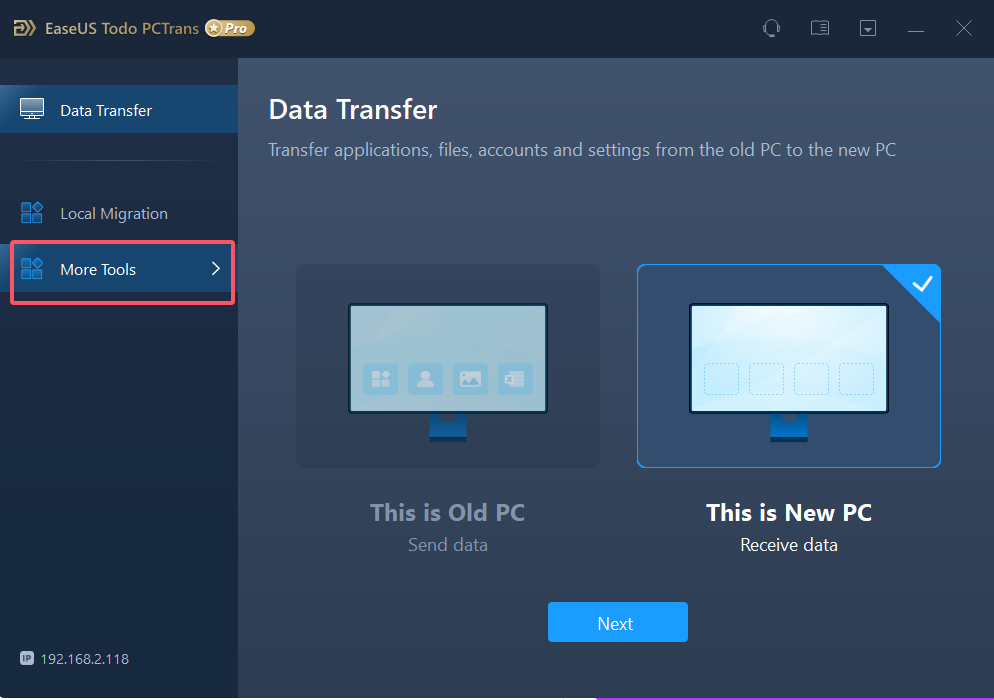
1. Launch Todo PCTrans and select Data Transfer. The IP address information on the current PC will be stated at the bottom.
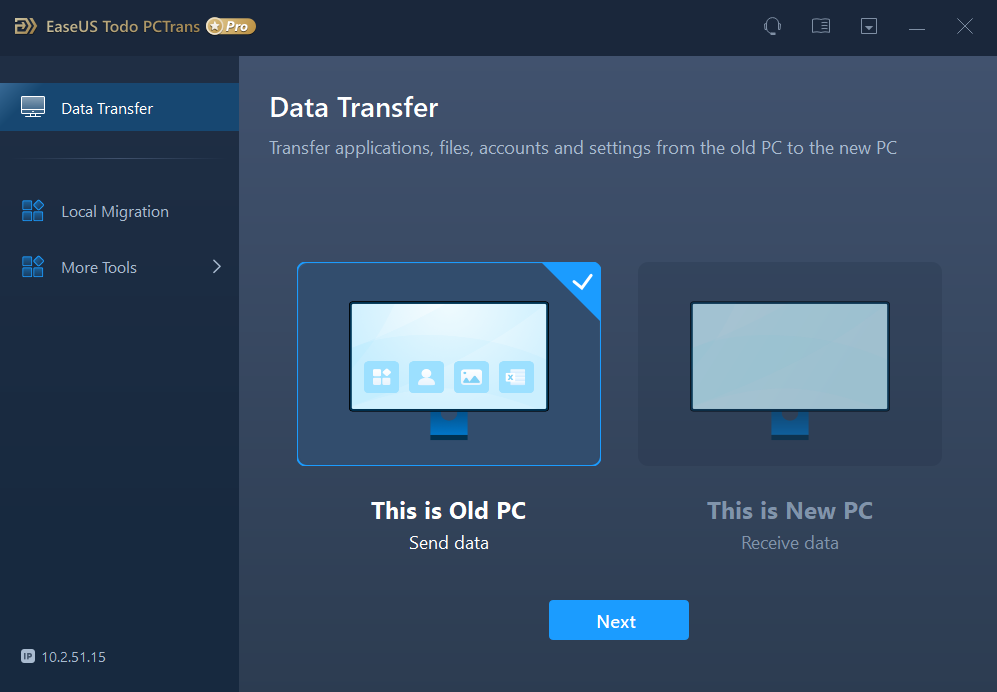
2. Click Data Transfer button and get the window to choose the current PC as the new PC(receiving data)or the old PC(sending data). The new PC is the PC you want to transfer the applications and files to, while the old PC is the PC you want to transfer the applications from.
On New PC
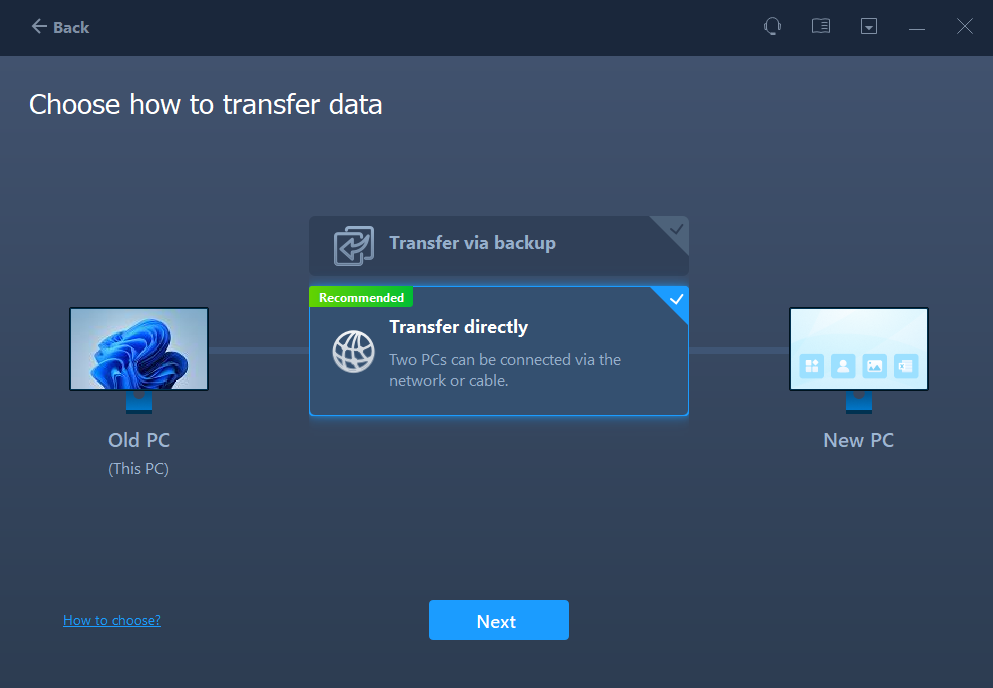
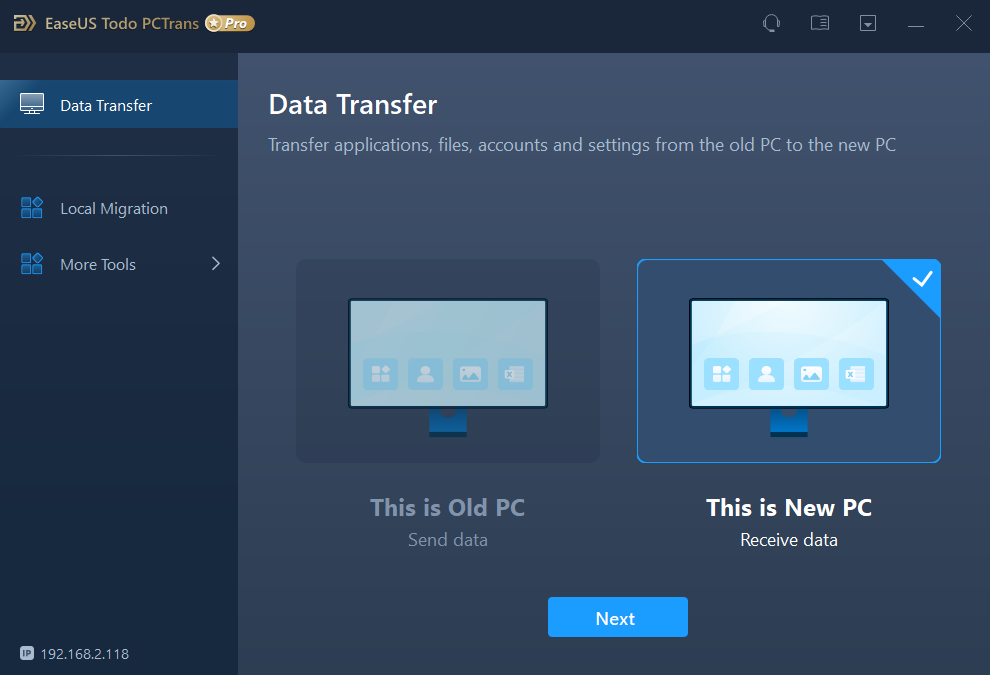
You should choose “This is New PC”, and you will see the interface below.
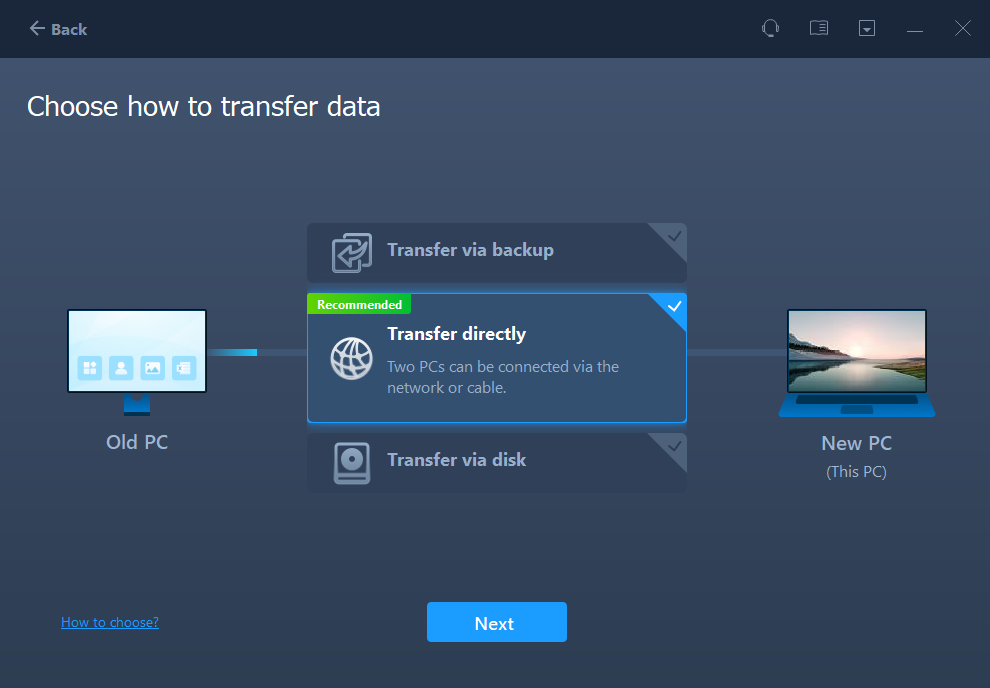
Please choose “Transfer directly”
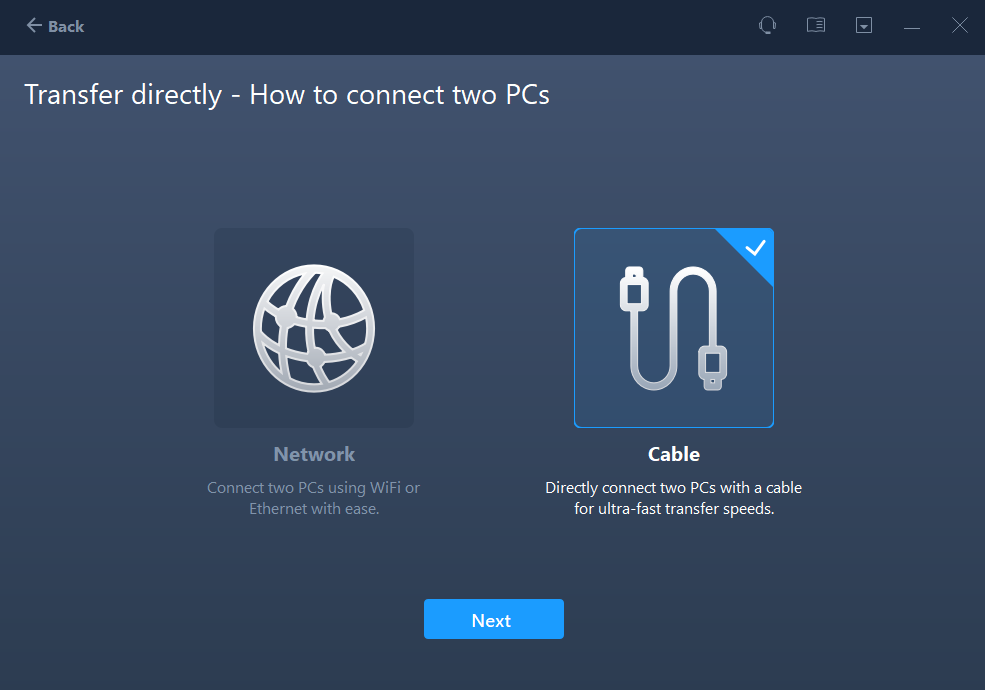
Please choose the connection mode as Network or Cable.
If two computers are connected to the same network, you can choose Network mode.
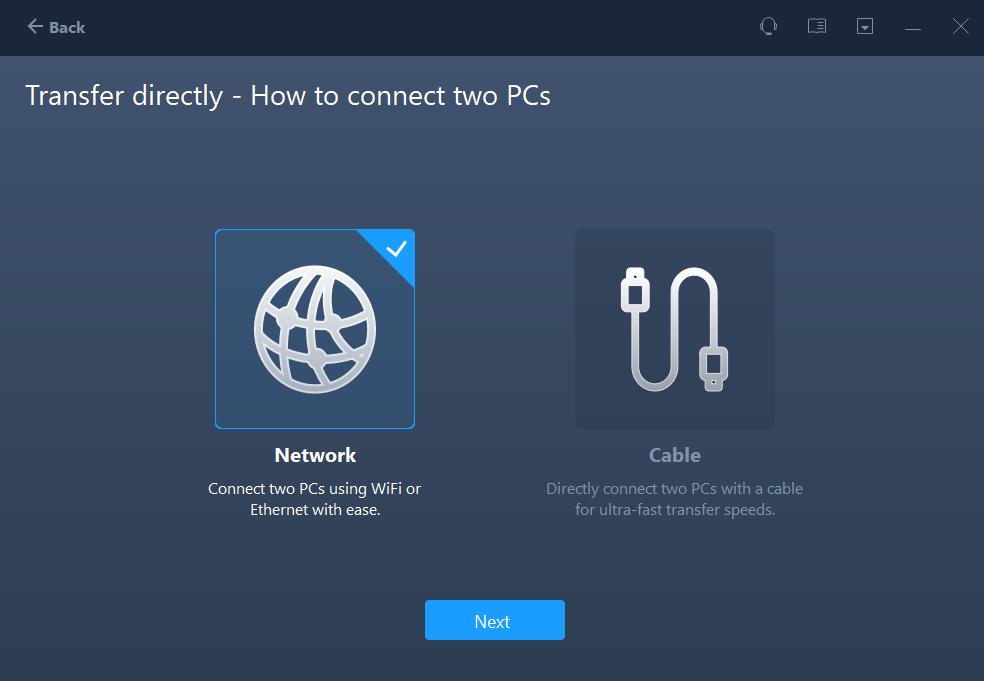
If you want faster and more stable transfer, or your computers don’t have internet connection, you can choose Cable method to connect to computers via wired connection.
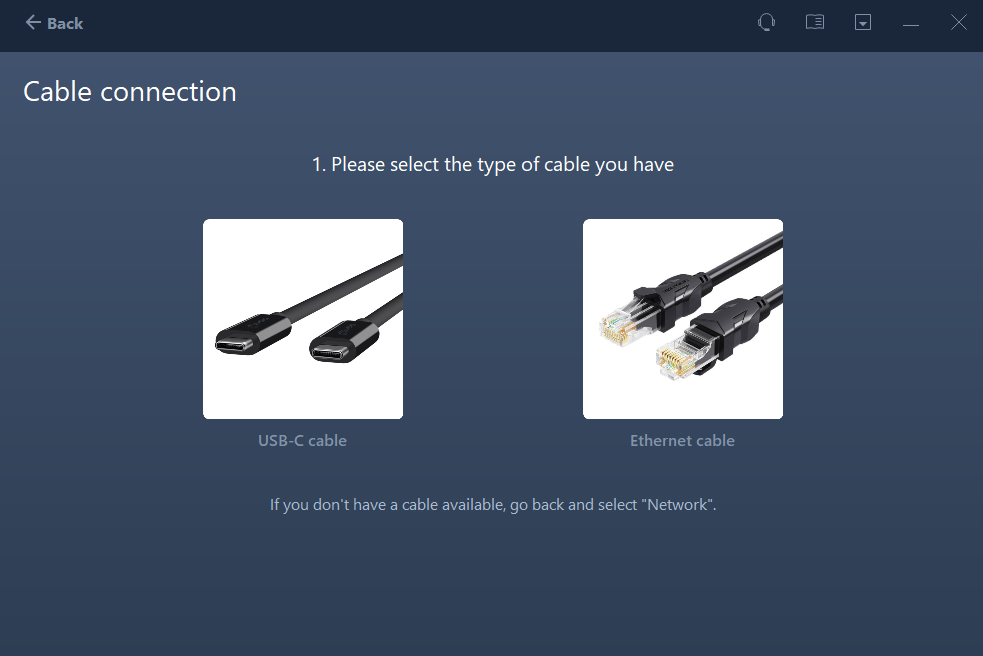
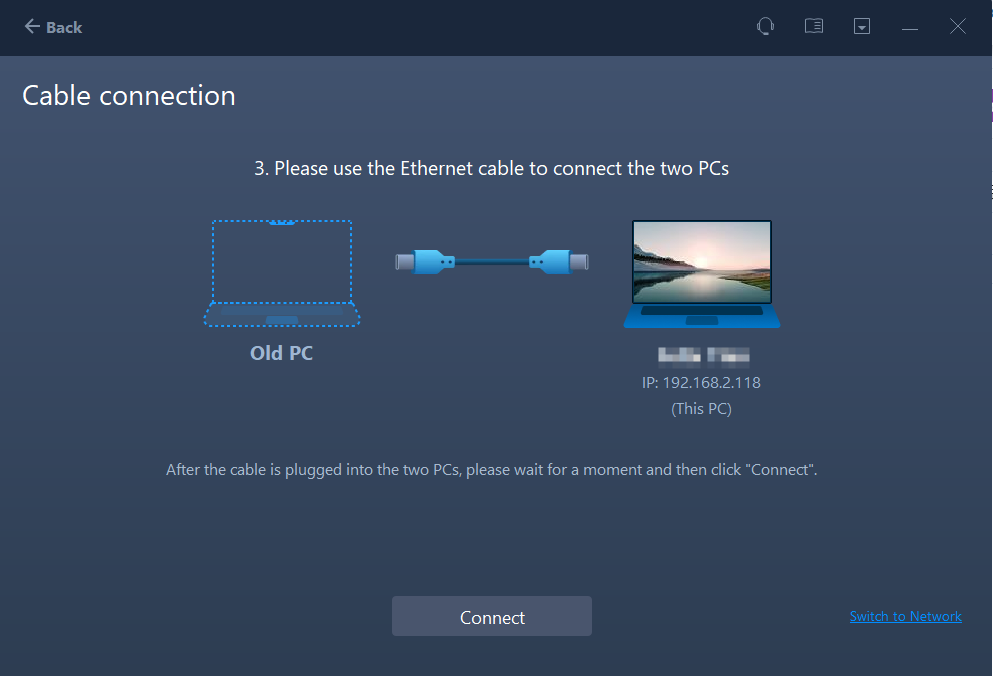
USB-C cable and Ethernet cable are supported. If you don’t have a cable available, please go back and select “Network”
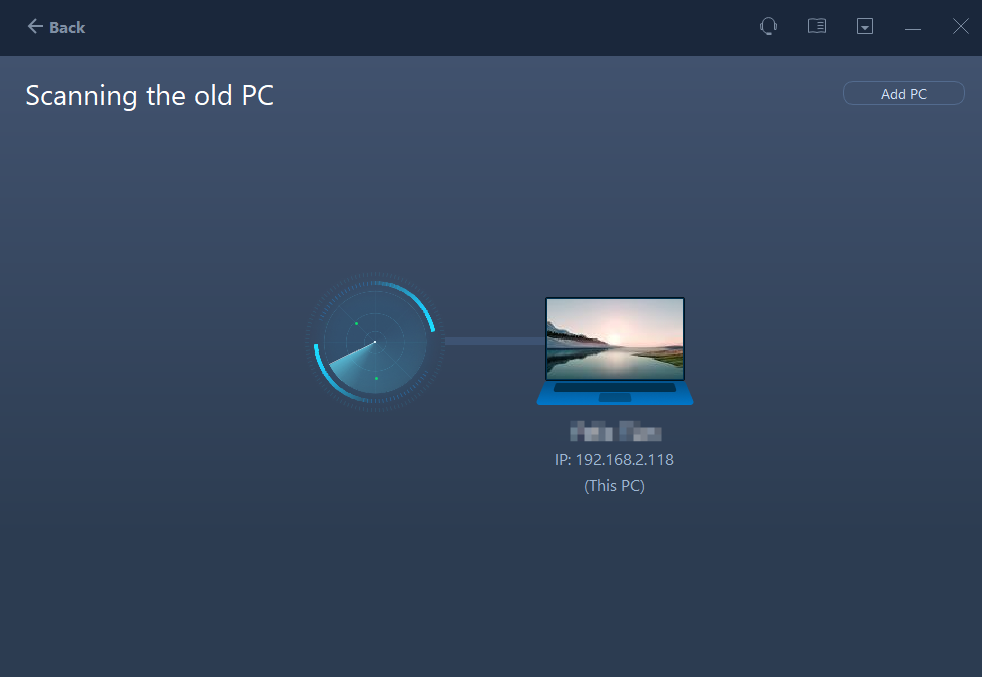
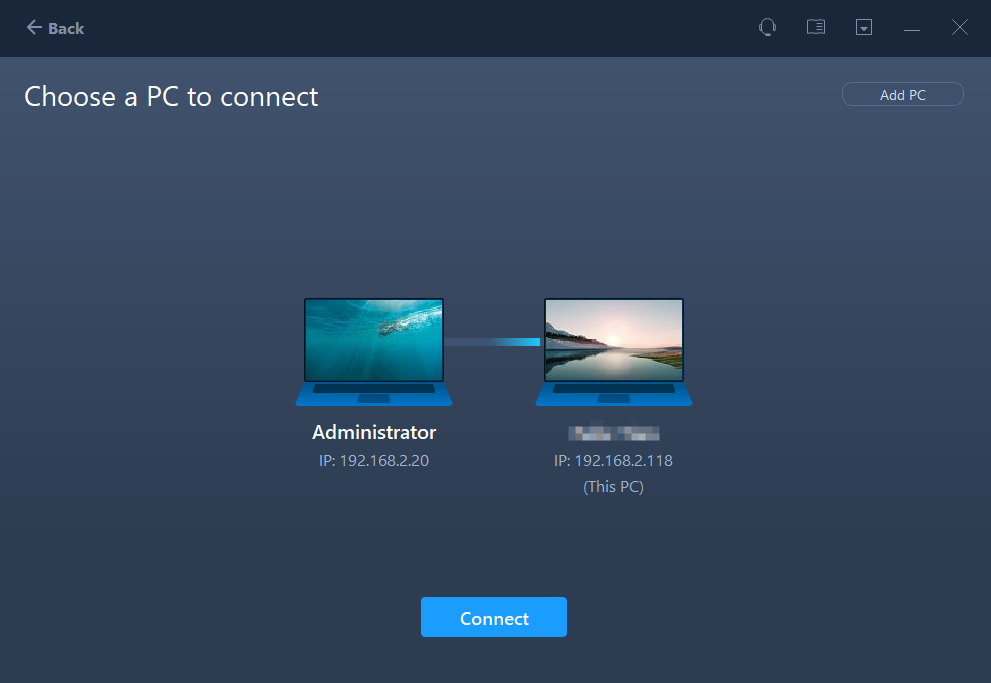
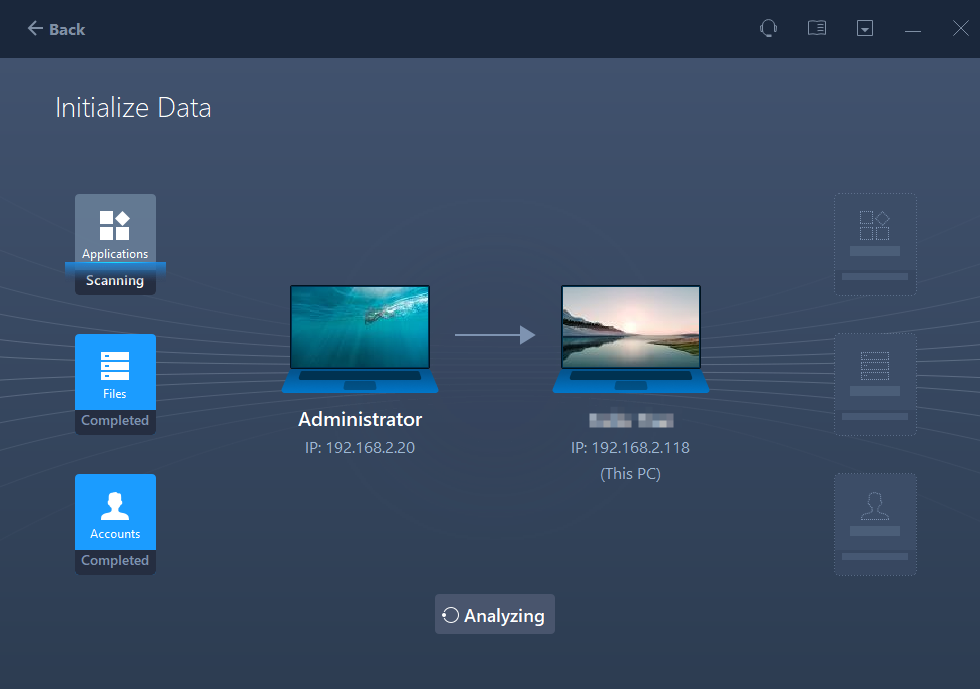
No matter which connection method you choose, after you establish connection between two computers, the product will scan and analyze the data in old PC.
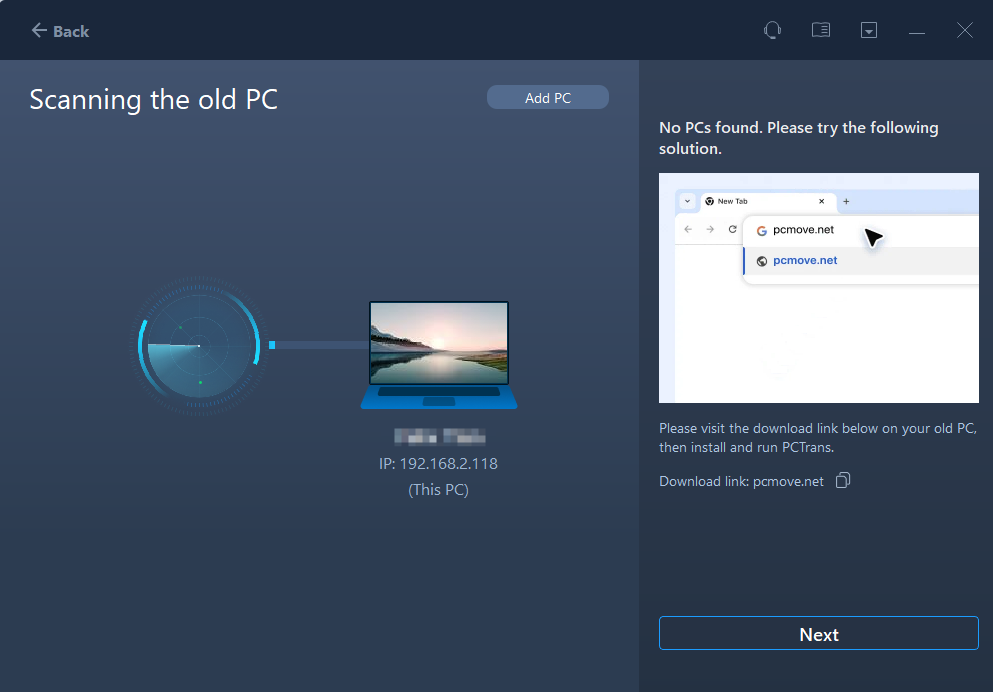
In case no PC is detected, a page will be presented containing useful hints to help you troubleshoot the issue.
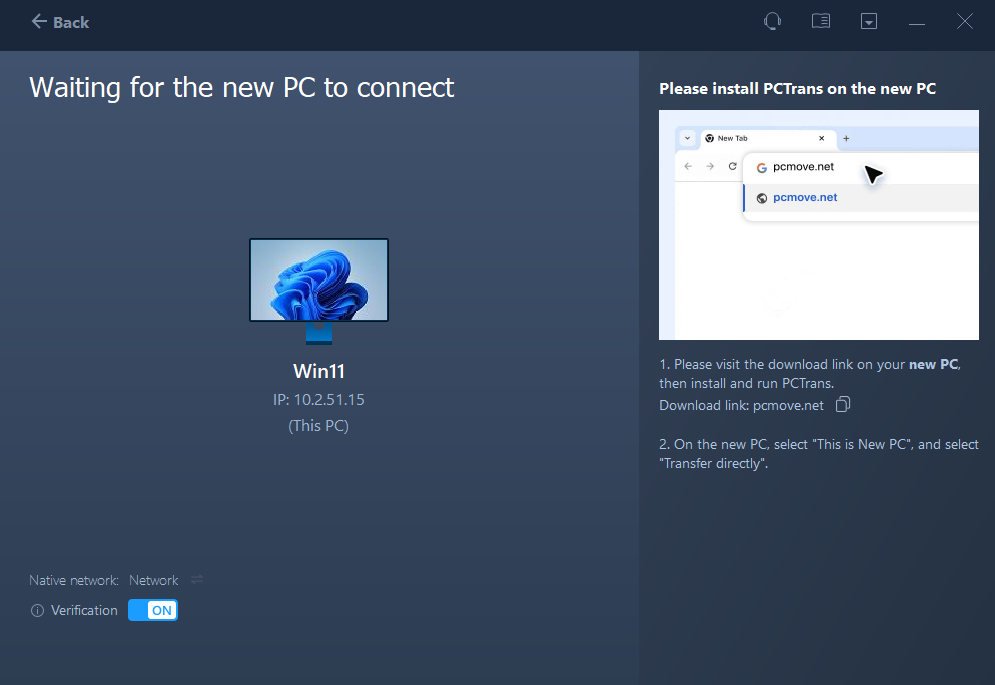
1. Visit pcmove.net to download and install the app on the other PC.
2. Make sure the two PCs are connected to the same LAN.
3. Turn off all the safety tools and firewall temporarily
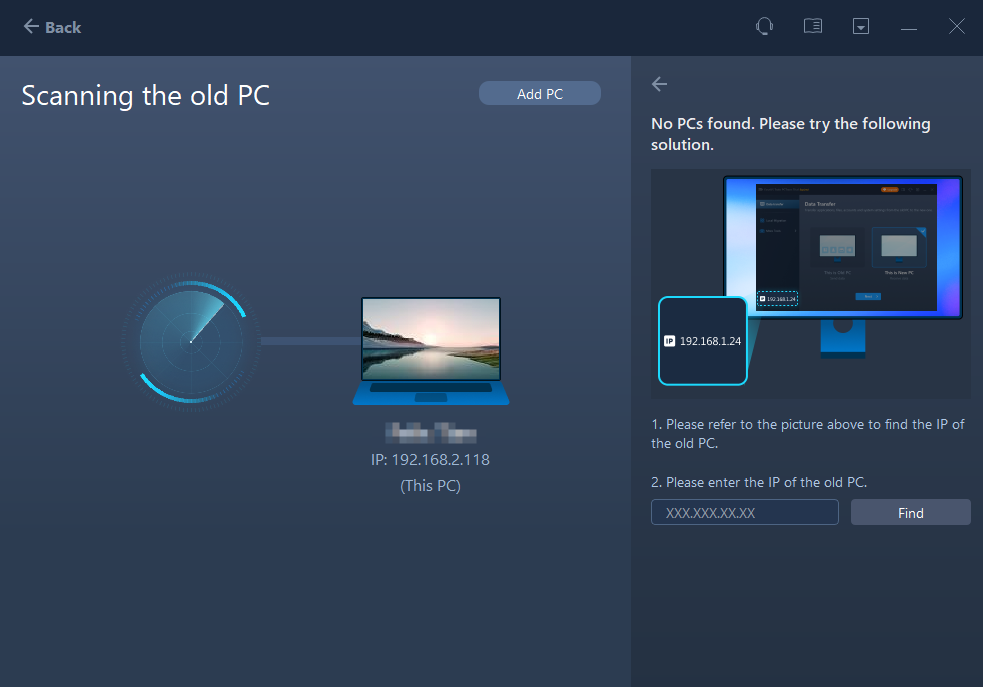
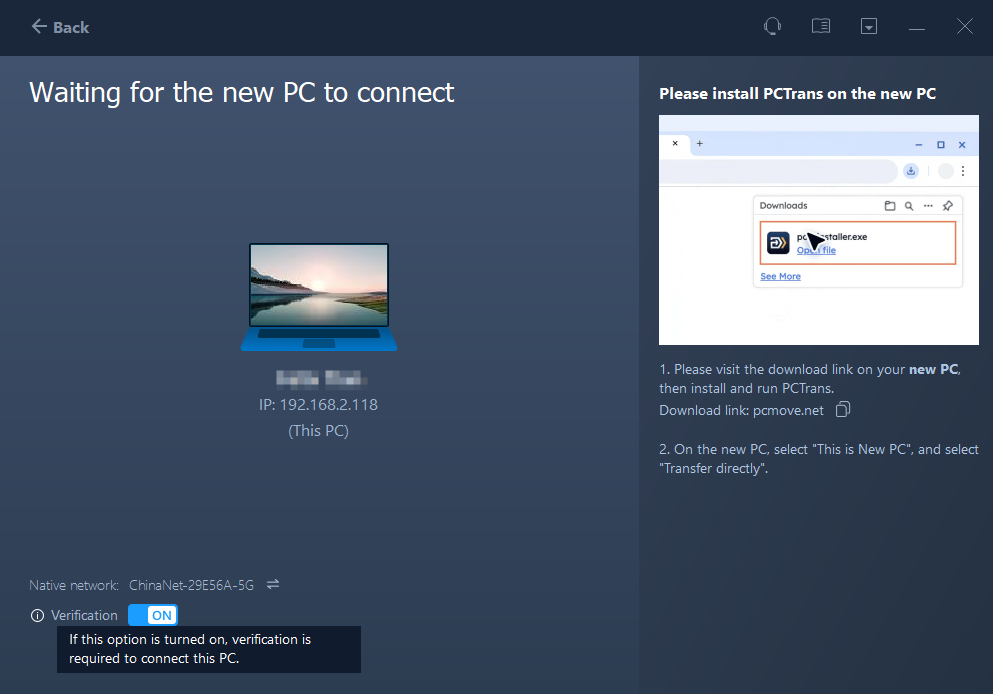
Todo PCTrans also provides the verification method to connect the two computers. If this option is turned on, verification is required to connect to this PC.
Old PC
New PC
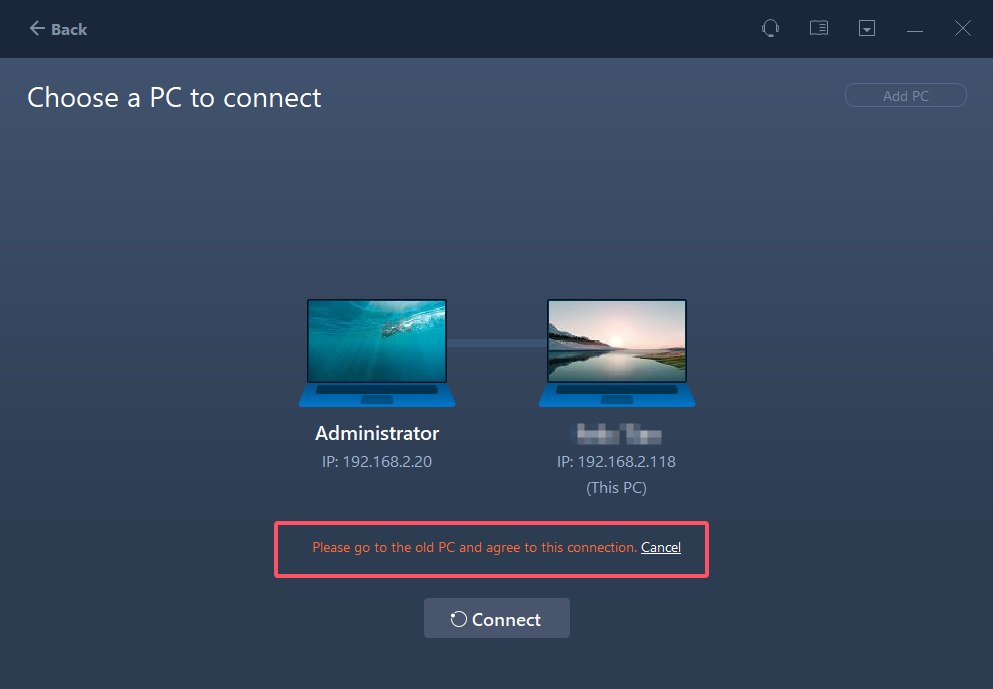
And then you will see the interface will be like below on old PC
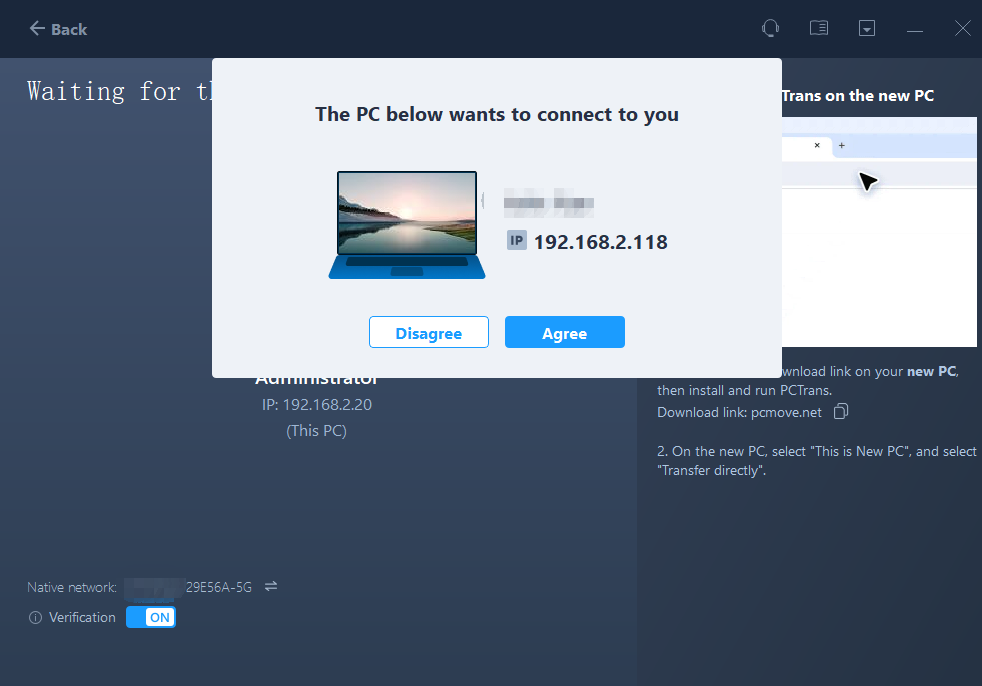
You need to agree the connection to proceed.
And you might also notice that the software will catch the screen wallpaper showing in our software to help you distinguish which is the old and which is the new PC.
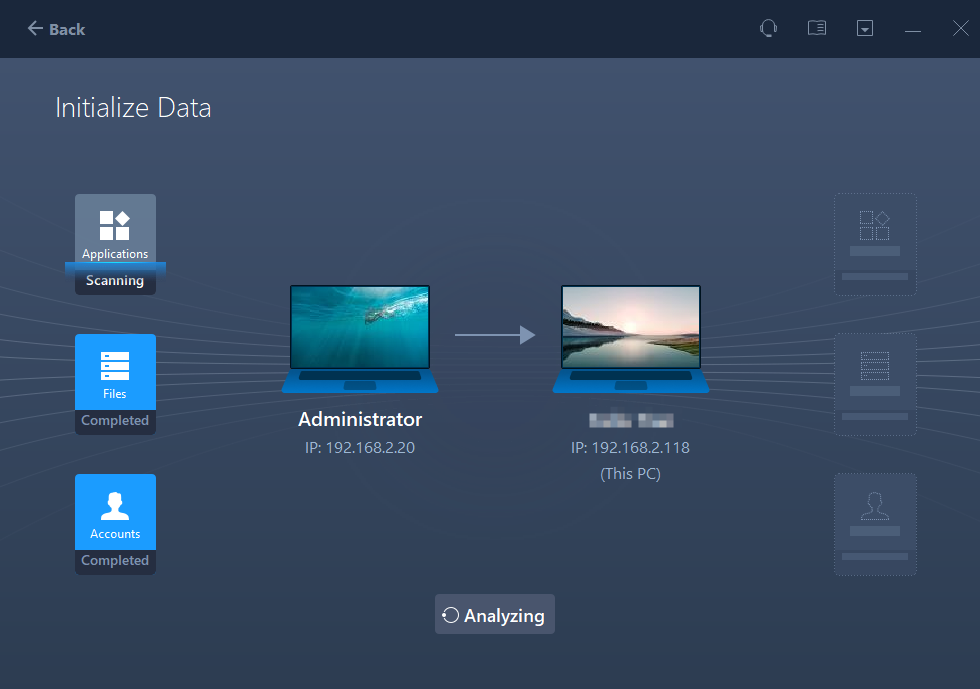
After finishing scanning and analyzing data in old PC, please select the content for transfer.
Select the content for transfer
1. Todo PCTrans requires some time to enumerate (load) all the applications, data, and accounts from the old (source) PC. The edit button will be clickable when enumeration completes. The required time varies due to the amount of data that needs to be transferred.
2. You will see all the applications, files, folders, accounts, and settings found by our product in the list.
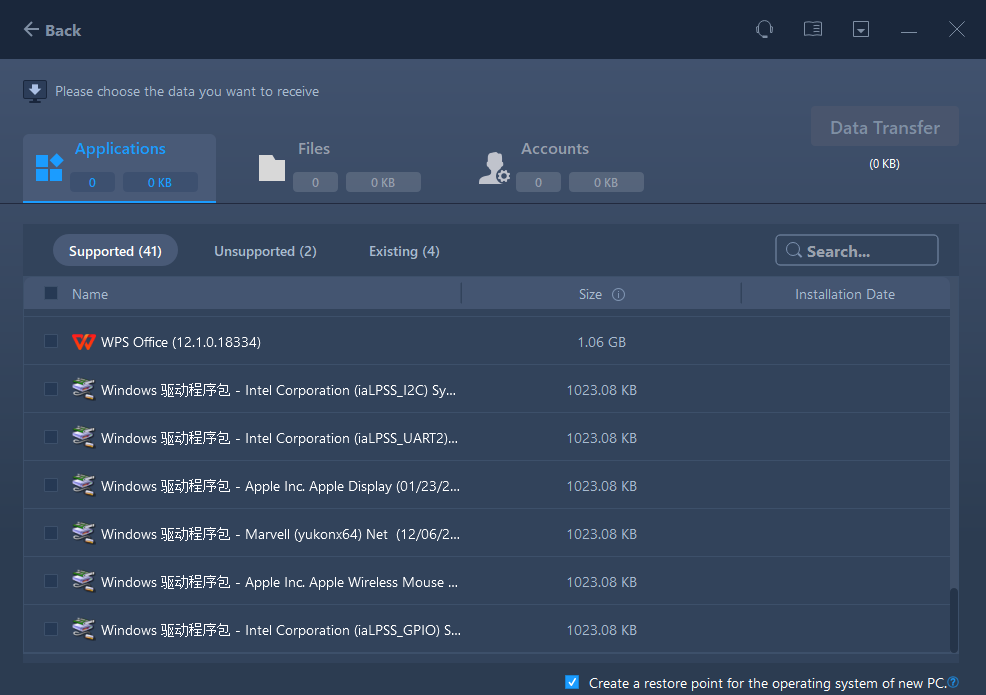
Creating a restore point for the operating system of the new PC ensures that you are always able to roll back your system to the status before transfer. However, enabling this option requires several minutes to finish the process.
3. Tick the check box to select the applications you want to transfer.
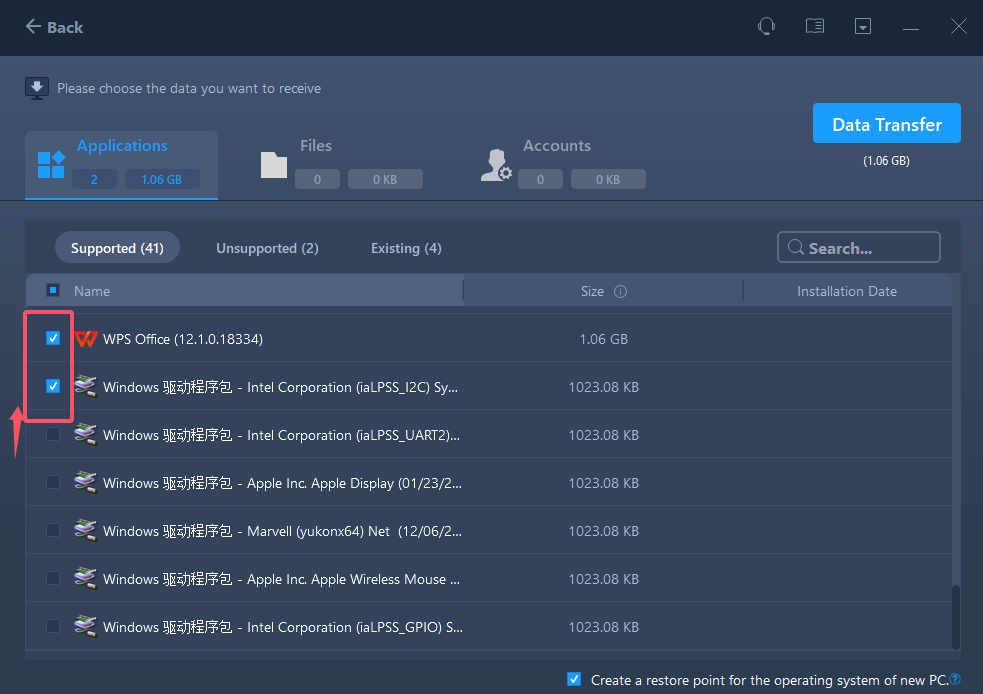
Note:
There are three categories of software compatibility:
Supported: the application is fully compatible with the new PC.
Unsupported: the application is not compatible with the new PC.
Existing: the application already exists on both PCs, transfer is not necessary.
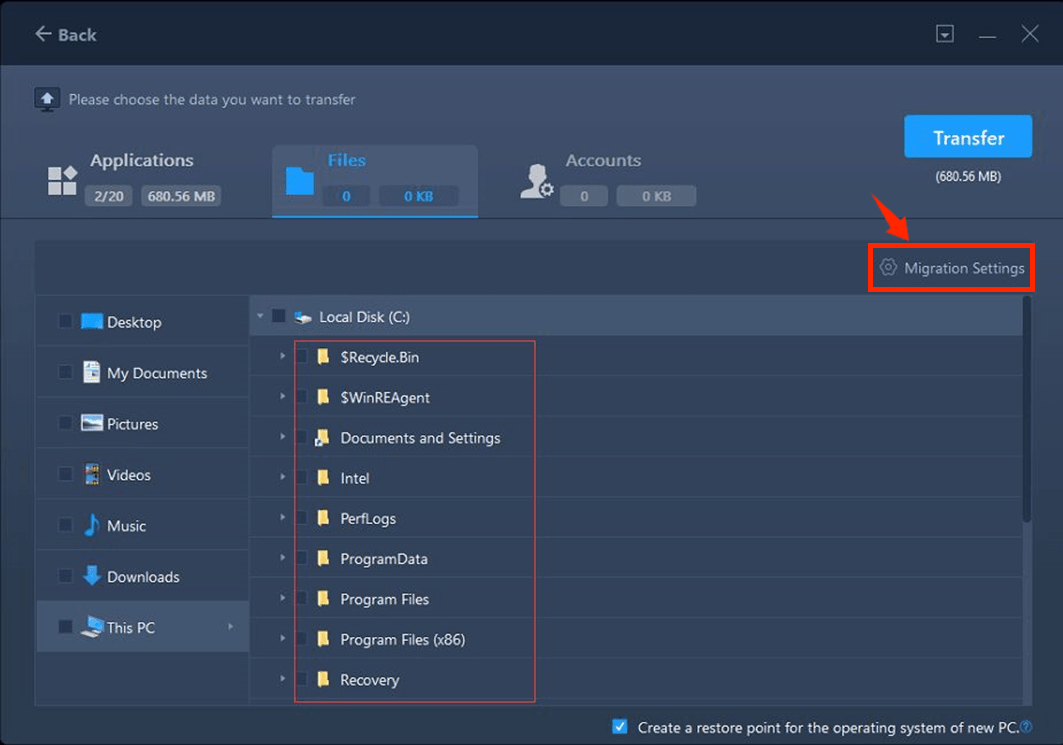
4. Regarding the Files option, all the root folders will be listed after a double click on the disk icon. You are able to check them for transferring.
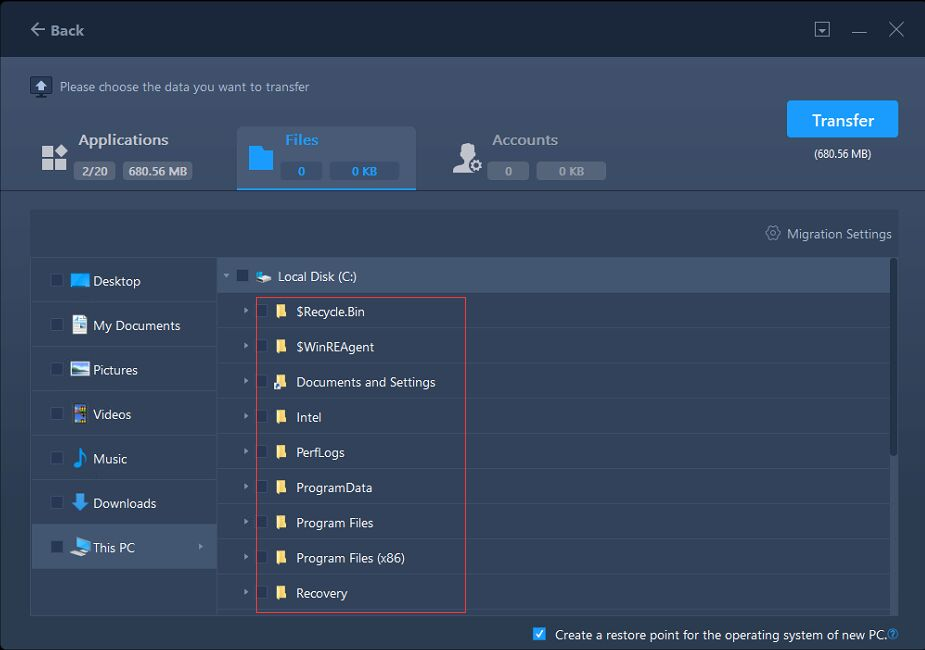
Some users selected their Documents, Pictures, Videos, Music, and Downloads for transfer, only to find that these files were not present on their new PC.
The culprit may be enabling OneDrive on the New PC, which will be explained below. To determine if these files are being stored in OneDrive, right-click on any of the missing items, select "Properties," and you will see the actual file path.
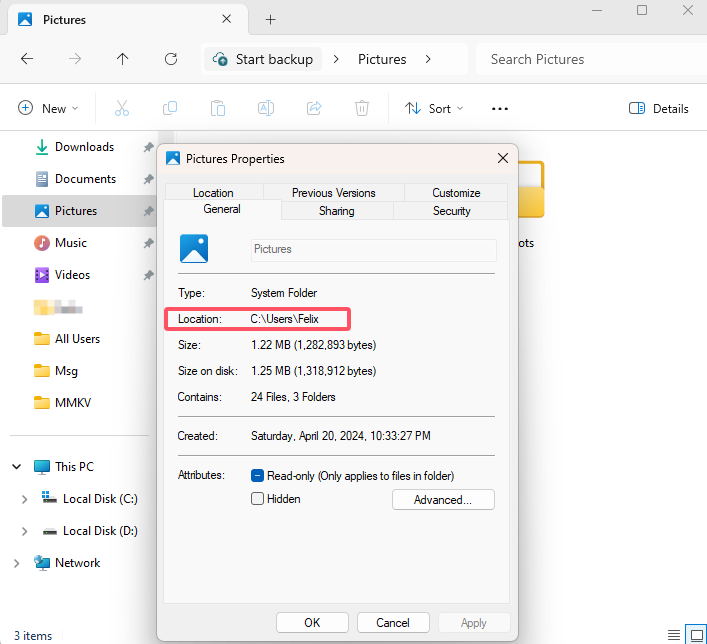
If the location shows as C:\Users\Onedrive\Felix, then the issue above might happen.
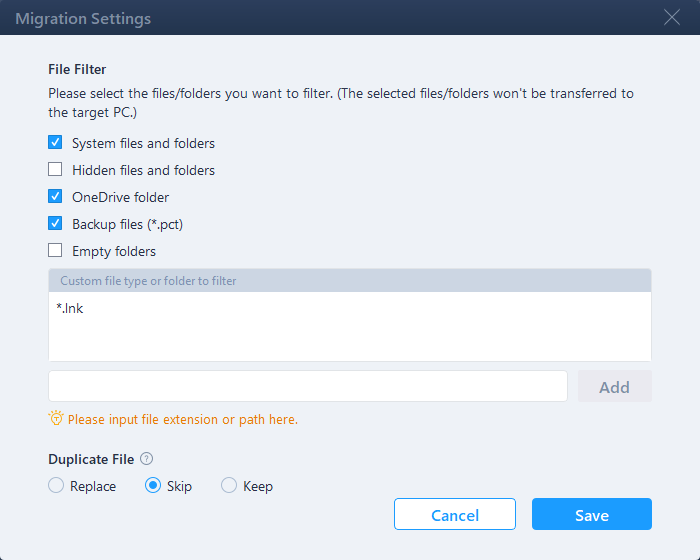
Migration Settings include File Filter and Duplicate File.
File Filter - To add file extension or file path for filtering them during the transfer process.
Duplicate File - You can select the option to replace, skip or keep the transferred duplicated files.
Note:
The files under the OneDrive folder will be filtered out by default because files on the cloud do not have a copy on local machine, no software can read data from cloud and directly transfer from cloud to your new computer unless you download the files to local machine.
If your old PC enables OneDrive, the files under OneDrive will not be transferred due to the filter feature. Then you may wonder why part of your files do not get transferred, the explanation above might be the reason.
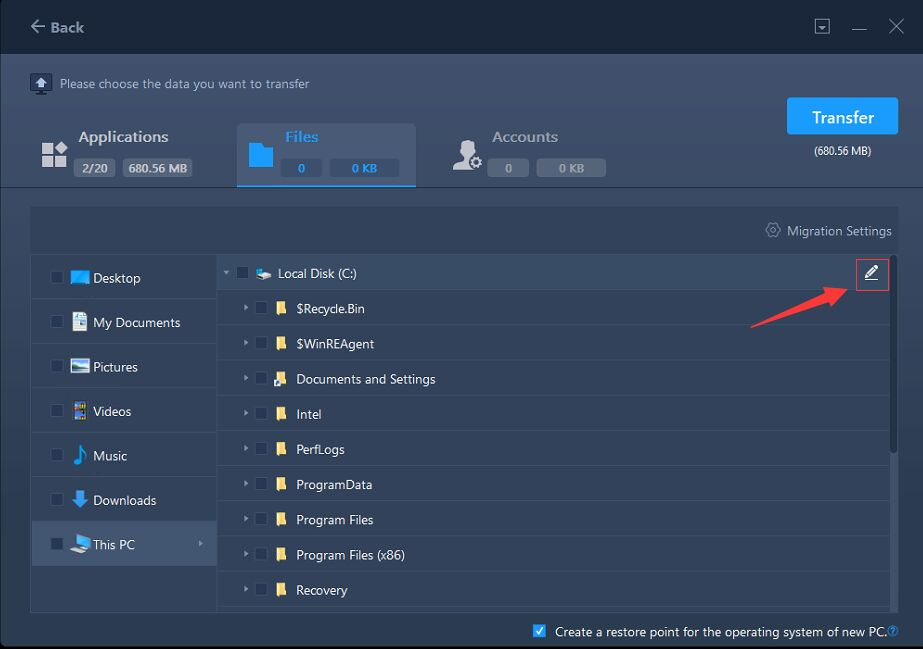
You can often use an "edit" button to change the target path for the transferred files. This can direct them to a new location on your new PC.
By default, transferred files might be stored in a specific location on the new PC, especially if OneDrive was enabled on new PC. This location is typically found at:
C:\Users\"Your User Name"\OneDrive
If you have transferred files successfully but cannot find them, make sure to check this path.
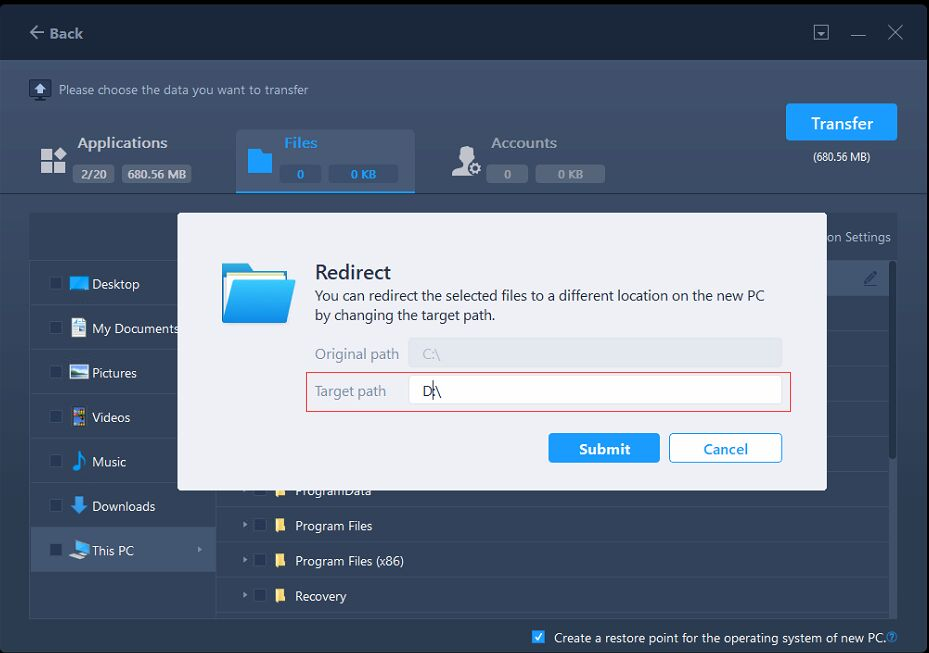
Let’s go back to the transfer process now, you can click the edit icon below to redirect the path where you want to save the files on your target PC.
Note:
To edit the Target Path, you are able to fill in a drive letter on your target machine. All the files will be transferred to the root directory of this drive.
Unlike the Files option, you are not able to edit the target path for applications. Applications will be transferred to the "Program" folder on the new PC by default. Usually, the "program" folder is located in C: drive.
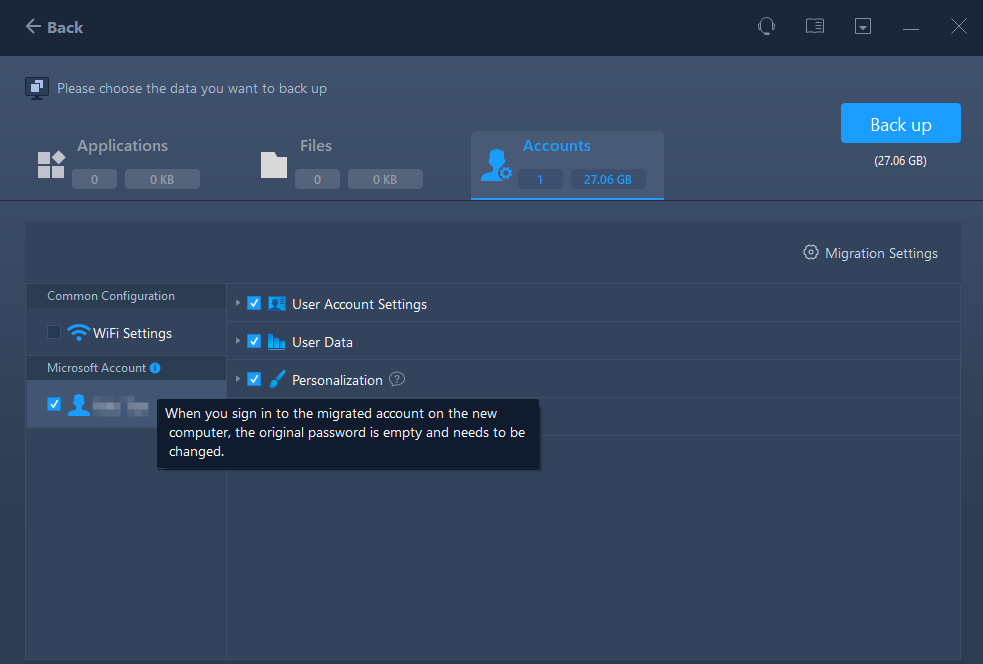
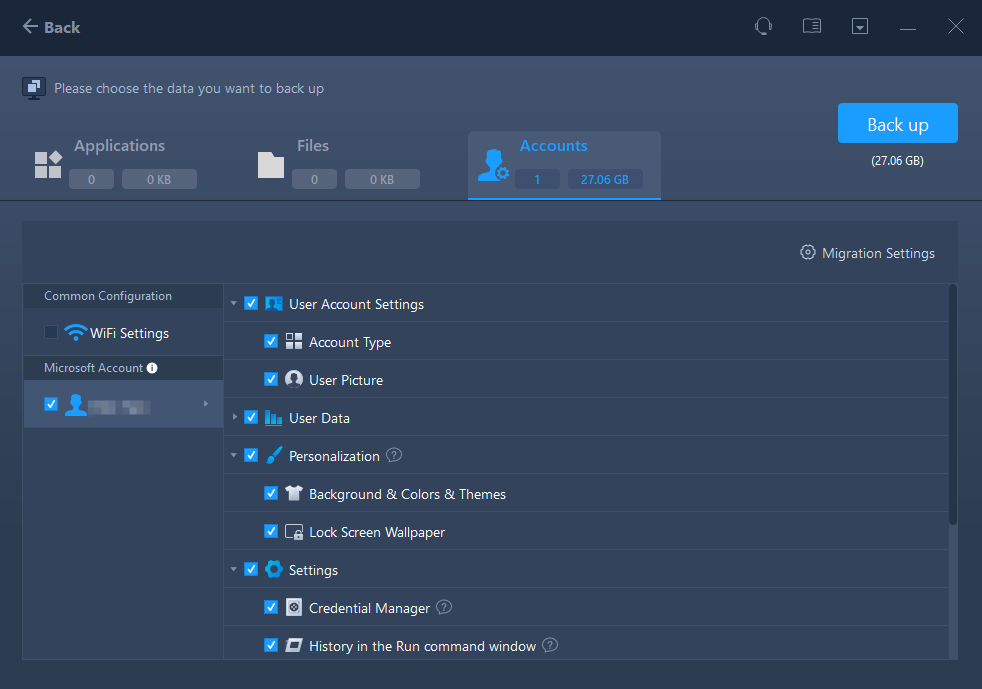
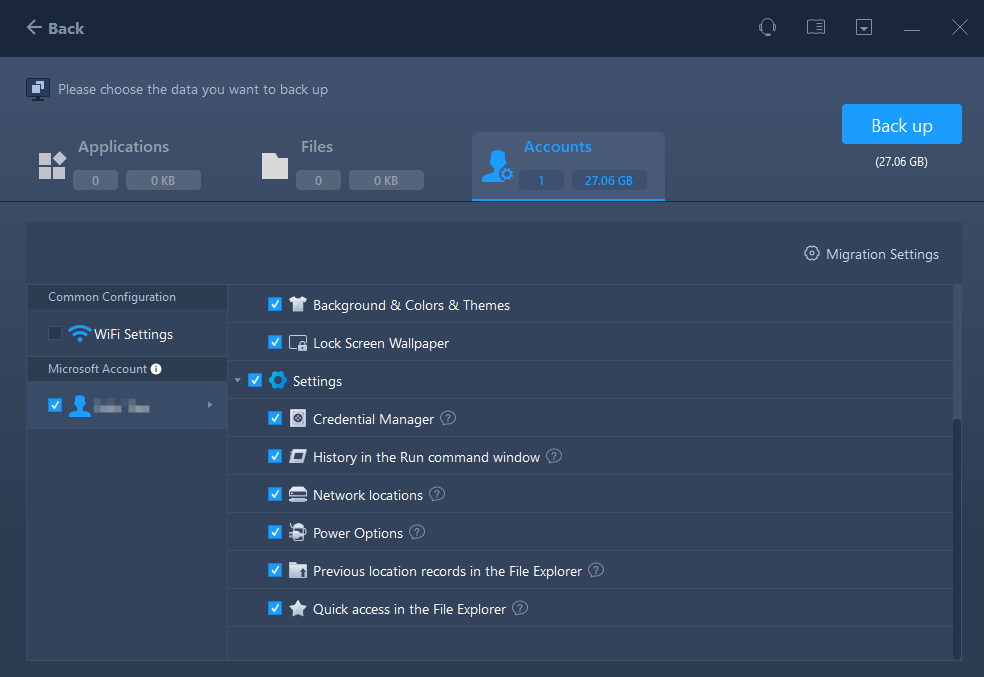
5. Switch to the Accounts option, all the accounts on the source PC will be listed in the program.
Note:
When you sign in to the migrated account on the new computer, the original password is empty and needs to be changed.
After selecting an account from the list, you can select what items under this account you want to transfer. This includes the User Account Settings, User Data, Personalization, Power options, Lock Screen Wallpaper, etc.
Start the transfer
After completing all the settings above, please click the Transfer button to start.
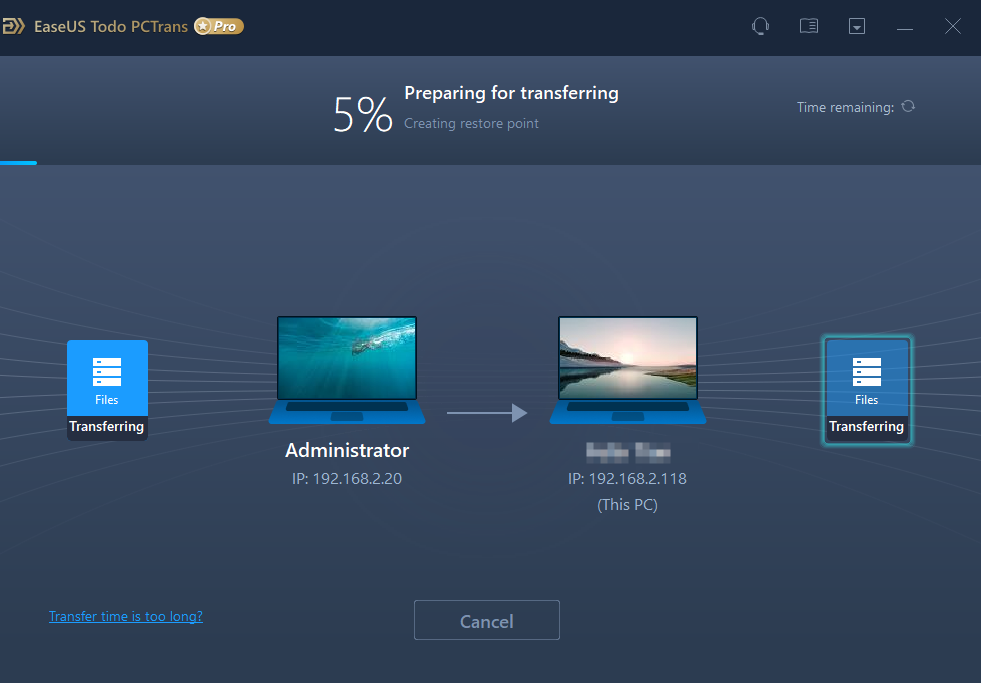
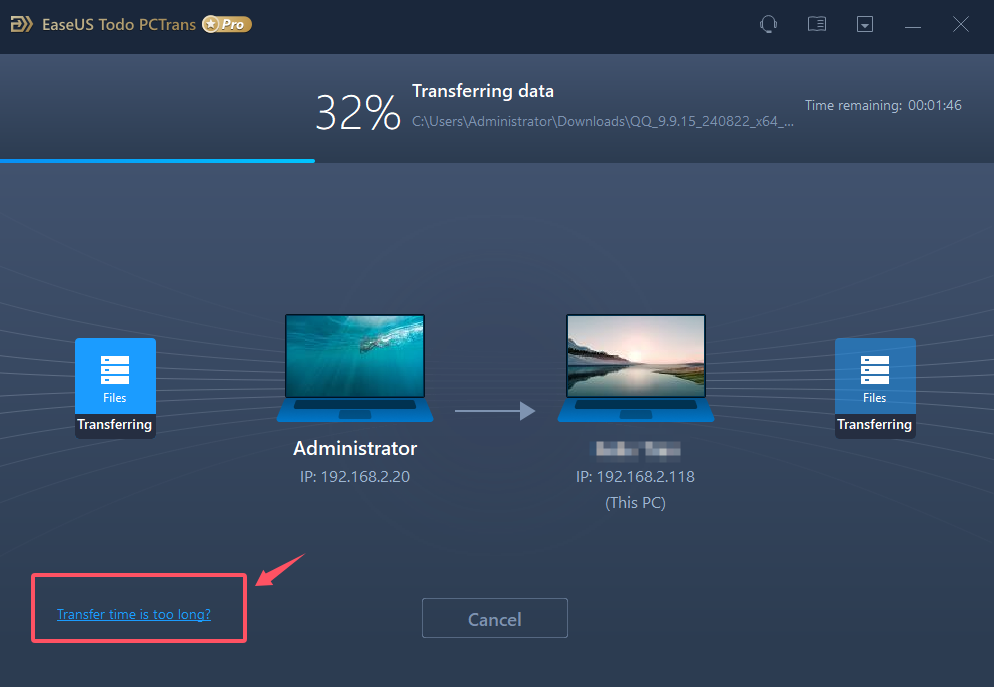
If you think network mode transfer is slow, you can change network mode to Cable mode during the transfer process. The software will automatically change connection mode after you connect two computers via a cable.
The transfer process will not be affected by changing the connection mode during the transfer process. (The connection may be interrupted 2-3 times but the connection will be re-established automatically. All you need to do is just plug in your cable to connect two PCs)
Note:
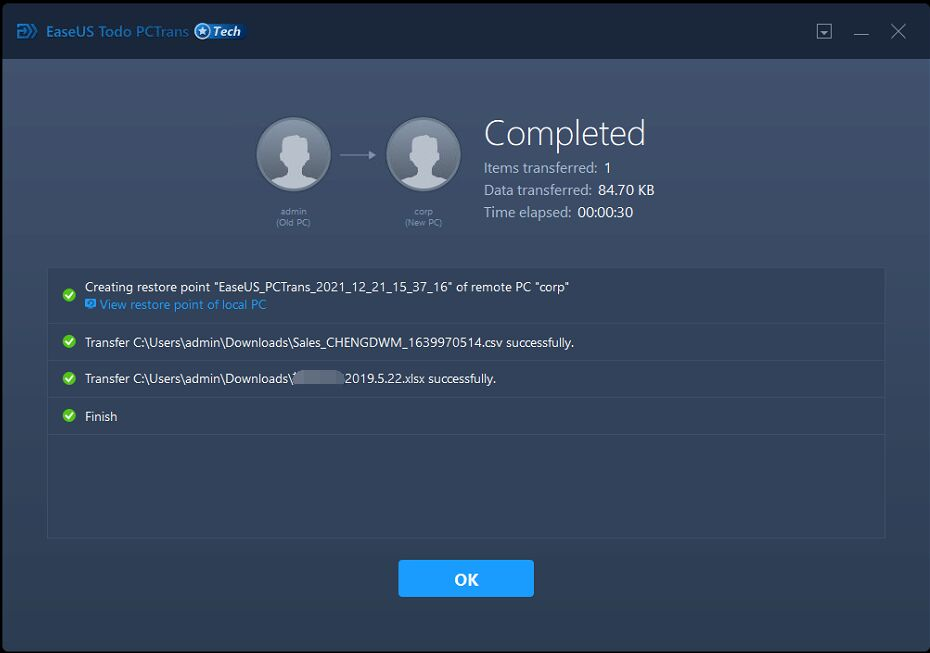
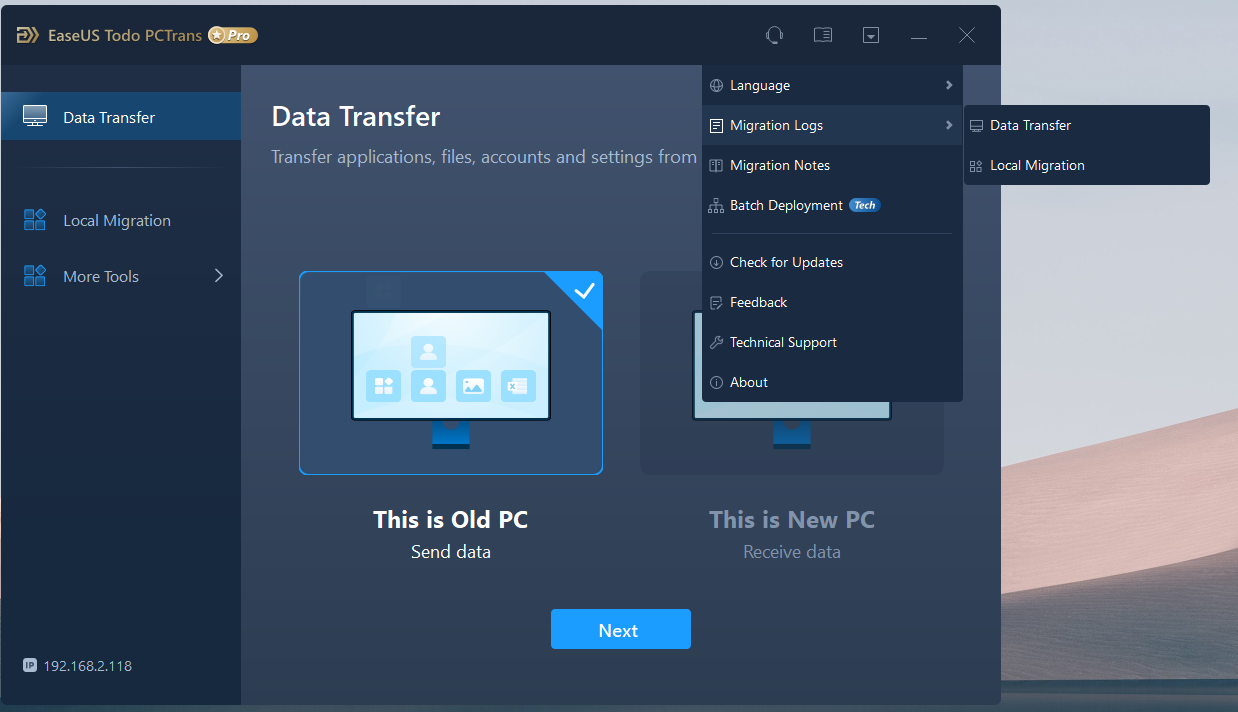
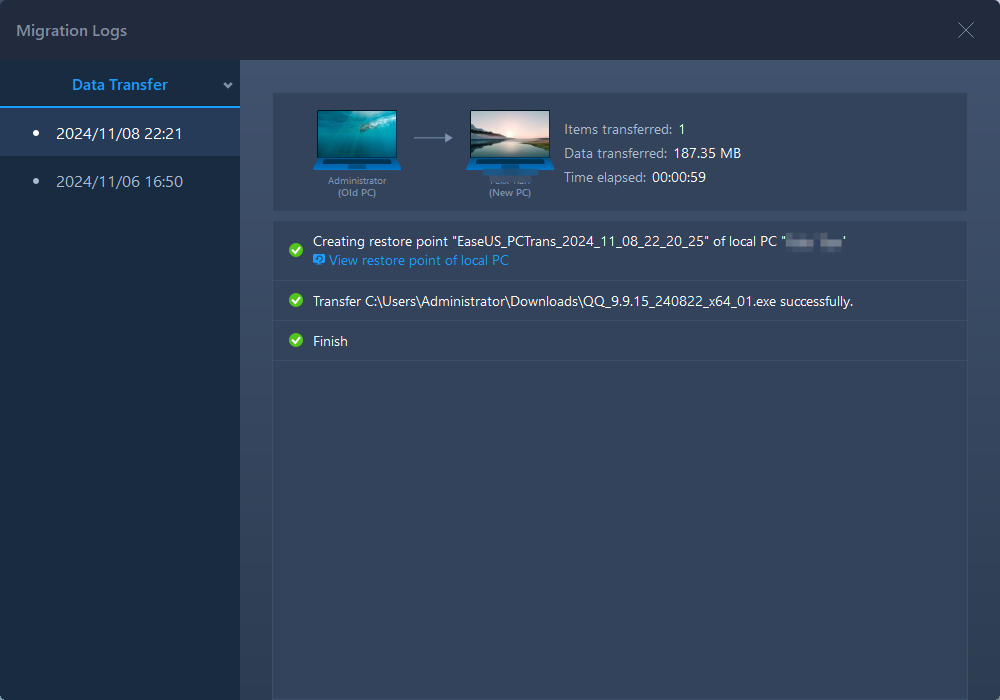
When the transfer is finished, a reboot is required to refresh all transferred information.The Migrate Logs can be seen on the main window for checking the transferred result after using Data Transfer method.
Transfer via backup
This feature prepares an image file to include applications, data, accounts, and settings in advance, then transfer from the image to the target PC. It transfers between two PCs or on the same PC after reinstalling the system. This method can also be used to back up your programs, data, and accounts.
This alternative method is more suitable for the situation that two computers don’t have internet or you are trying to upgrade your Windows system and want to keep apps and files to your new system.
Data Backup
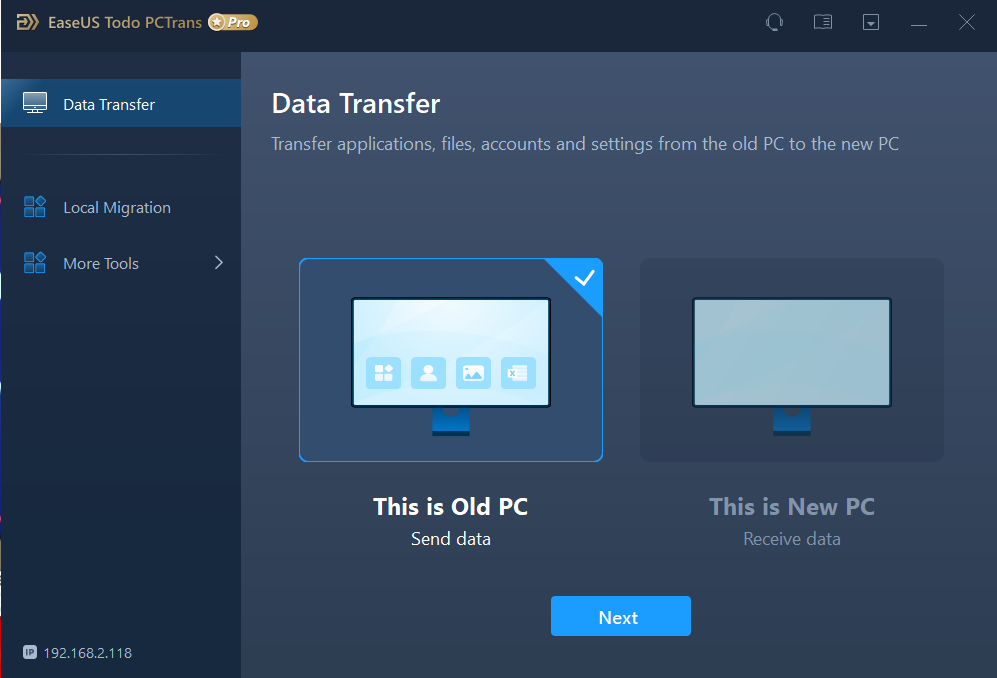
1. Launch Todo PCTrans, select This is Old PC at the home page of EaseUS Todo PCTrans, then click the Next.
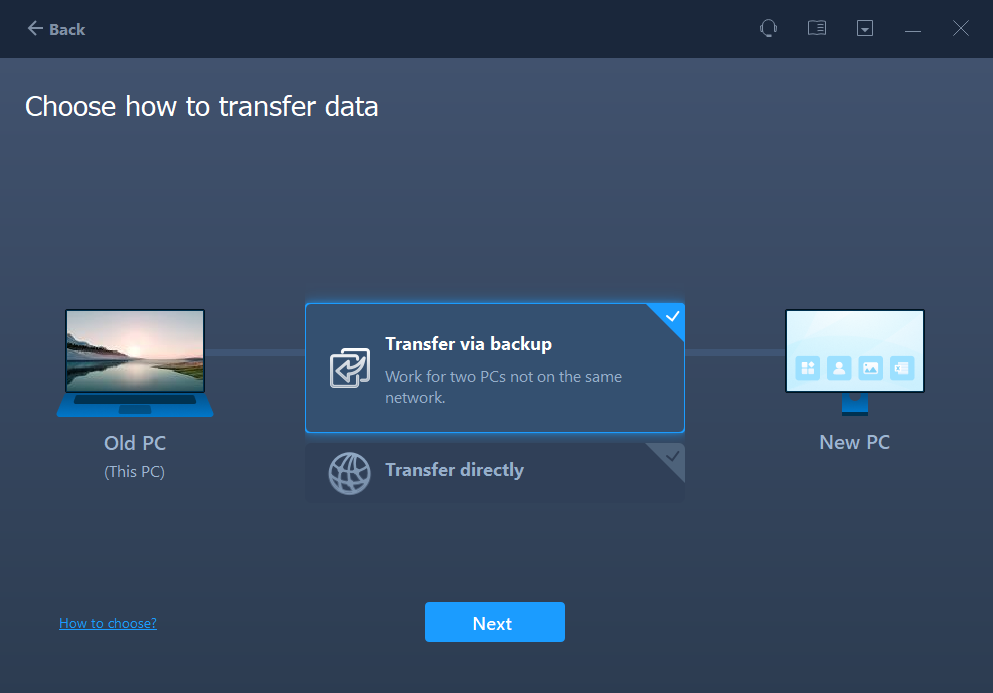
2. Select the Transfer via backup method and click the Next.
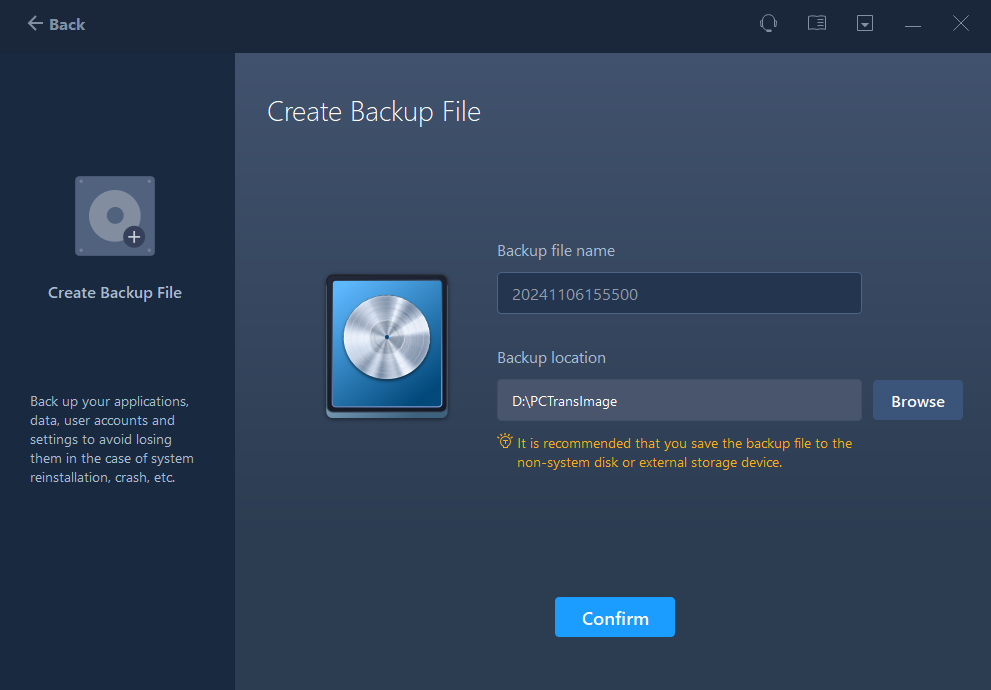
3. Confirm the image name and path for saving images. (Please save your *.pct file to a location where the new PC can access, like an external hard disk or shared network location.)
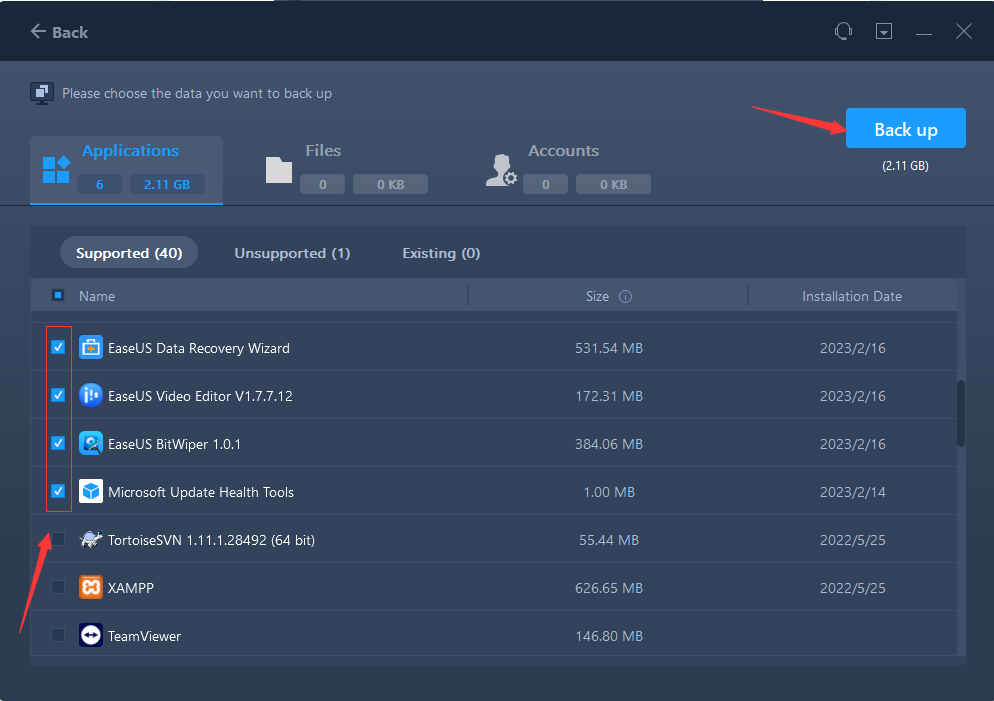
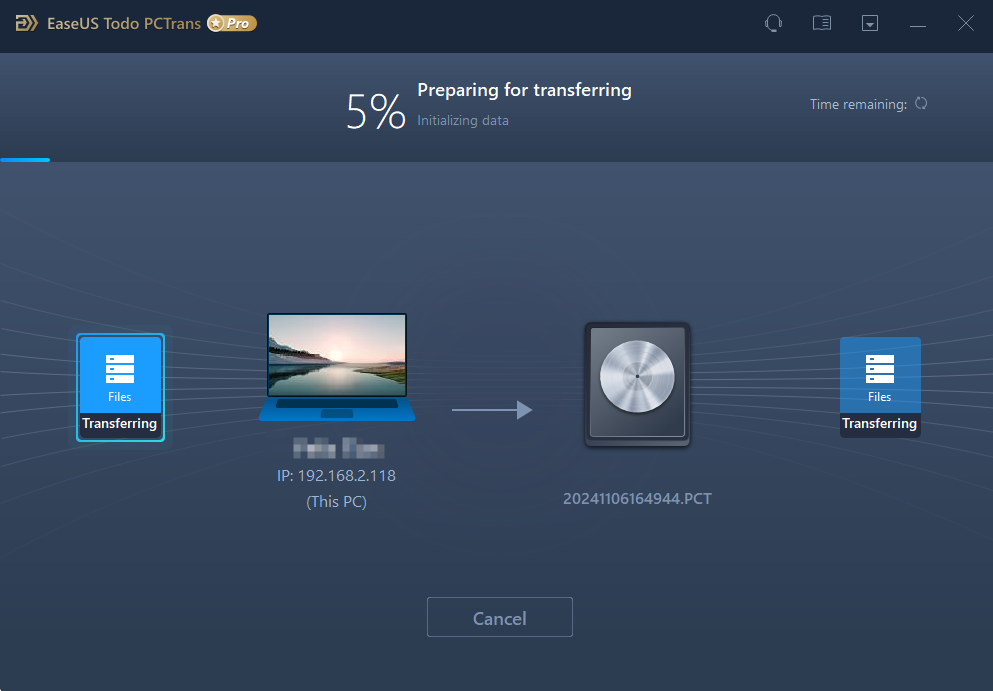
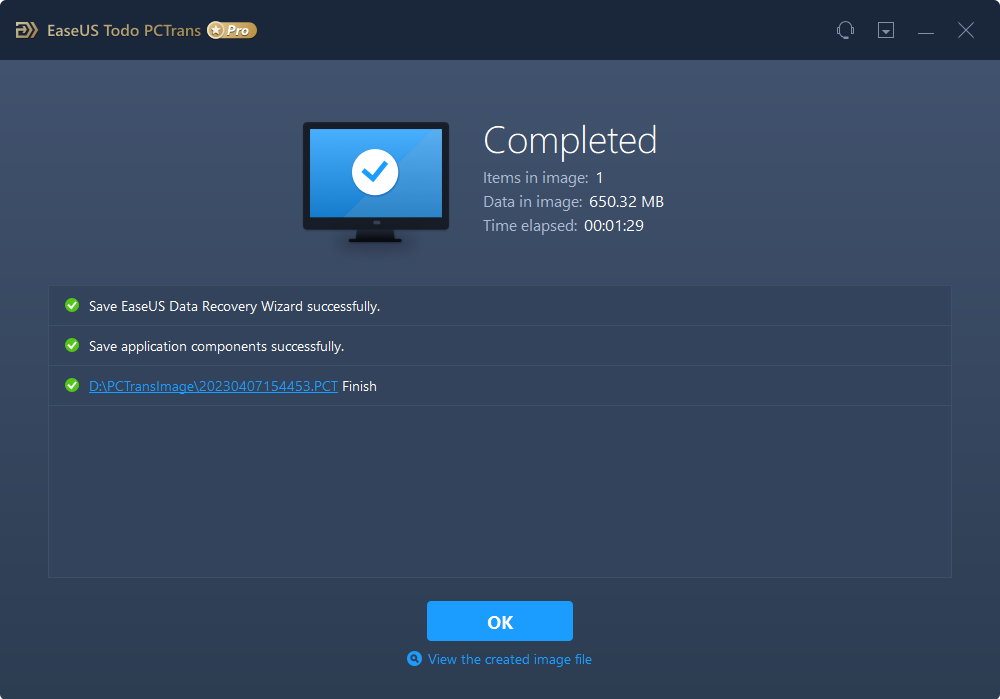
4. Click the Backup to execute the backup
Data Restore
At this step, there are two different operations:
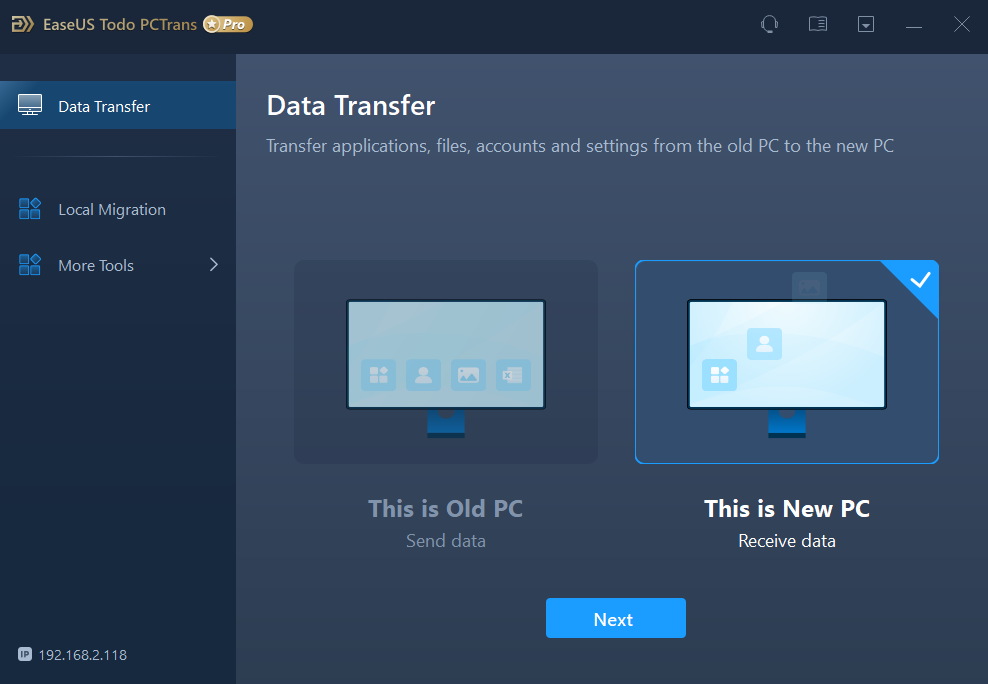
If you are upgrading the operating system and wish to transfer the data in the image file in the new operating system, just run Todo PCTrans again, select Data Transfer->This is New PC.
Suppose you are transferring data to a separate computer, please copy the image file to the target computer and run the program, select Data Transfer->This is New PC
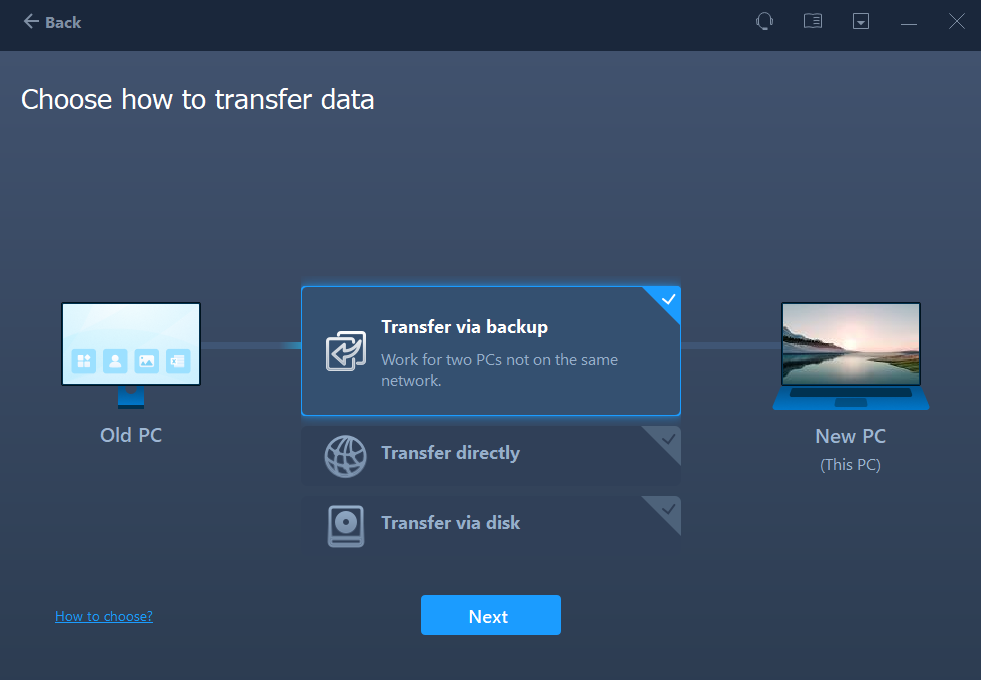
1. Select Transfer via backup and click Next.
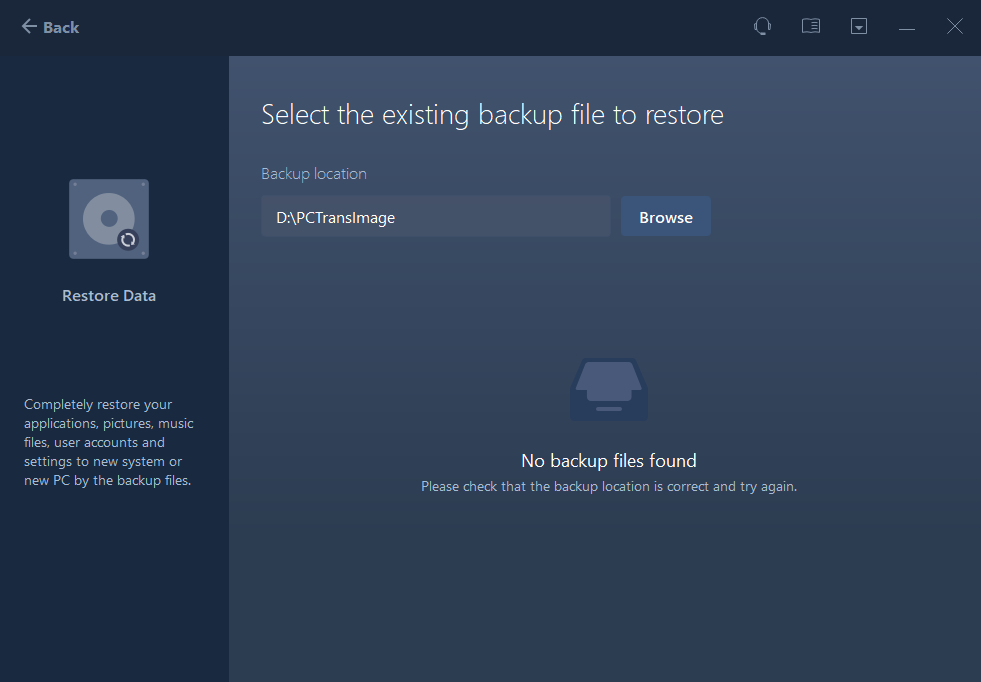
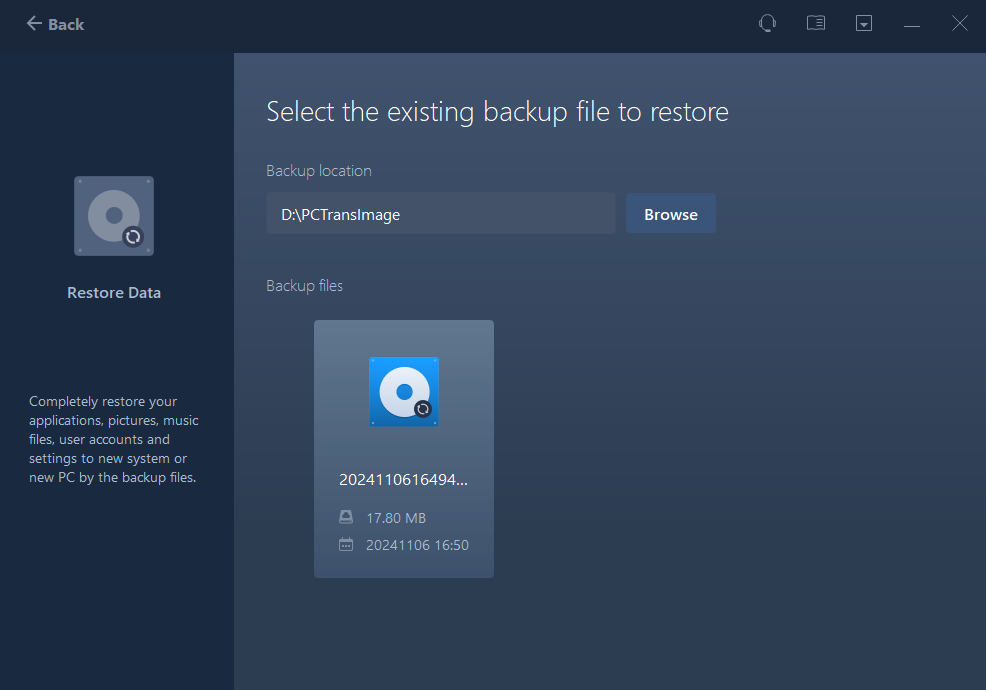
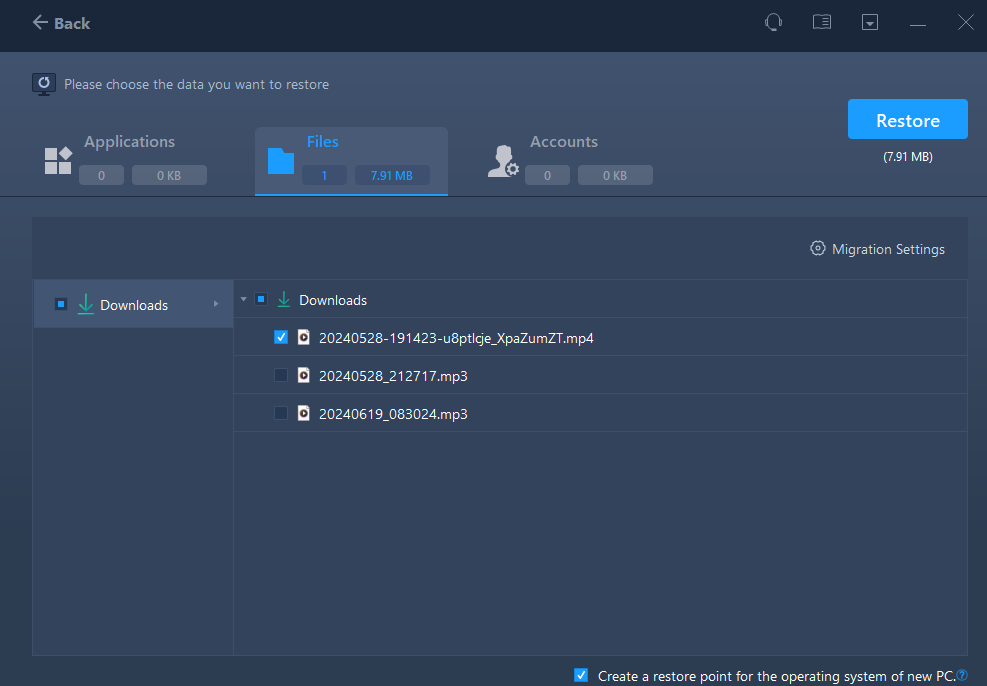
2. Browse the location of your backup image and select the image to Restore. You could also only select a part of the items to recover.(If you don’t have a *.pct file yet, please generate it on old PC and then use that *.pct file to perform a restore.)
Note:
1. To edit the Target Path, you are able to fill in a drive letter on your target machine. All the files will be transferred to the root directory of this drive.
2. Unlike the Files option, you are not able to edit the target path for applications. Applications will be transferred to the "Program" folder on the new PC by default. Usually, the "program" folder is located in C: drive.
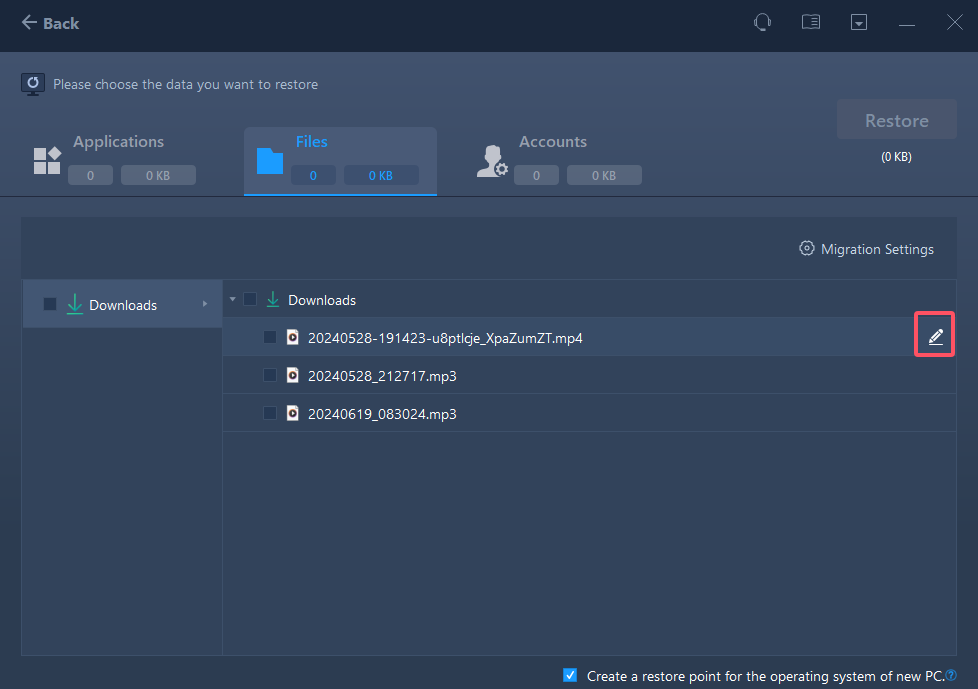
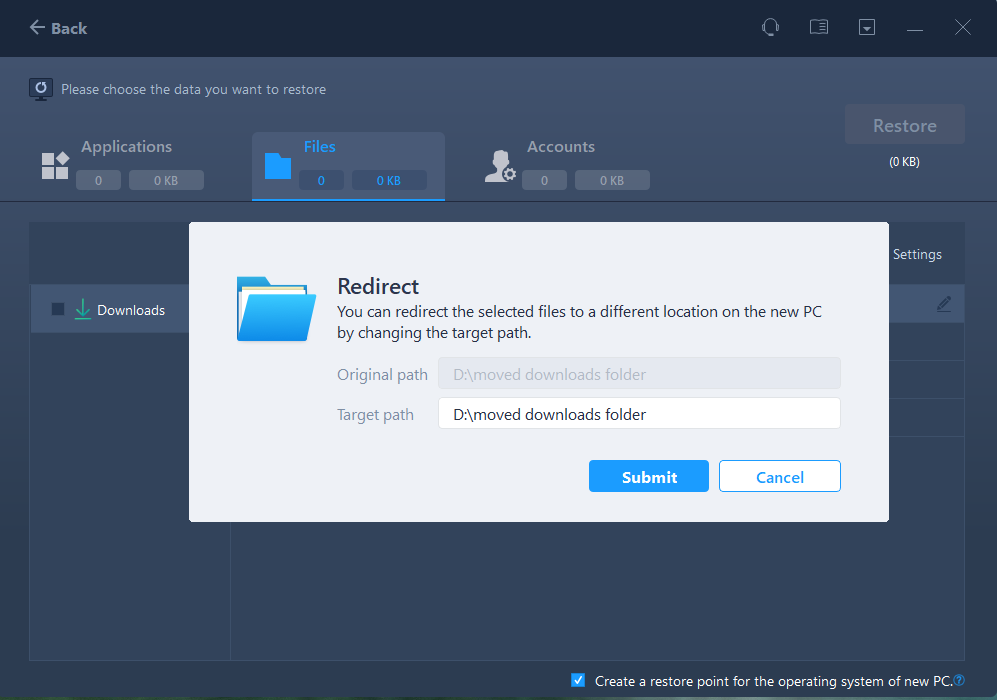
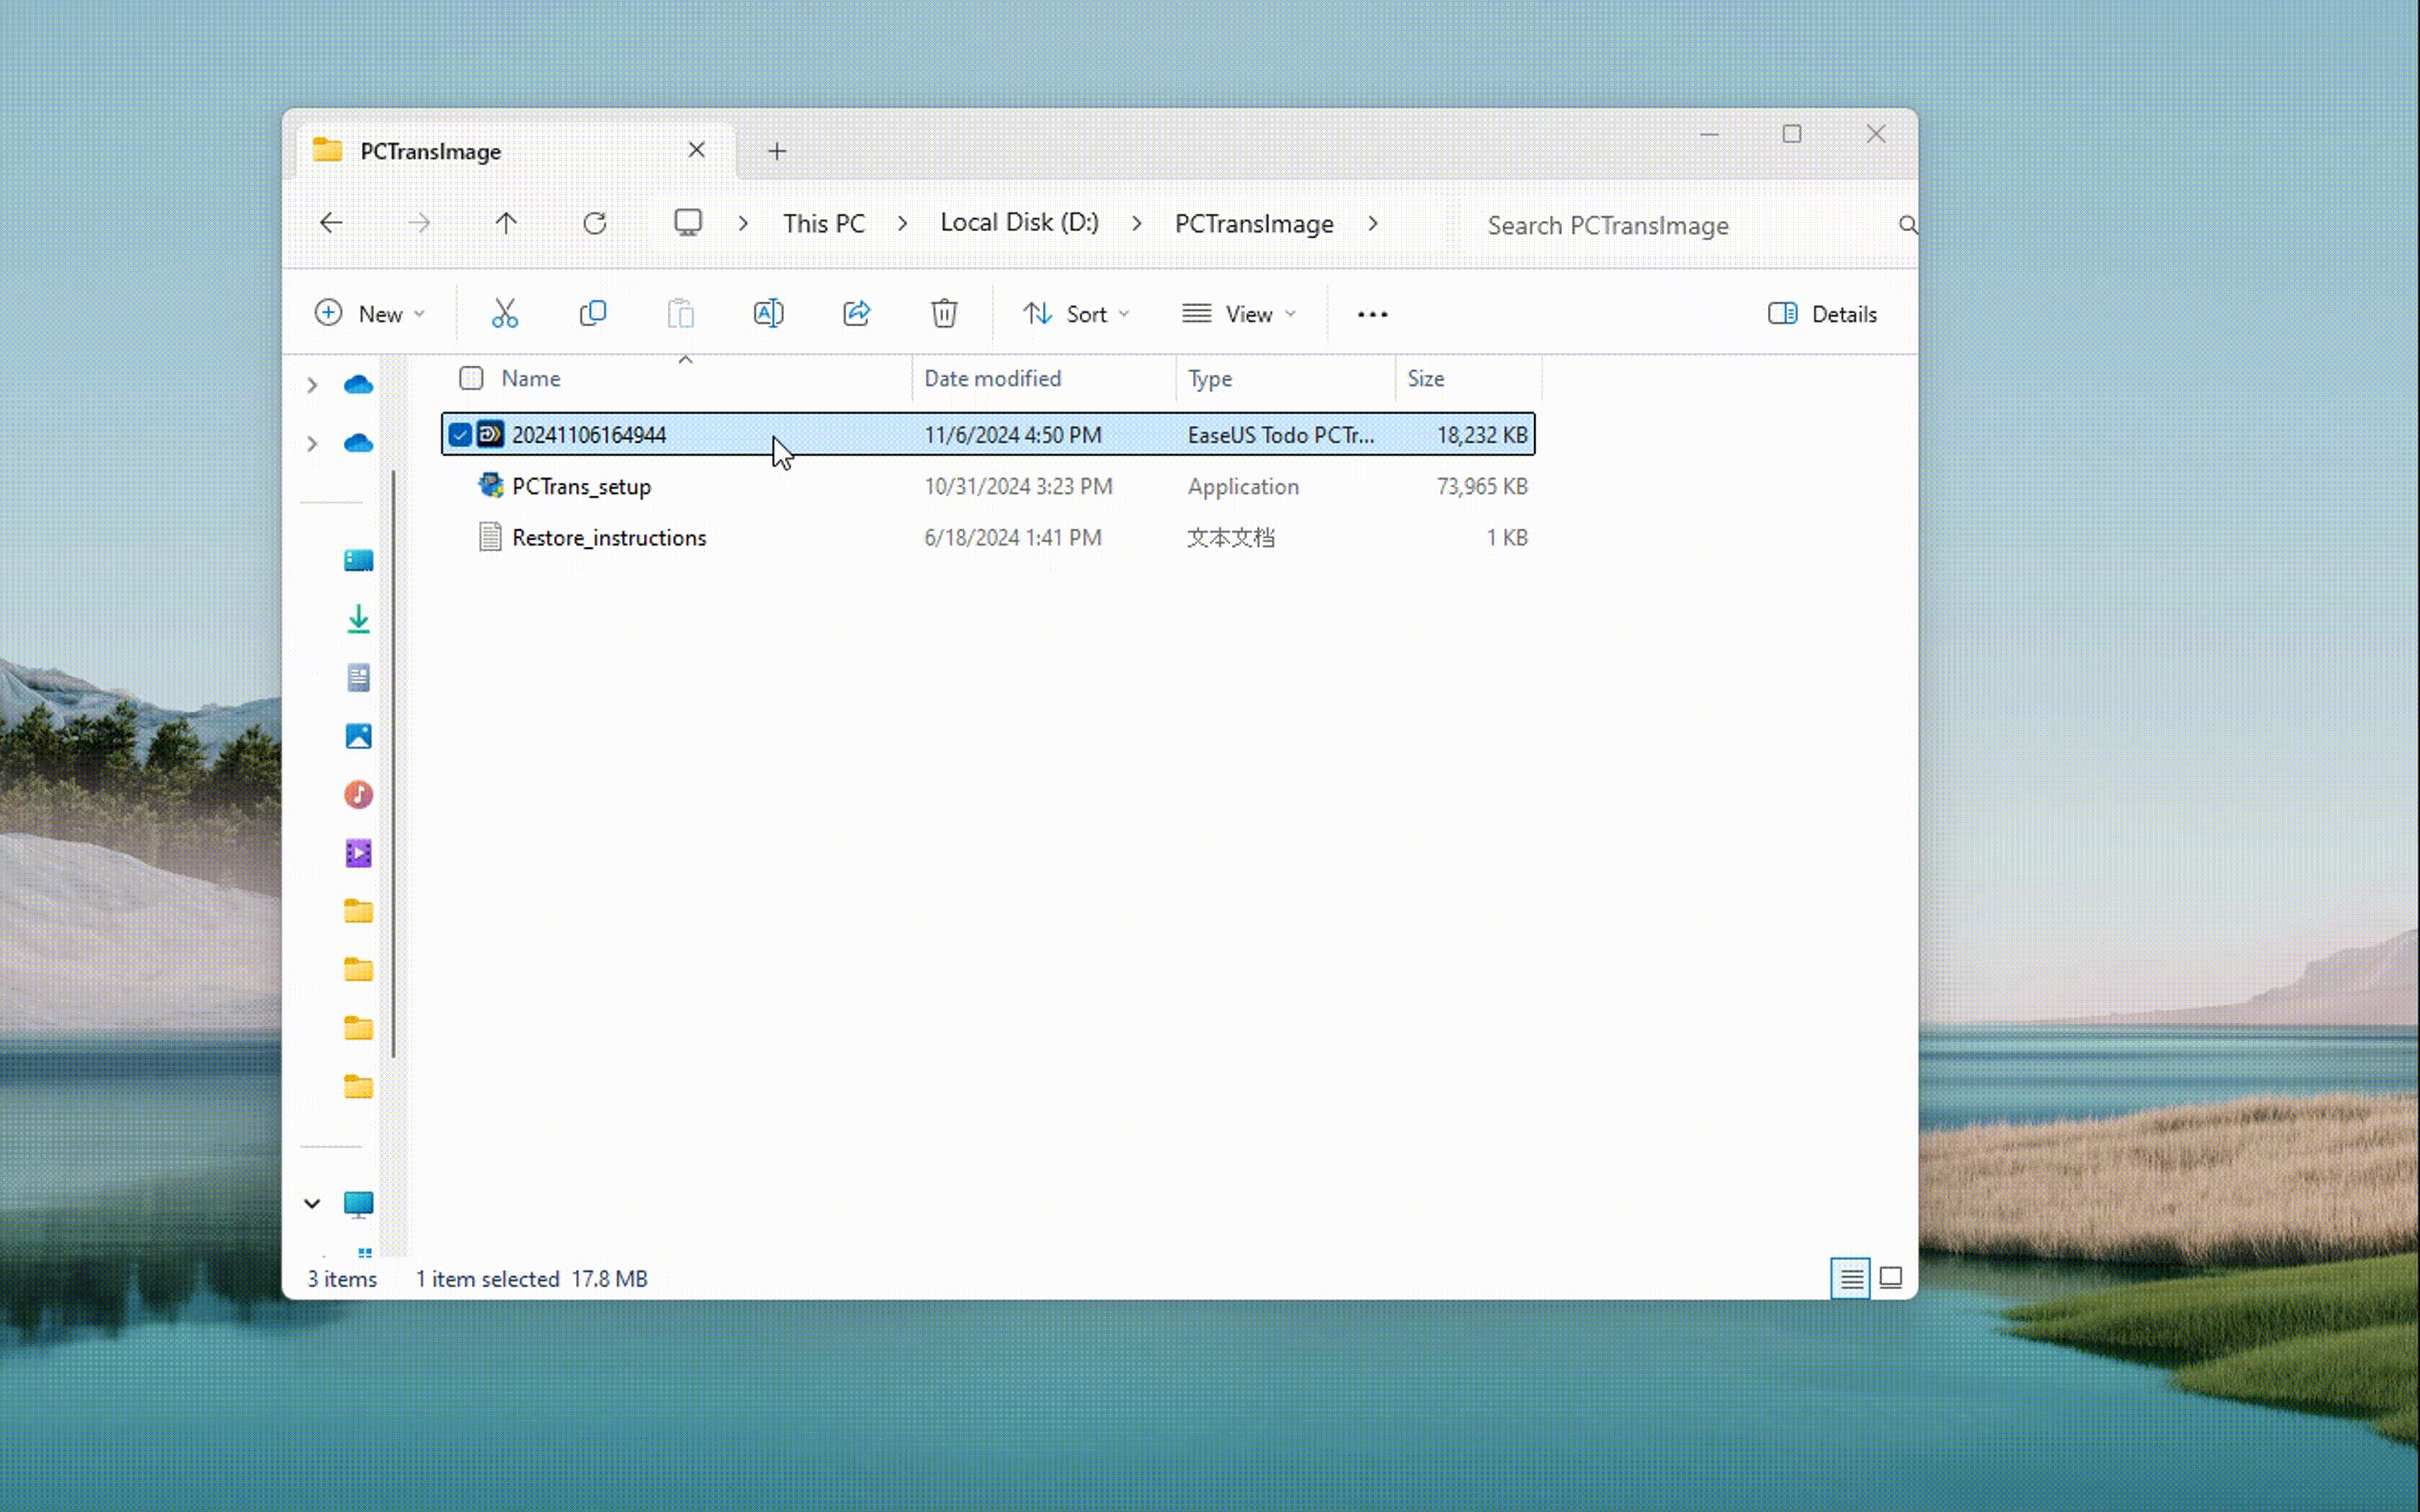
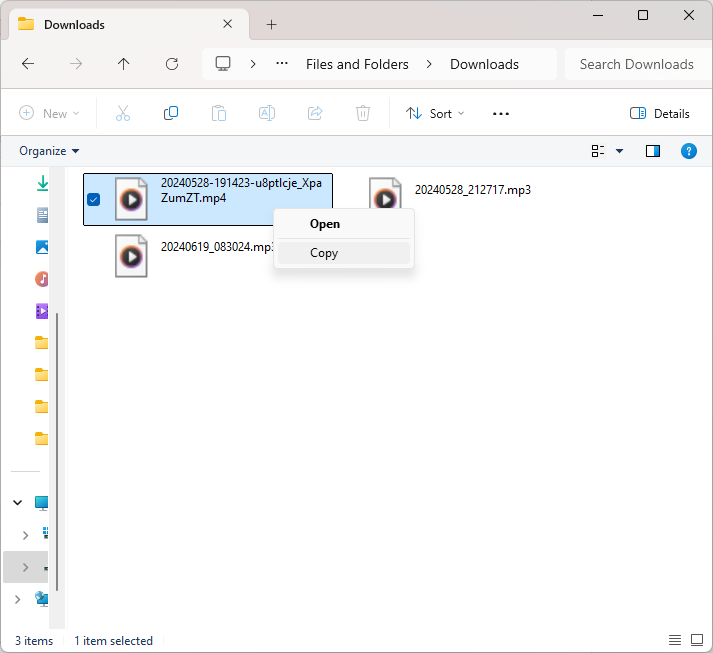
By the way, you can also start the restore process by directly double-clicking the *.pct file in Windows File Explorer.
There is no need to launch the EaseUS Todo PC Trans in advance. Double-clicking the *.pct file will automatically launch the software and take you to the interface below.
Sometimes, the backup image file may get corrupted by unexpected error like disk error etc. You will then receive a “the file is corrupted” error message when you try to restore, you can try to right-click the backup image file to browse if the file can still be accessed normally.
If it still reports the file is corrupted, then there is no solution for the situation. You have to create a new backup image file.
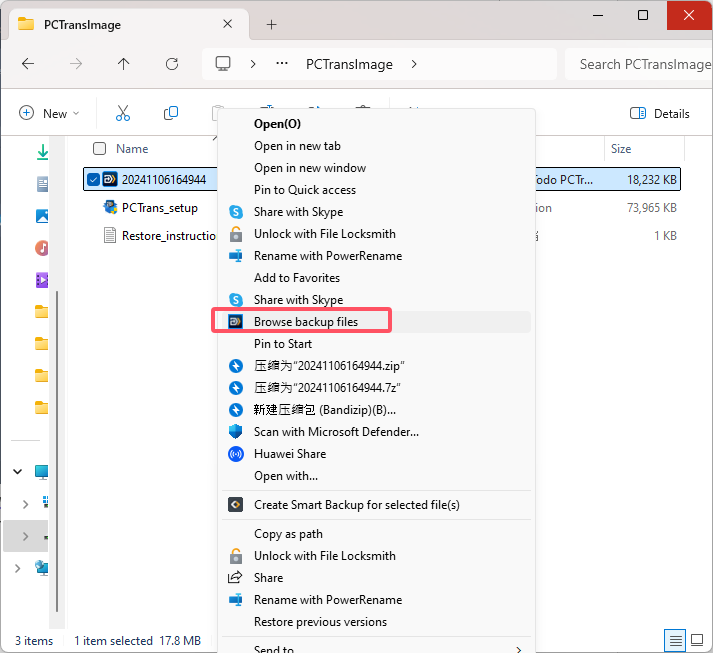
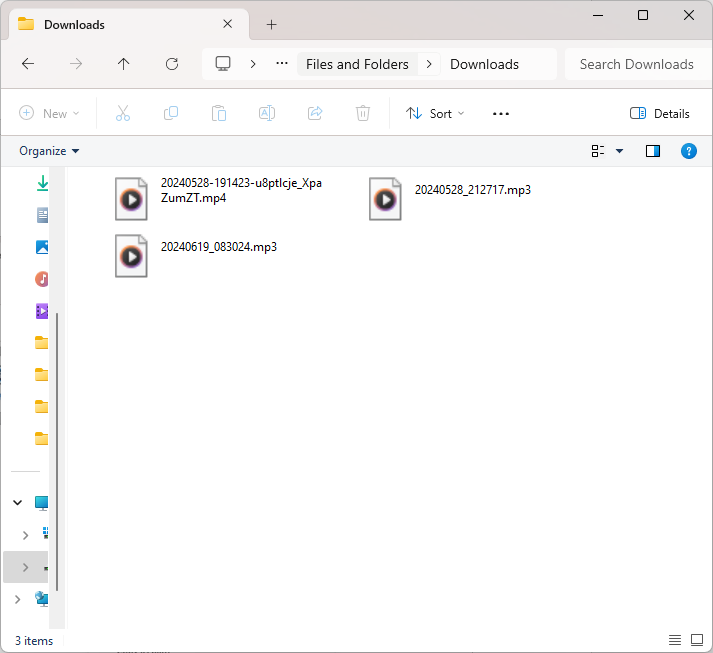
The data files can be copied from the image directly.
Transfer via disk
When you have a system disk that cannot boot anymore, this feature can help you rescue apps and files in the disk to a new healthy Windows system. As a result, you can continue using the apps and files in that unbootable system disk.
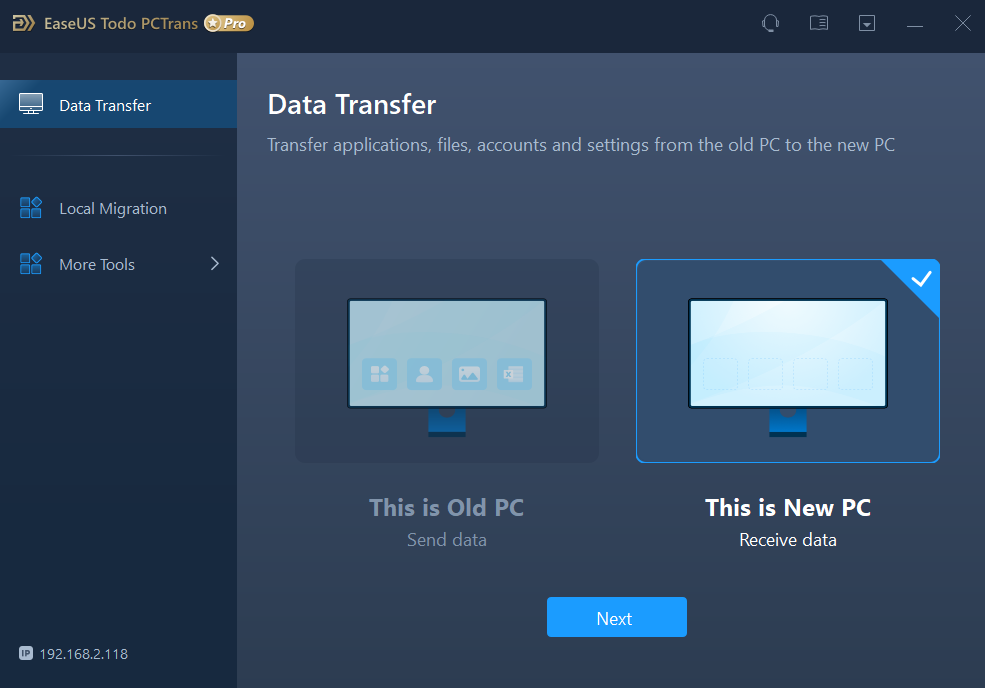
Transfer via disk is previously called Data Rescue. This feature is listed under “This is New PC”, so if you choose “This is Old PC”, you won’t see this feature listed.
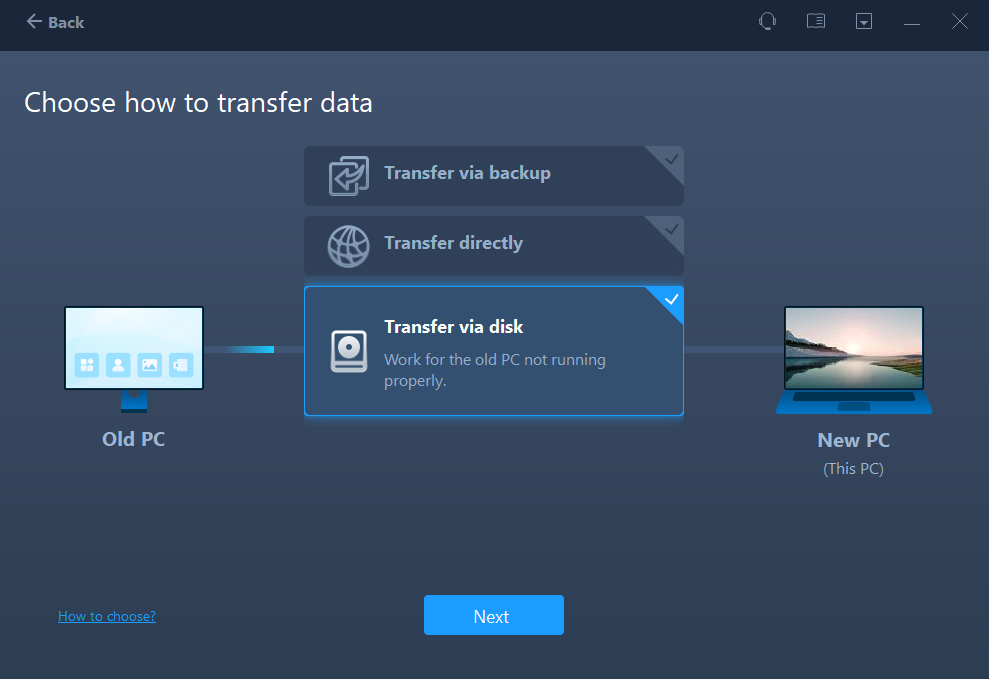
1. Take out the system hard drive from your old computer and connect it to the new computer. Please select “This is New PC” and then choose the Transfer via disk to click the Next.
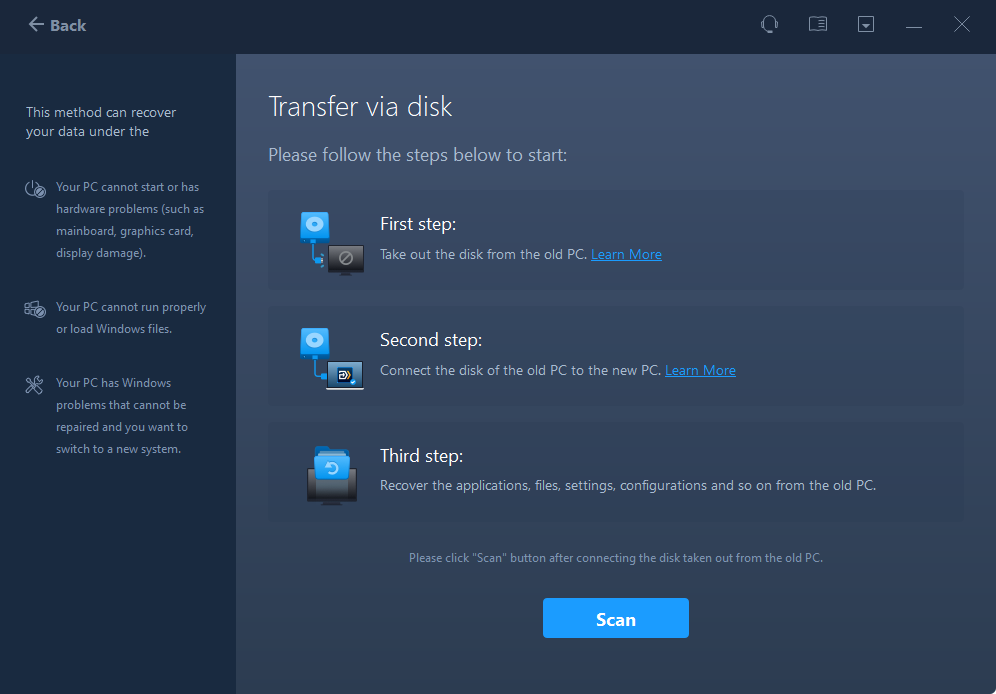
2. Further check the “Transfer via disk” steps and ensure you have done step 1 and 2 correctly, then click the Scan.
3. Select the system drive from the Old PC that failed to work properly then click the Continue.
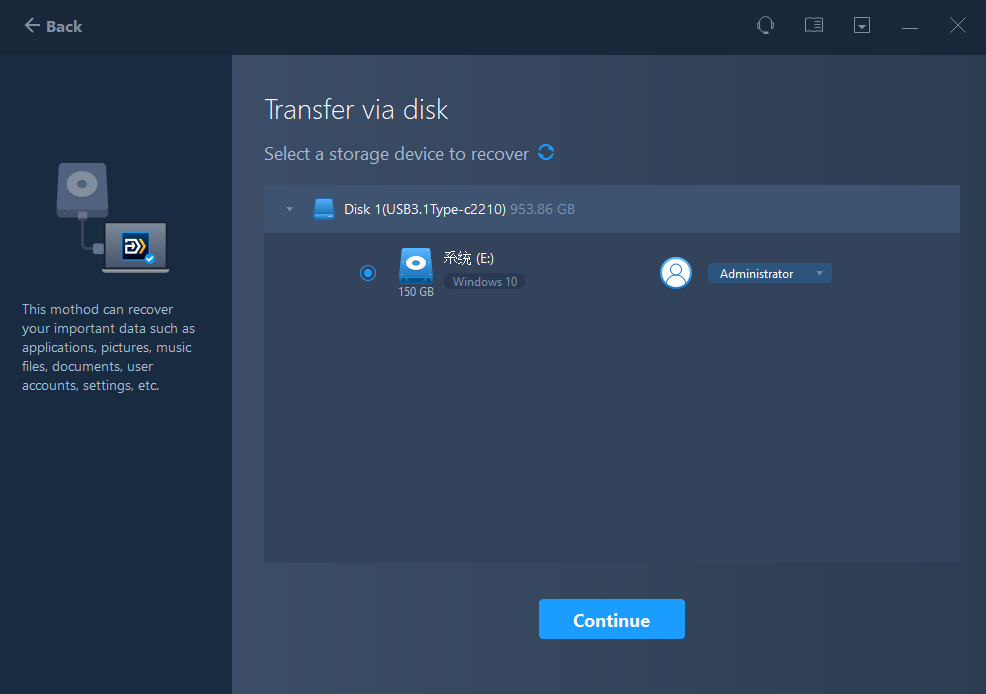
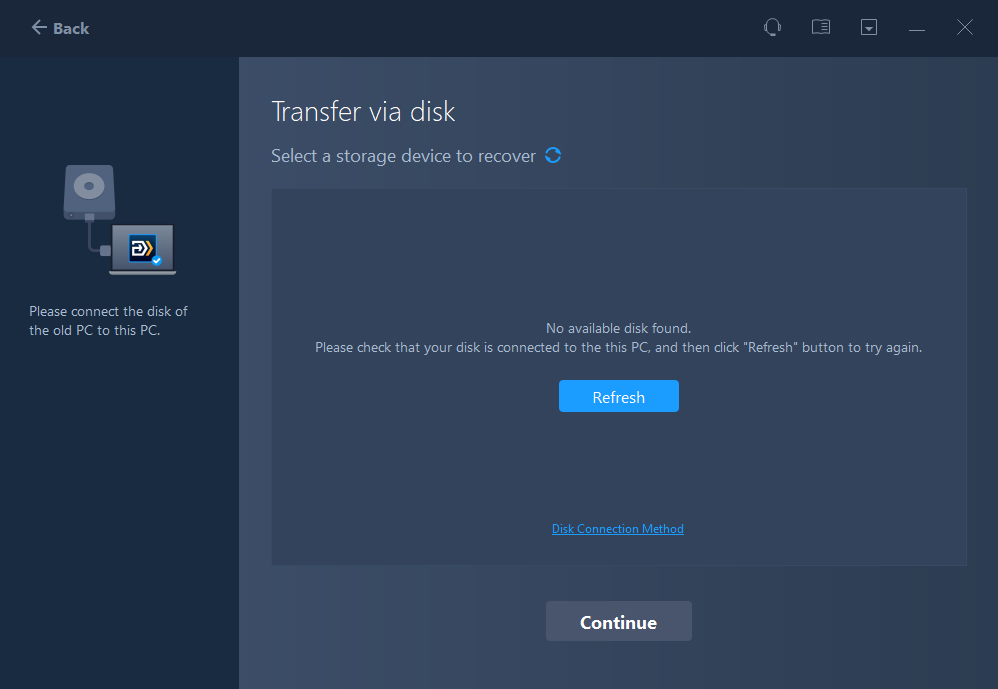
If the old PC system disk’s registry is corrupted, it will fail to detect your disk and will show as below. There is no way to rescue your applications anymore. You are suggested to copy your file data as soon as possible to avoid further loss.
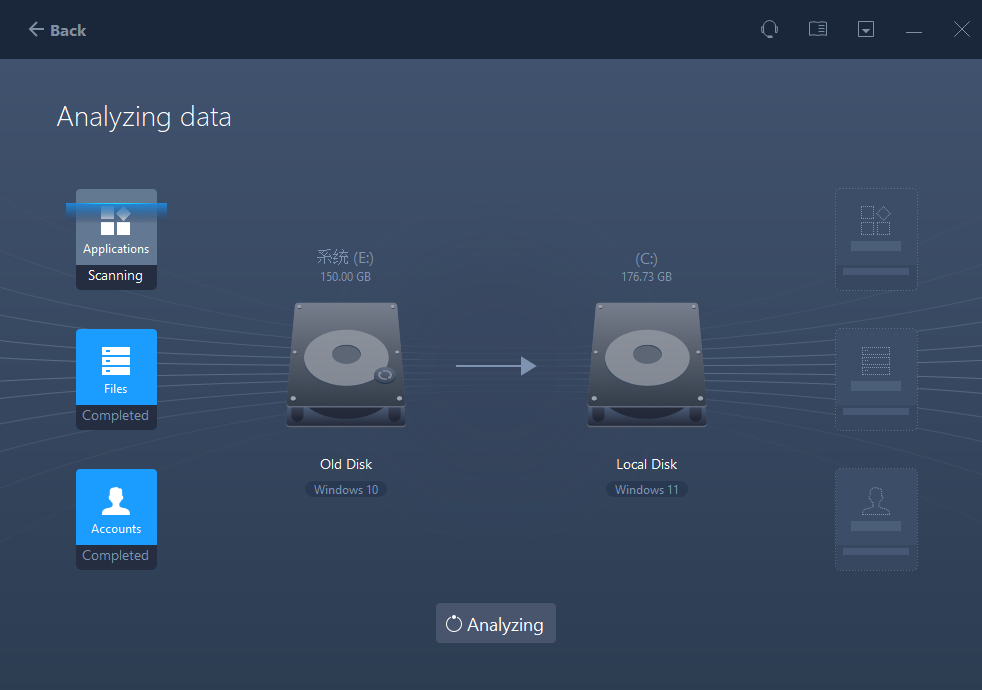
4. Your programs, files, and accounts will be listed after the analysis.
5. Select the applications you want to transfer.
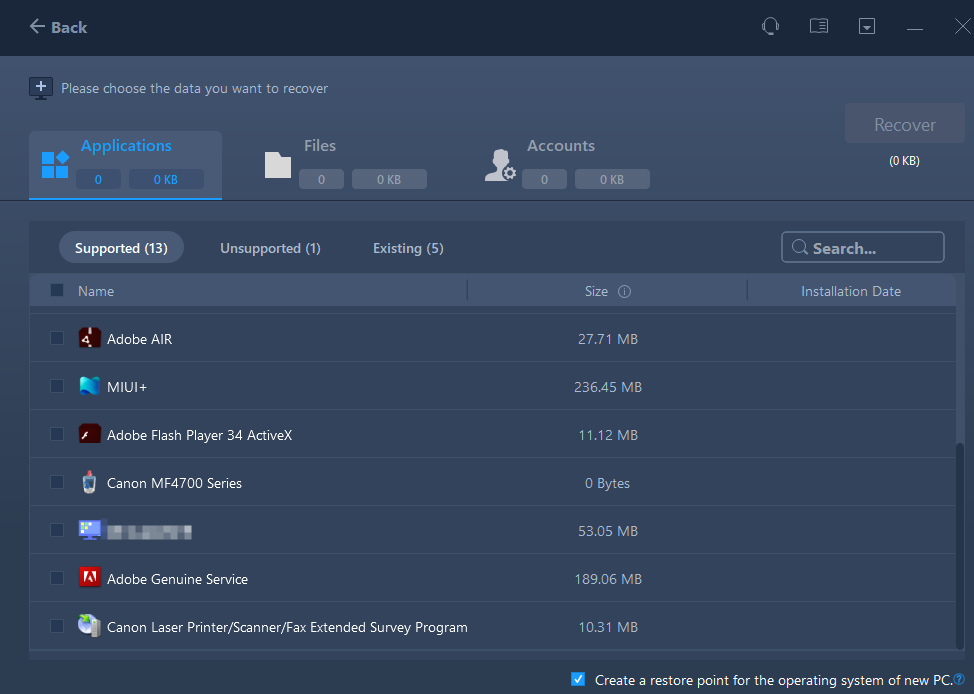
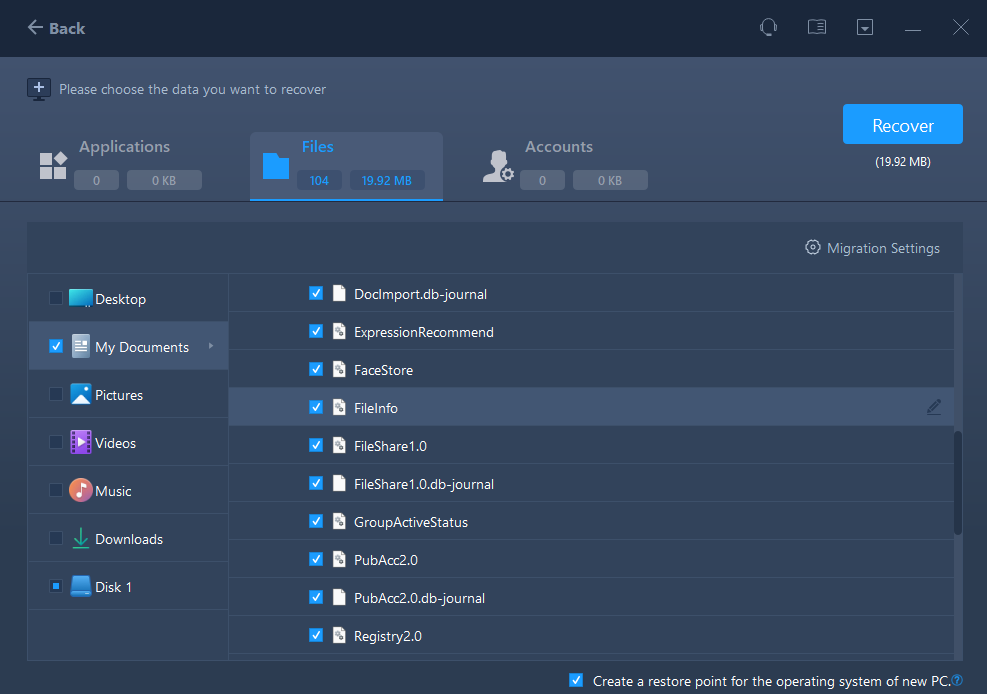
6. Start the transfer/rescue
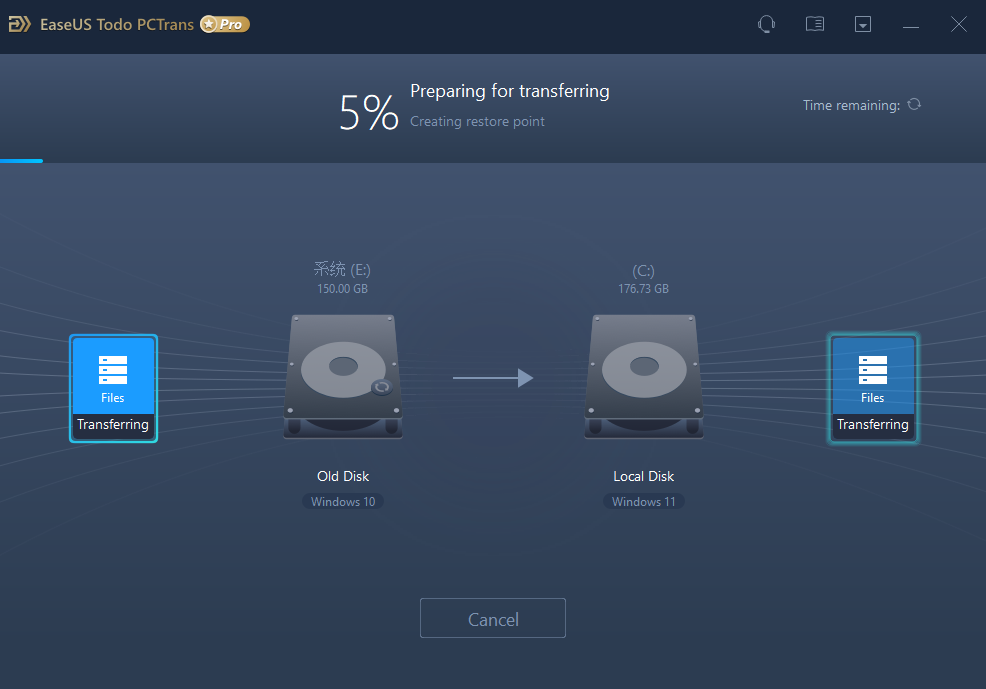
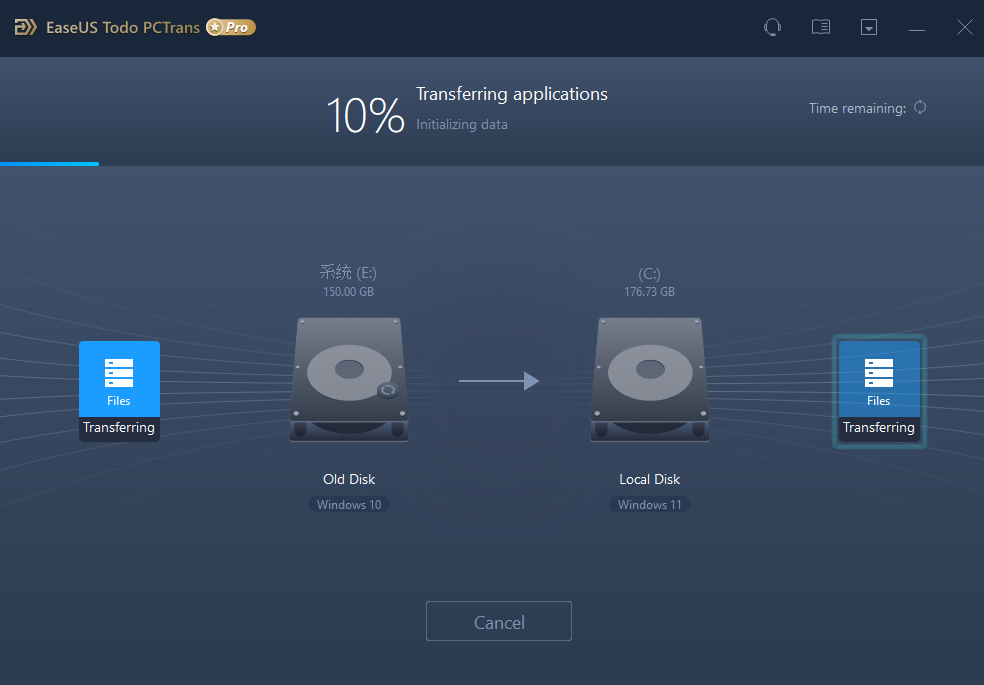
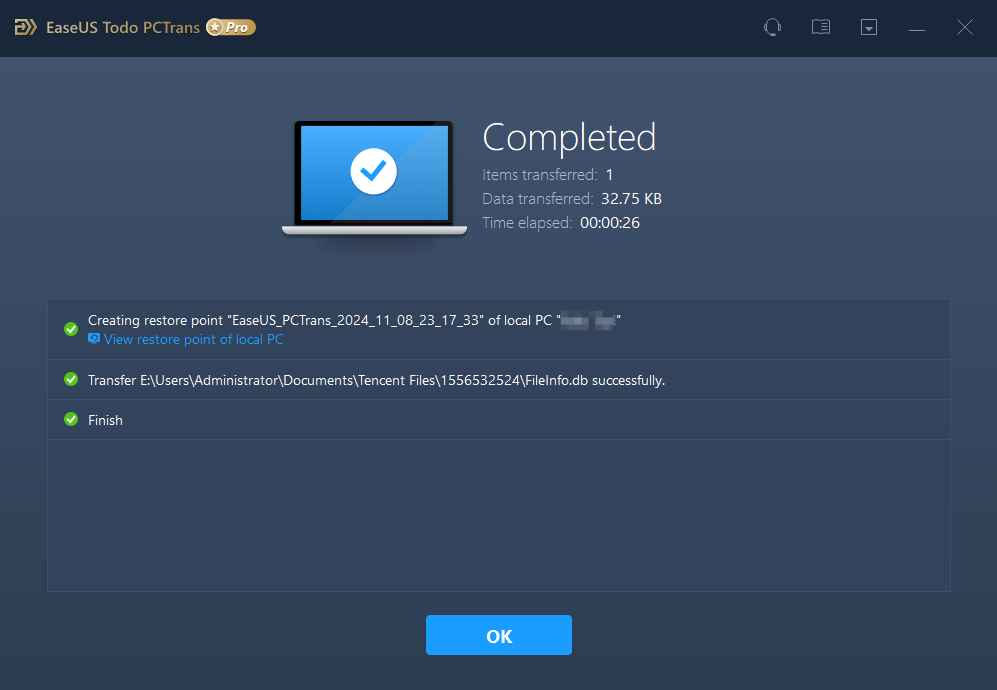
Note:
When the transfer is finished, a reboot is required to refresh all transferred information.
Local Migration
Local Migration only transfers applications from one to another partition on the internal hard disk.
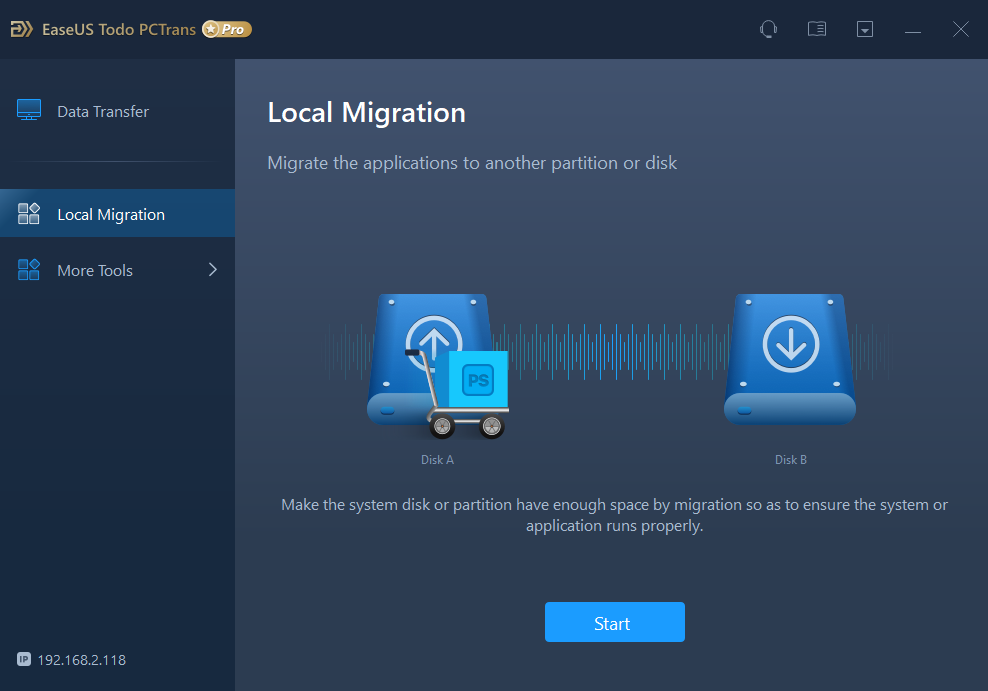
1. Launch Todo PCTrans, select Local Migration at the home page of EaseUS Todo PCTrans and click Start.
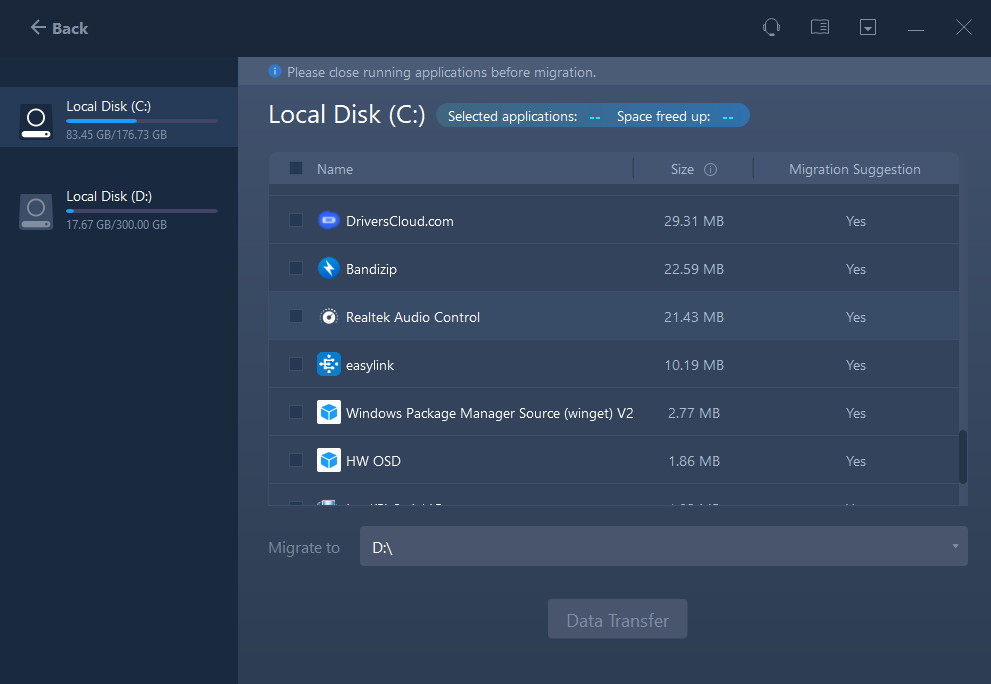
2. Tick the little boxes in front of applications to decide transfer programs and select the target partition, then click Data Transfer to continue.
3. Finish the transfer.
Note:
When the transfer is finished, a reboot is required to refresh all transferred programs.
More Tools
More Tools includes the following features:
1. File Sharing
2. System Cleanup
3. Large File Cleanup
4. App Management
5. Product Key
File Sharing
File Sharing function enables quick and efficient file sharing between PCs over a network. This feature is especially useful for users who need to share documents, photos, or entire folders within a secure and fast environment. Here’s how you can get started with File Sharing:
1. Initiate Connection:
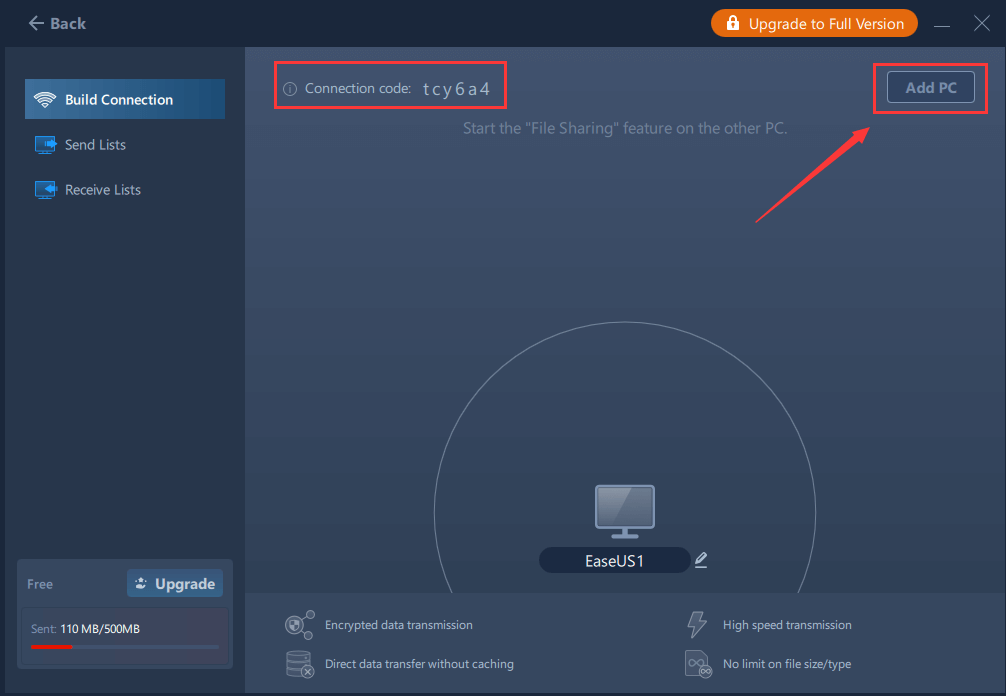
On both PCs, open the software and from the left-side menu, select File Sharing and click on Start.
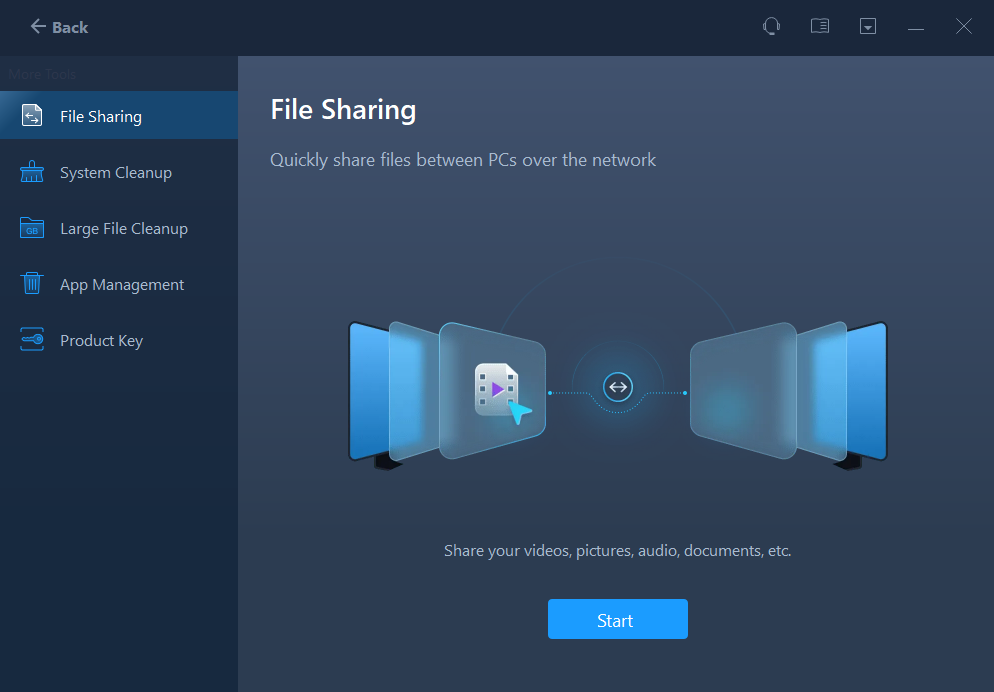
2. Connect to Another PC:
Ensure that both devices have entered the File Sharing interface. Click on Add PC, enter the Connection Code of the other device, and select Connect.
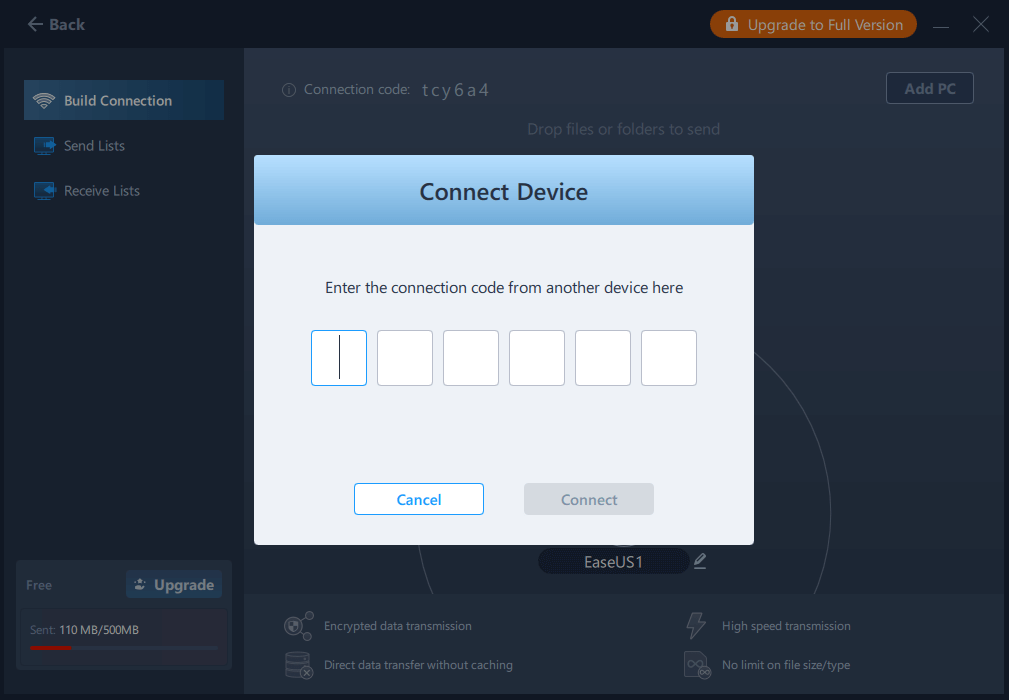
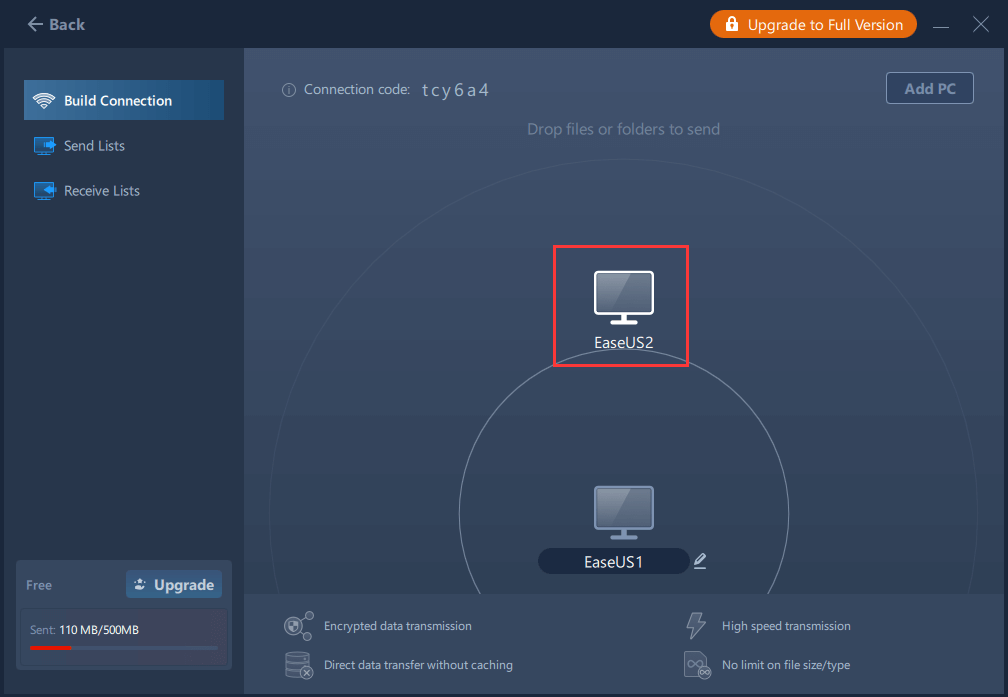
Once connected, the connected device will appear in the sharing interface. If both devices are on the same LAN, the software may automatically detect and connect these devices.
3. Select Files or Folders to Share:
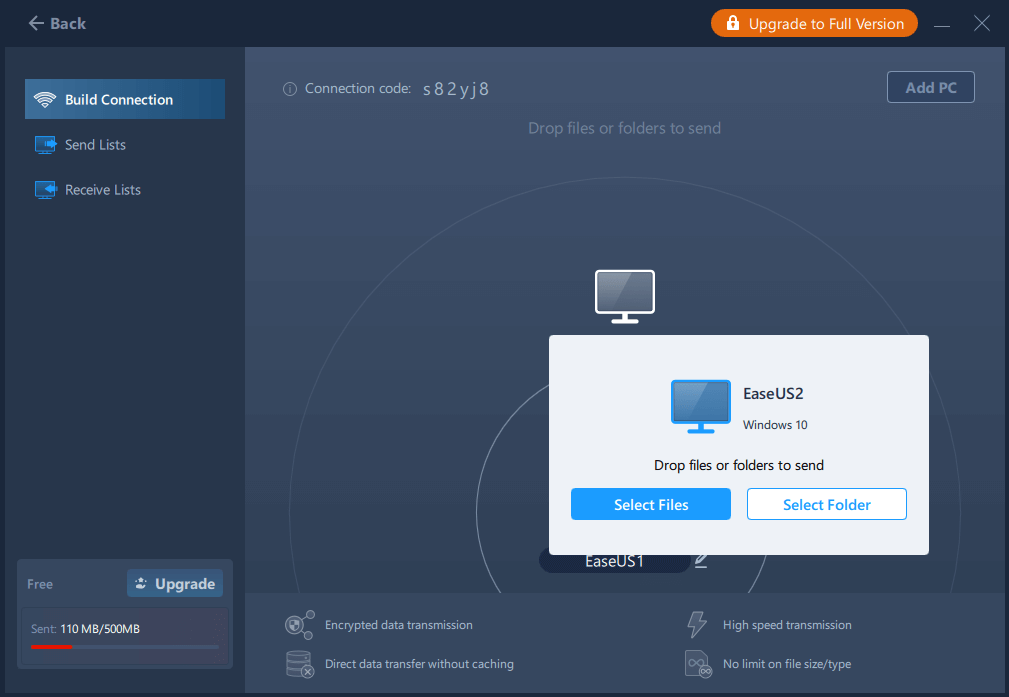
Click on the device you want to share files with. You can either choose to select files/folders or simply drag and drop files or folders directly onto the target device in the interface.
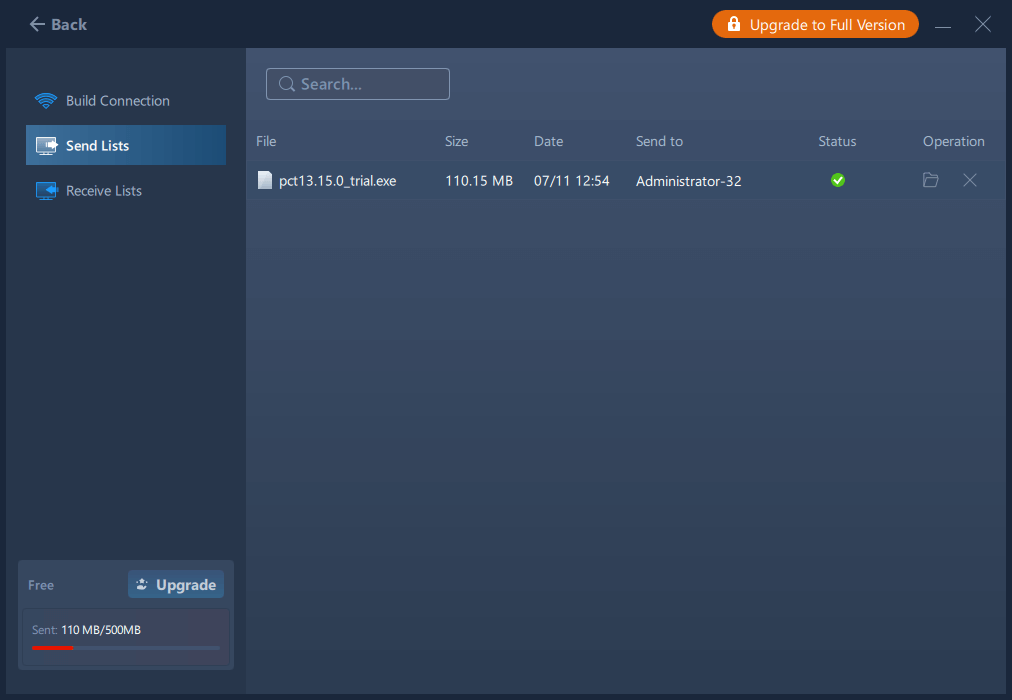
4. Sending Files:
After the transfer is complete, you can review the details of the sent files in the Send Lists.
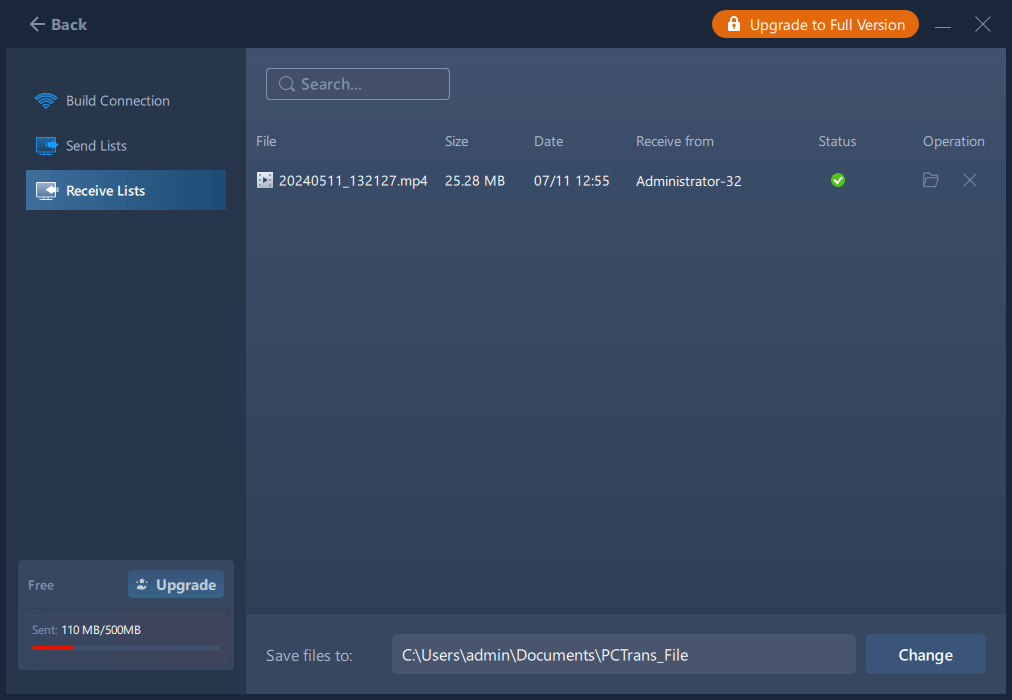
5. Receiving Files:
Once files are received, they appear in the Receive Lists. You can change the default save path of received files by clicking on Change.
System Cleanup
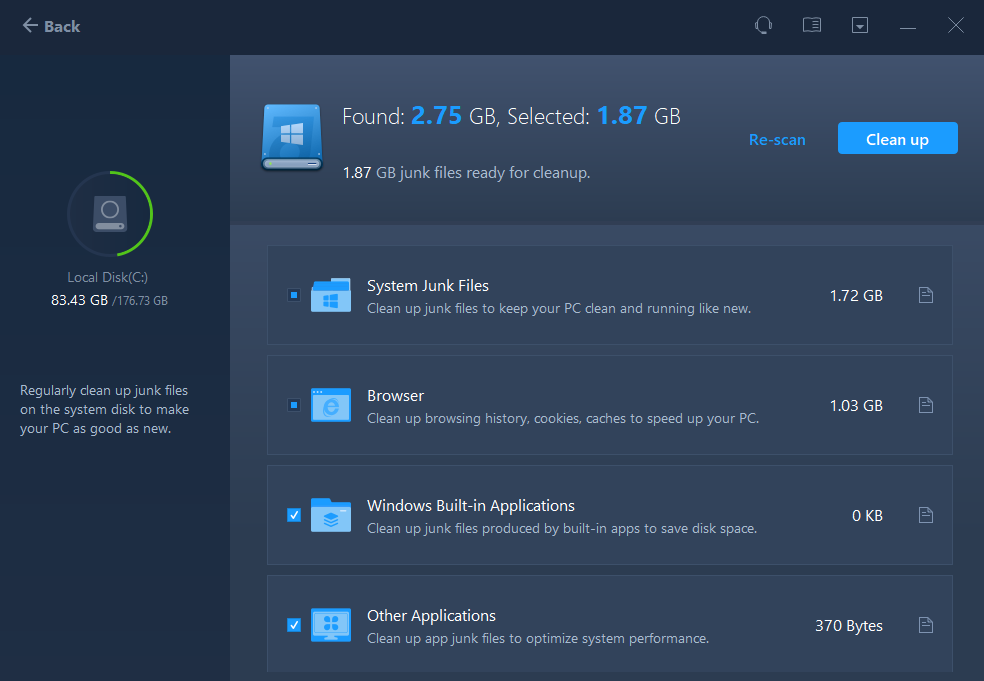
System Cleanup cleans junk files from System, Browser, Windows Built-in Applications, and Other Applications, it will save disk space and improve your computer performance.
1. Scan your C partition after running the System Cleanup function.
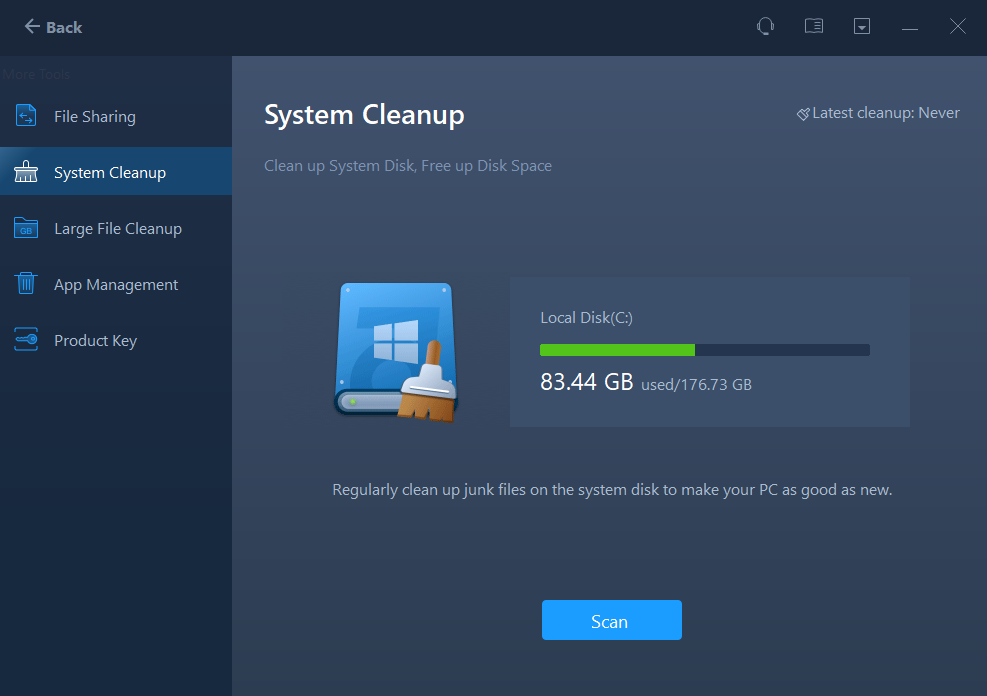
The scanning may need a long time if you have lots of junk files. Please wait patiently.
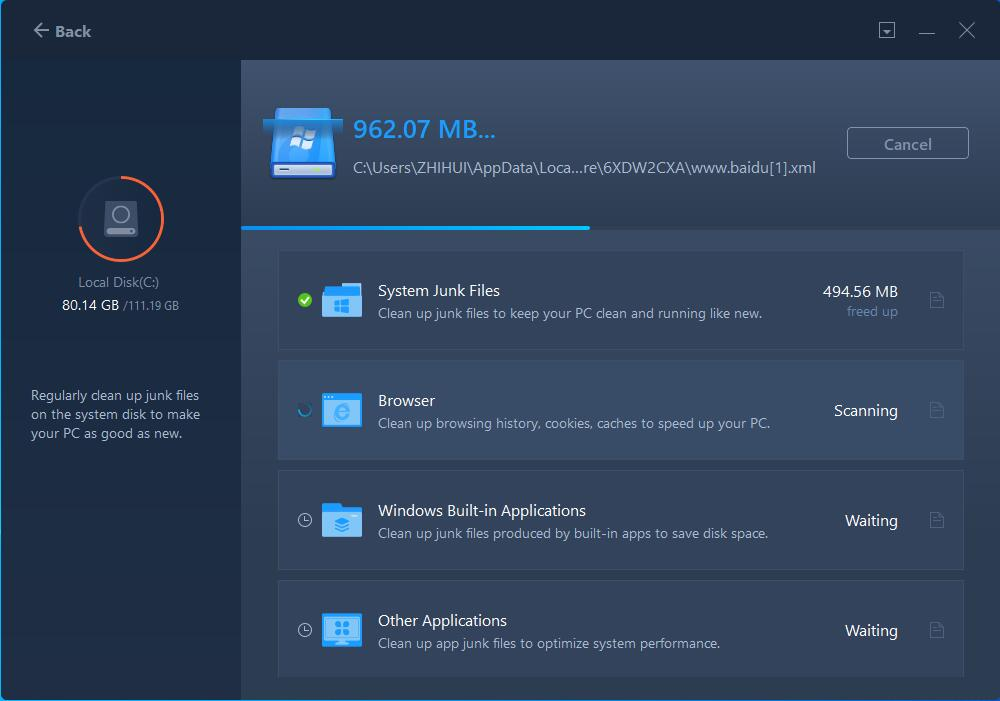
2. Check all listed junk files to manually select them or select them by default option.
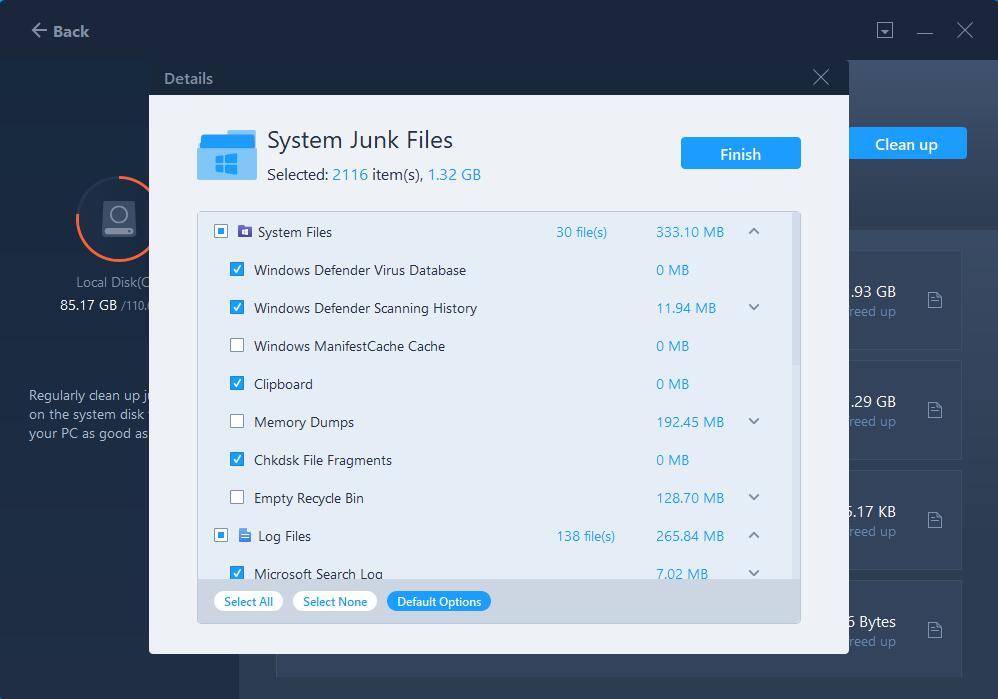
3. Click the Clean up button to delete your selected junk files.
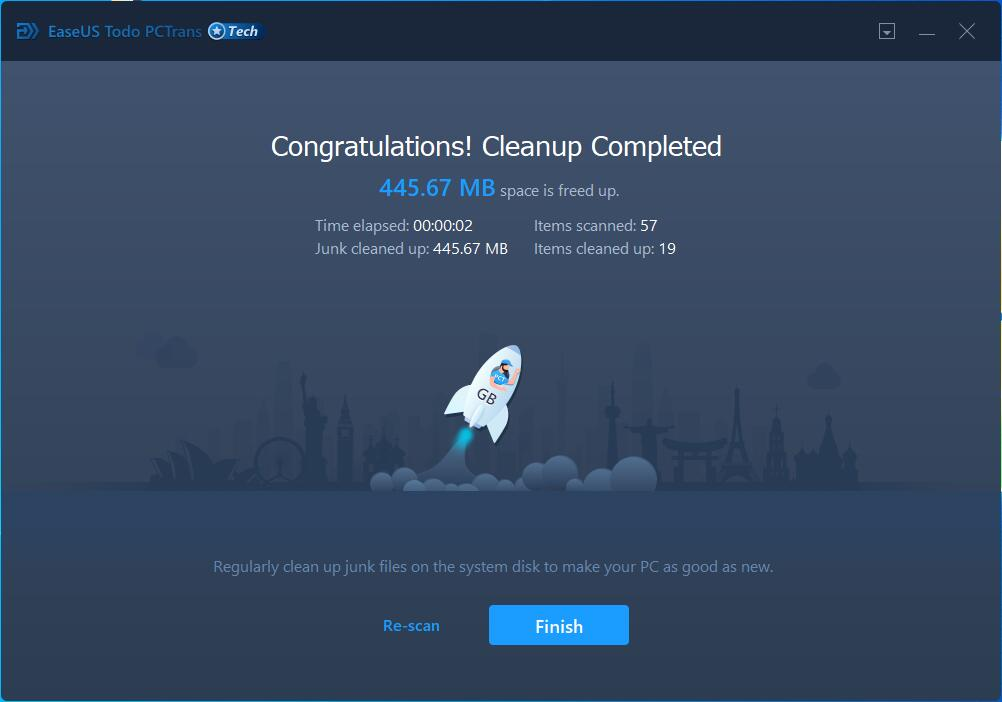
Cleanup Completed window appears once it is finished.
Large File Cleanup
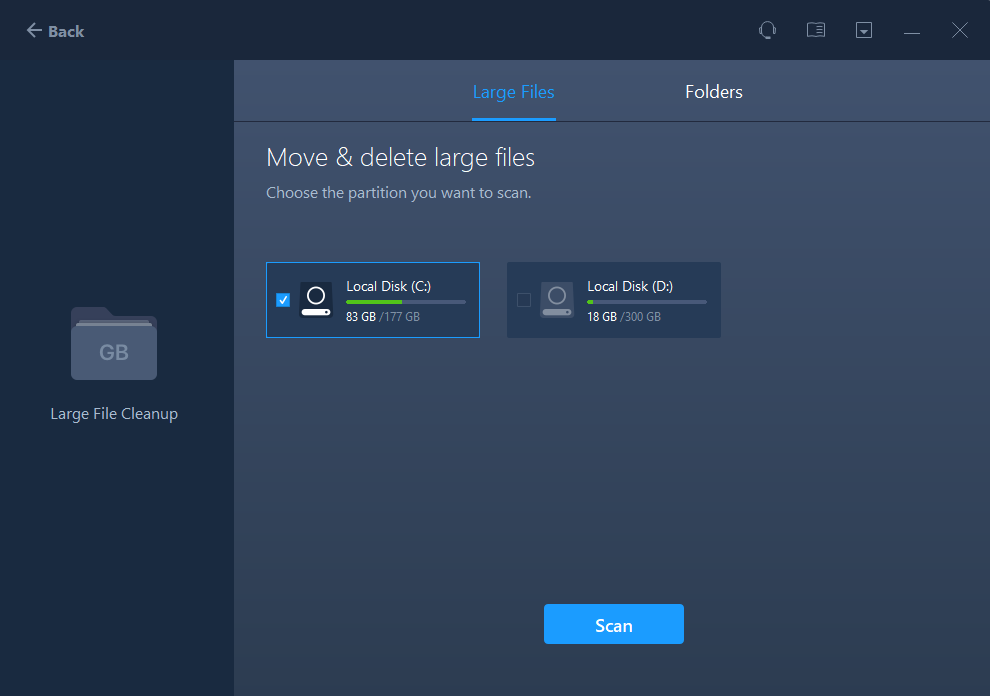
If the capacity of your hard drive is running low, it is time to clean off some files. A good place to start is by locating the largest files on your hard drive. Large File Cleanup can locate these files and easily remove them from your hard drive.
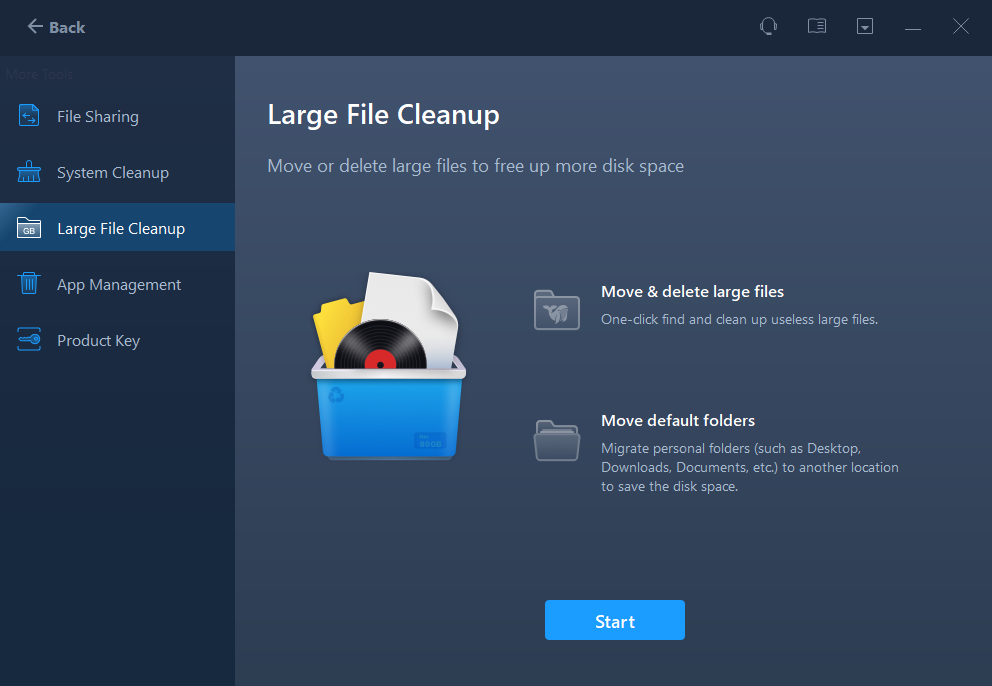
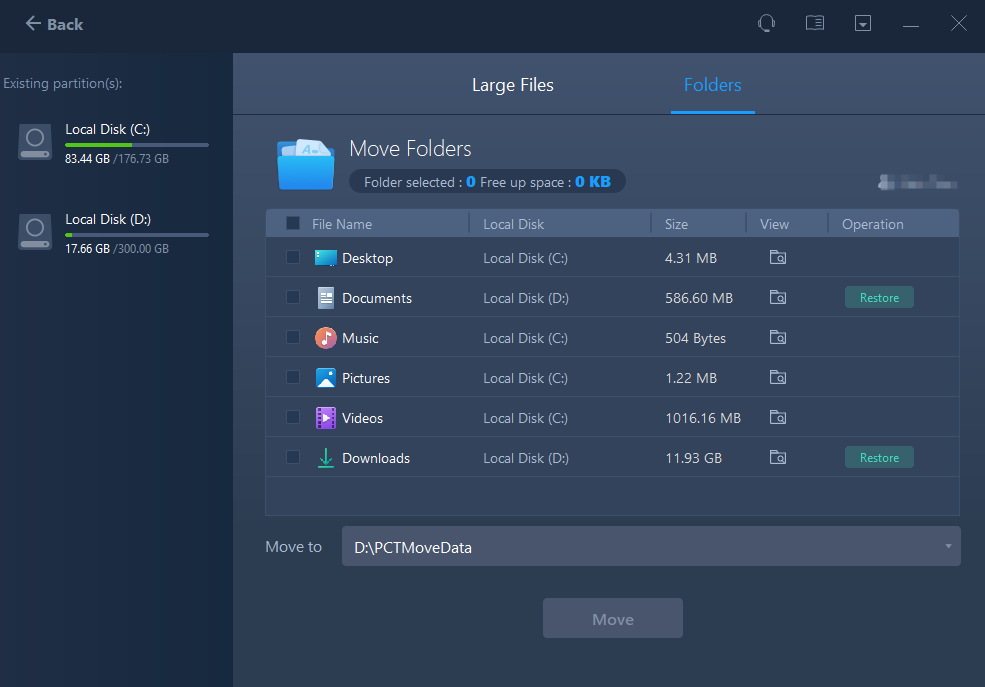
There are two options in this function: Large files and Folders
Large files: Move or delete large files from the selected partition(s).
Folders: Migrate personal folders (Such as Desktop, Downloads, Documents, etc) to another location to save disk space.
Note:
Please do not delete the files from the installation directory of your programs, otherwise, it may cause the program cannot be used.
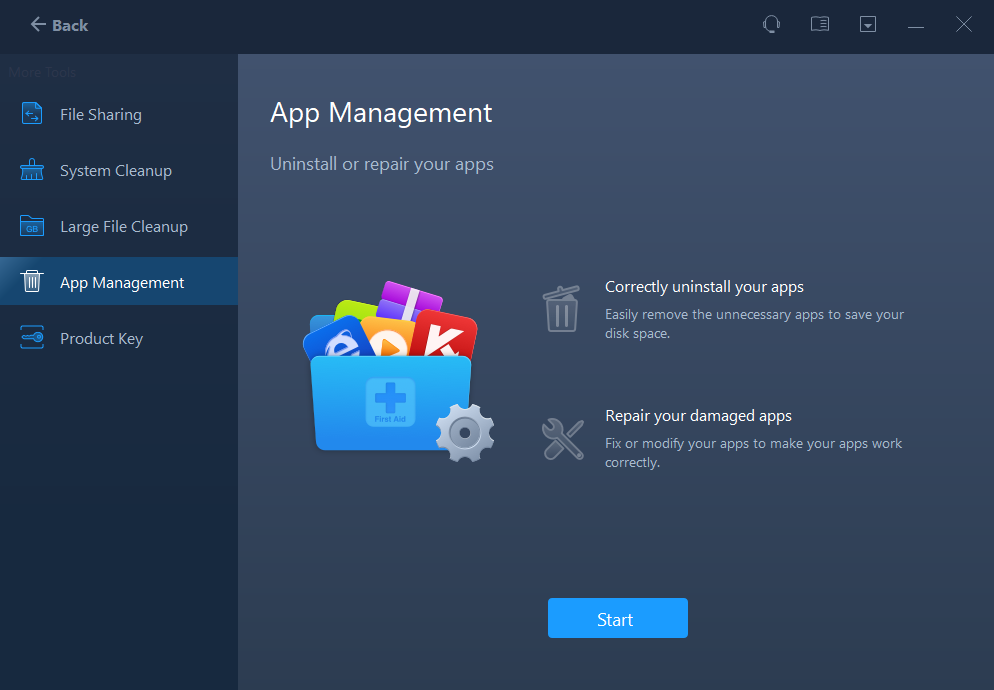
App Management
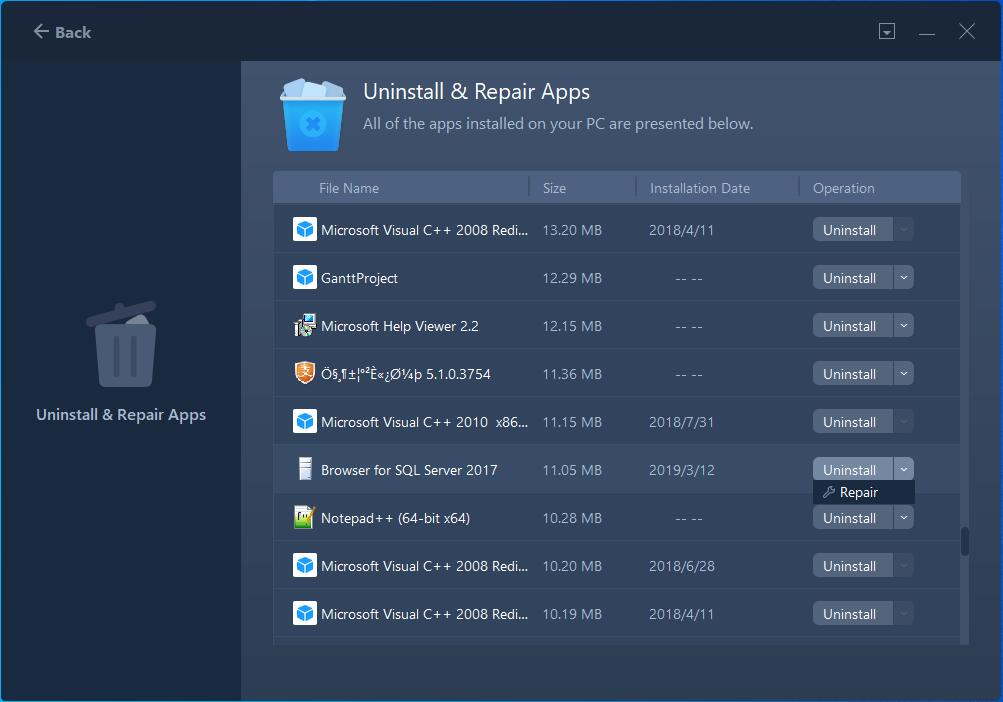
This feature is used to uninstall programs, repair damaged programs, or delete the program registry information from your computer.
There are three operation options for your selected programs:
Uninstall: Uninstall the selected program from your computer.
Repair: Fix your programs to make it work normally.
Delete: Delete the registry key of the selected program but still keep the program files in the installation directory.
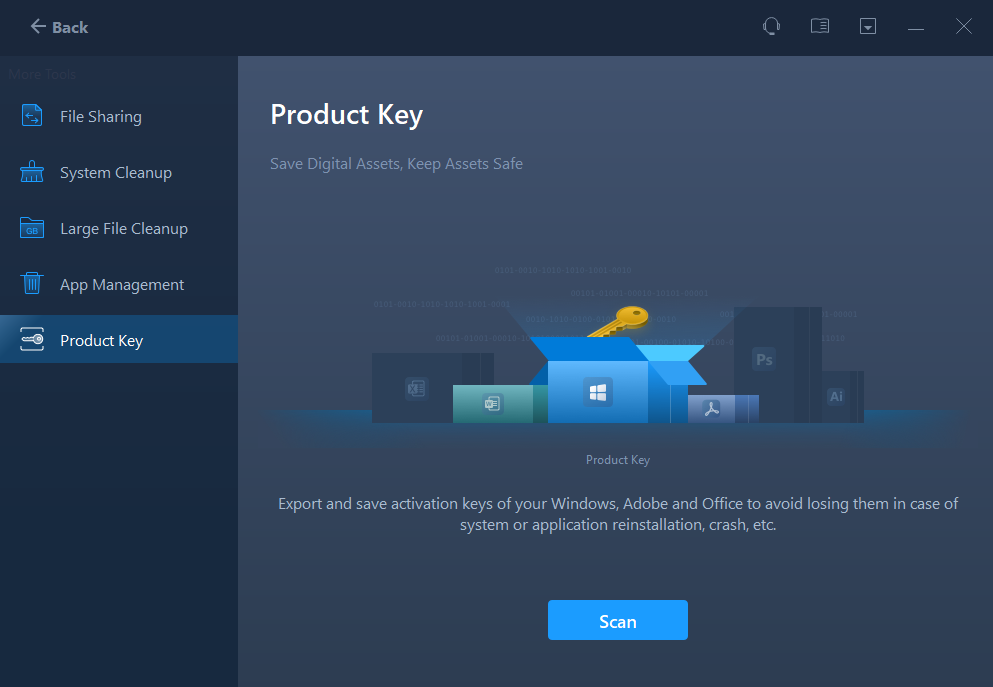
Product Key
This feature is used for saving activation/license keys of your system and applications to avoid losing them in case of system reinstallation, crash, etc.
1. Click the Scan to scan the license key of your Operating System and Applications.
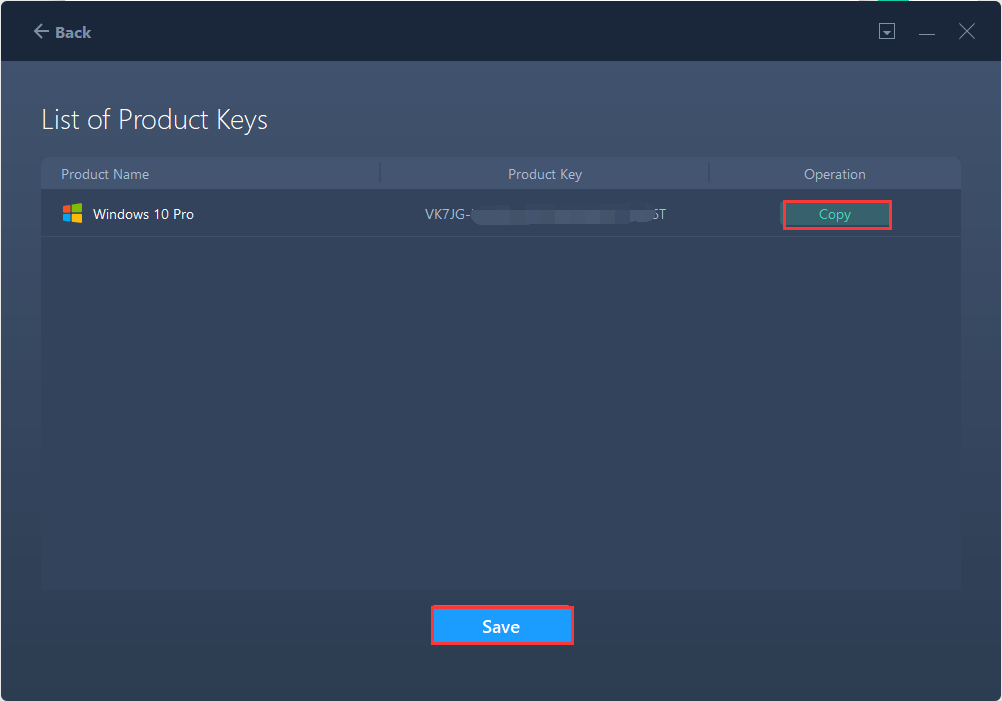
2. Save your keys to a *.txt file or directly copy the key.
Note:
Only the keys of the Windows operating system, Microsoft Office, and Adobe are supported.
Feedback and Support
We invite your comments on how well EaseUS Todo PCTrans performed, and we are also enthusiastic about replying to all your questions about using it. Please feel free to contact us at:
techsupport@easeus.com
We also provide an online chat service and the Live Chat option can be located in the top navigation bar of EaseUS official website www.easeus.com