Page Table of Contents
Updated on Feb 28, 2024
According to a recent study, 62% of people have lost their computer data, and over 70% of individuals have deleted something unintentionally. If you don't want to be an individual from the above statistics, you must back up your USB to Google Drive.
There are simple and effective ways to backup USB to Google Drive, and in this detailed blog from EaseUS, we will take you through all these methods so that you never lose your essential data.
The Benefits of Backing Up USB to Google Drive
Imagine if you are unable to access your data one day. You can lose the USB drive, or there could be a hardware failure. Therefore, regular backup USB to Google Drive ensures you avoid such panic scenarios and access data easily anytime, anywhere.
- Remote Accessibility and Convenience: When you back up the USB to Google Drive, you can access data anywhere. If you have an internet connection, you can easily log into your Google Drive from any computer, smartphone, or tablet and retrieve your files instantly.
- Redundancy and Data Security: Hardware failures, accidents, and unforeseen disasters can strike at any time, potentially losing your precious data stored on a USB drive. However, backing up files to Google Drive allows you to introduce redundancy into your data storage strategy. Hence, Google's robust and distributed infrastructure ensures that multiple copies of your files are stored across various servers and data centers.
- Data Preservation and Recovery: Accidental deletions, formatting errors, and corruption can instantly render your USB drive data inaccessible. When you back up USB to Google Drive, your files are not only protected against these unfortunate events, but you can also take advantage of the "version history" feature.
- Effortless File Sharing and Collaboration: Sharing files stored on a USB drive can sometimes be cumbersome, involving the physical transfer of the drive or the creation of duplicates. Google Drive simplifies this process by allowing you to share files and folders with others easily using secure links or by granting them access directly.
- Automatic Backups and Peace of Mind: Modern life is busy, and remembering to back up your USB drive regularly manually might slip your mind. You can set up automatic backup schedules using tools like Google Drive's desktop application or USB backup software. This "set-it-and-forget-it" approach ensures that your files are consistently backed up without requiring constant attention.
🎀Related Reading: Backup Hard Drive to Google Drive | Backup Google Drive to External Hard Drive
3 Ways to Backup USB to Google Drive
Now that we understand the significance of backing up USB drives to Google Drive. Let's delve into the three different methods you can use to achieve this:
| Method | Effectiveness | Time Required | Difficulty |
| EaseUS Todo Backup | High | Less Time Consuming | ⭐ |
| Google Drive for Desktop | High | Less Time Consuming | ⭐ |
| Manual Upload to Google Drive | Low | More Time Consuming | ⭐⭐⭐ |
Way 1. Backup USB to Google Drive via Cloud Backup Software
One of the simplest methods to back up your USB drive is using specialized backup software like EaseUS Todo Backup. This software streamlines the backup process and offers a simple interface and multiple features.
Secure Download
Below are some of the critical features of it:
- Back up data to external hard drives, NAS, network, and cloud
- Provide 250GB of free cloud storage space
- Create full, differential and incremental backups
- Clone a hard drive
- Image a hard drive
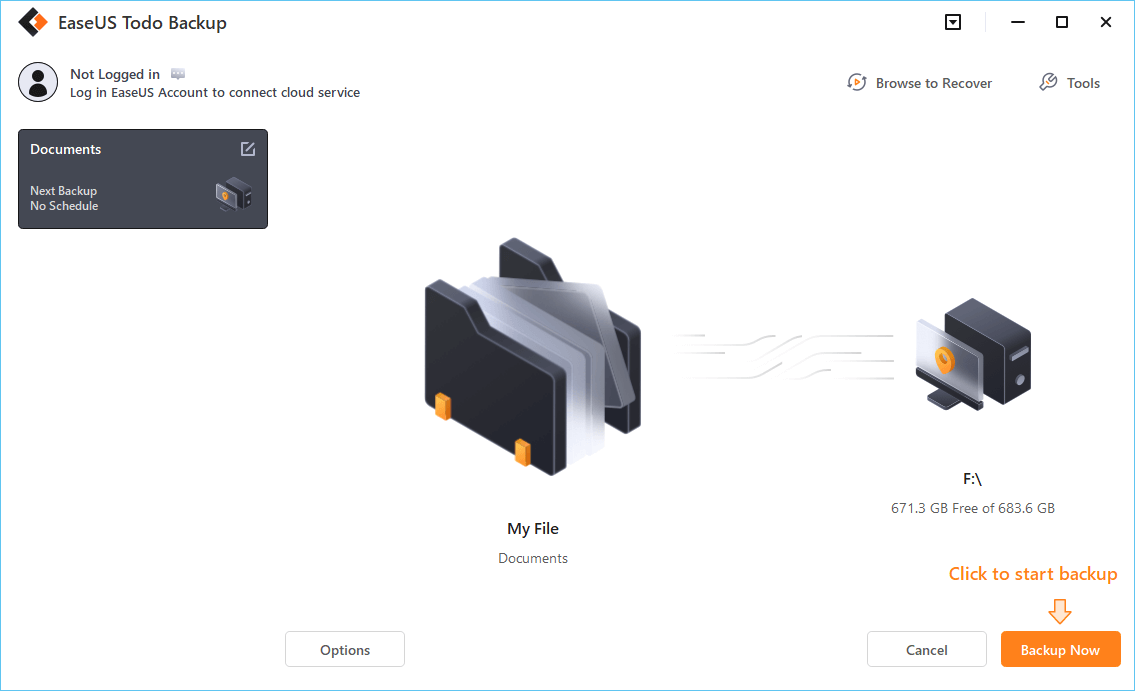
Here are the detailed steps you should follow to back up USB to Google Drive:
Step 1. To initiate a backup, click the Select backup contents option.

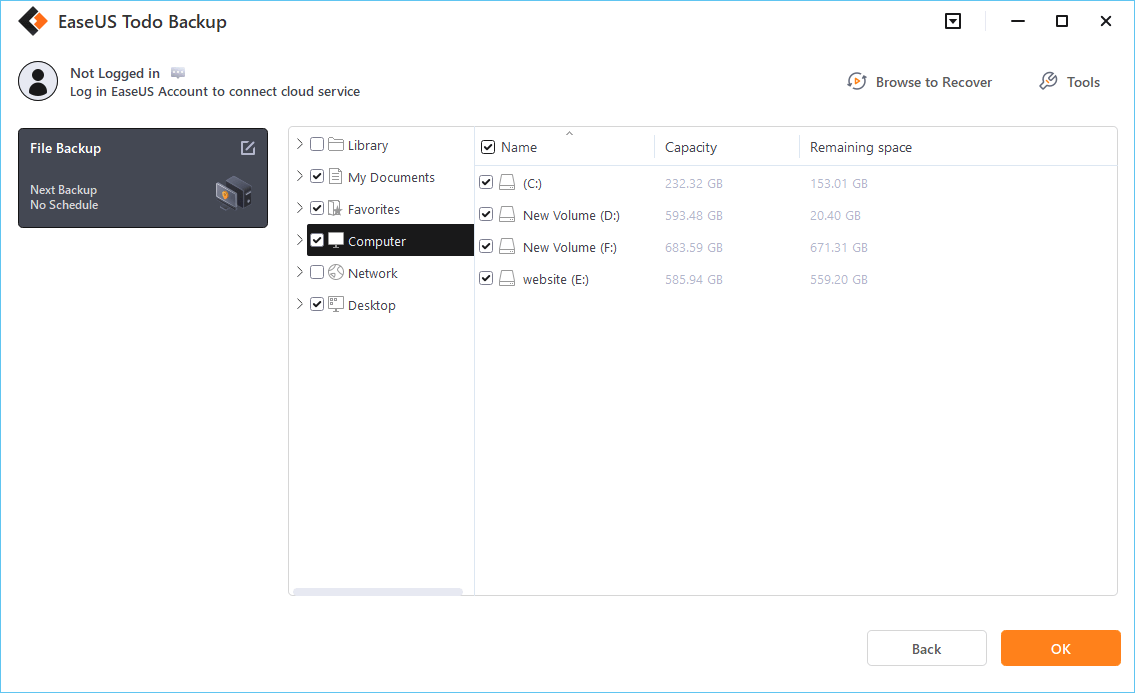
Step 2. There are four data backup categories, File, Disk, OS, and Mail, click File.

Step 3. On the left, both local and network files will be shown. You may extend the directory to pick the backup files.
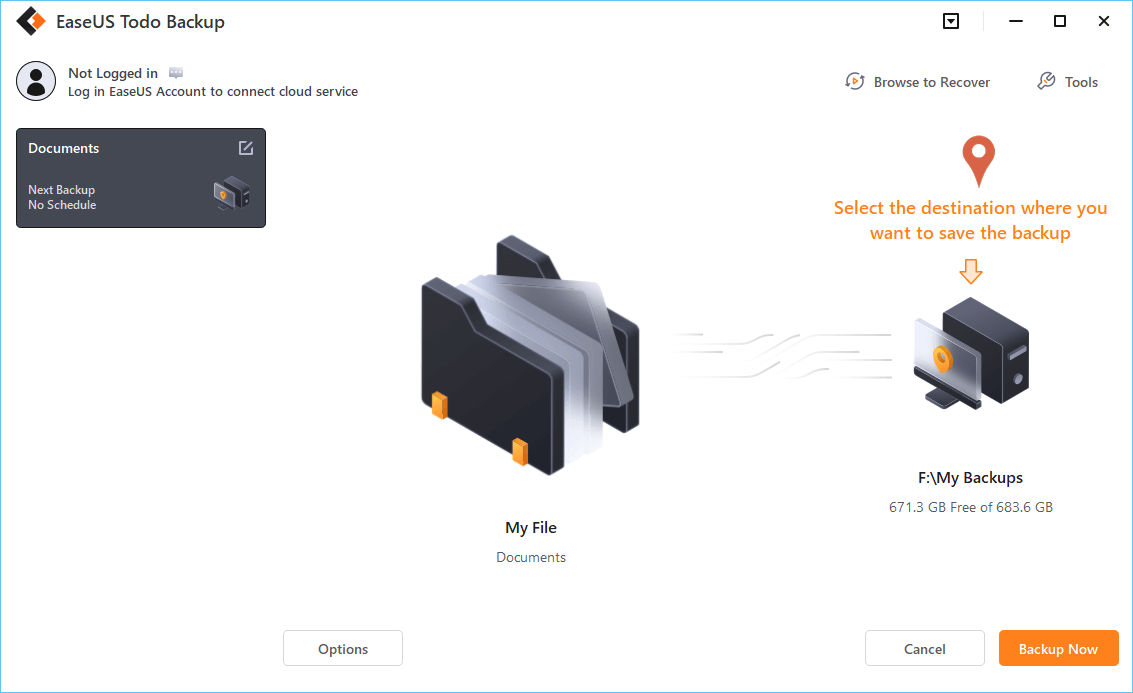
Step 4. Follow the on-screen instructions and choose a location to store the backup.
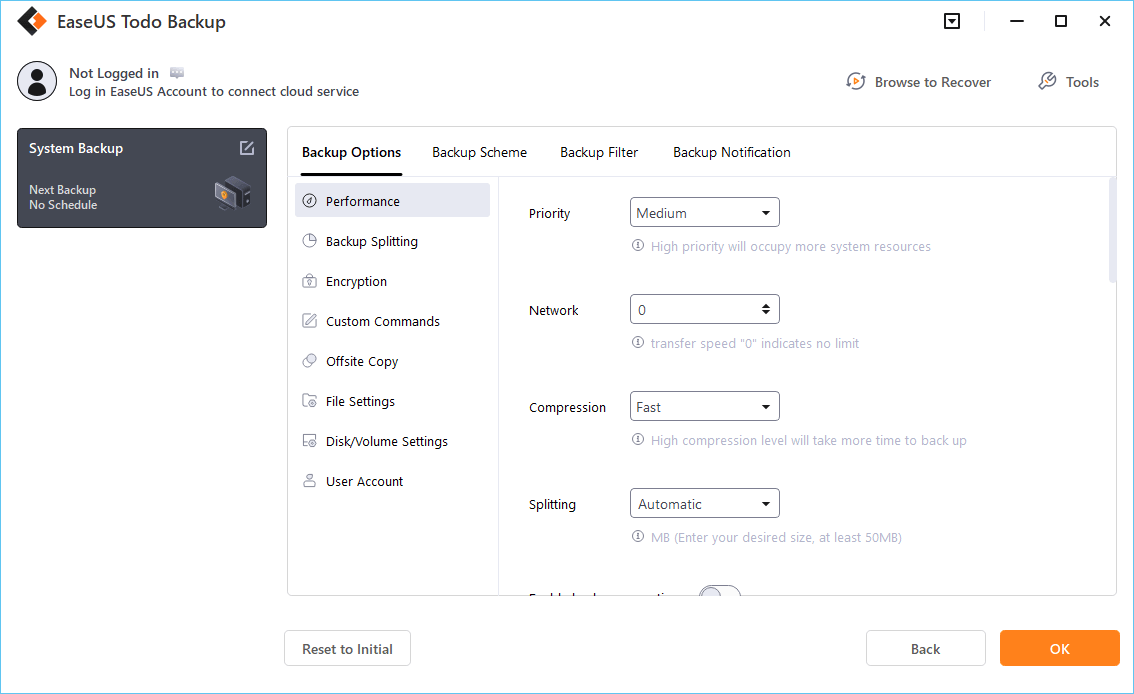
Click Options to encrypt the backup with a password in Backup Options, then click Backup Scheme to specify the backup schedule and start the backup at a certain event. There are also other additional choices you may choose to tailor the backup process to your requirements.
Step 5. The backup may be stored on a local disk, EaseUS' online service, or NAS.

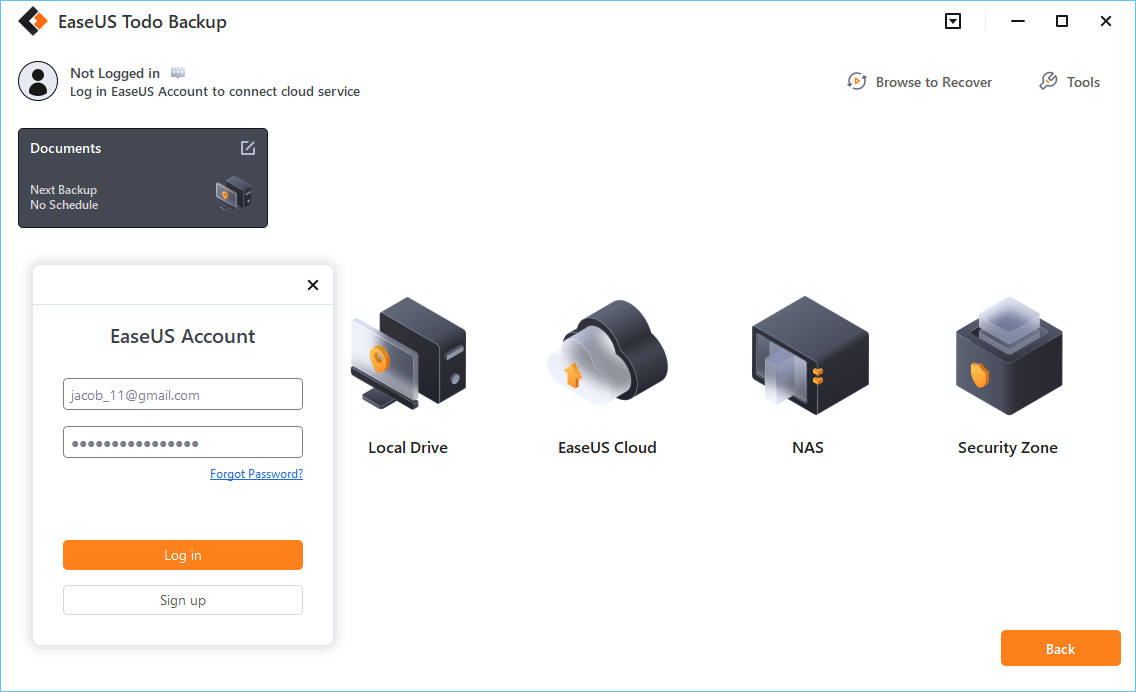
Step 6. EaseUS Todo Backup enables customers to back up data to a third-party cloud drive as well as its own cloud drive.
If you want to back up data to a cloud drive provided by a third party, choose Local Drive, scroll down to add Cloud Device, and then add and log in to your account.

You can also choose the EaseUS cloud drive. Sign up for an EaseUS Account, then click EaseUS Cloud and log in.
Step 7. Click Backup Now to begin the backup process. The backup job will be presented as a card on the left side of the panel after it has been finished. Right-click the backup job to handle it further.
Its features ensure your data's safety through scheduled backups and incremental backup options.
Way 2. Sync Files to Google Drive with Drive for Desktop
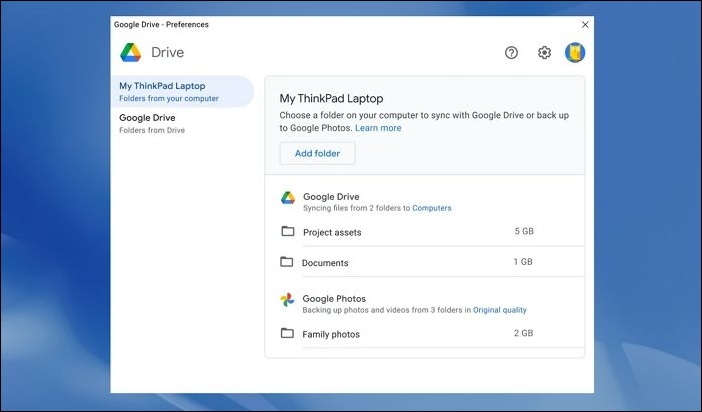
Google offers a convenient desktop application, Google Drive for Desktop, that allows you to sync files on Google Drive and your computer effortlessly. You can even sync files on Google Drive offline.
Step 1. Download and install Google Drive for Desktop.
Step 2. Sign in to your Google Account.
Step 3. Select the folders you want to sync between your computer and Google Drive.
Step 4. Copy the files from your USB drive to the synced folder on your computer.
Step 5. Google Drive for Desktop will automatically sync the files to your Google Drive.
Way 3. Upload USB Files to Google Drive Manually
You can manually upload files from your USB drive to Google Drive if you prefer a more hands-on approach.
Step 1. Open the web browser and go to Google Drive.
Step 2. Sign in to your Google Account.
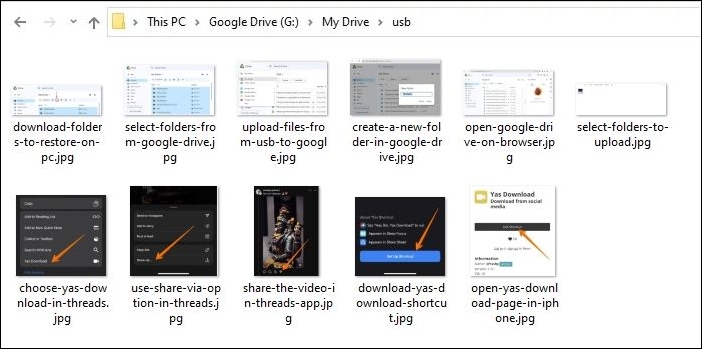
Step 3. Create a folder to organize your USB drive files.

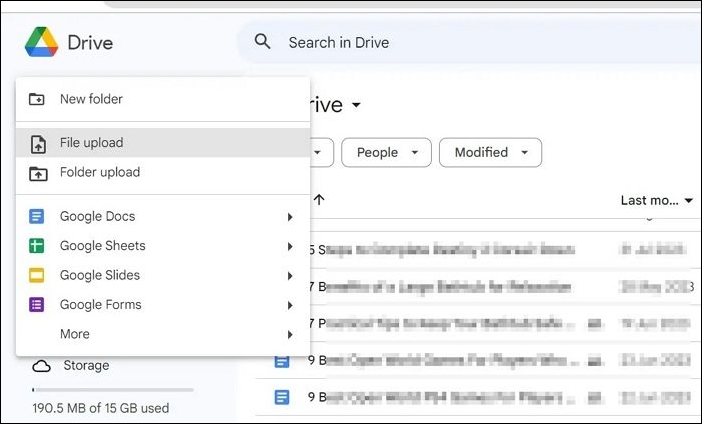
Step 4. Upload Files: Open the folder, click the "+ New" button, and select "File upload." Choose the files from your USB drive.
Step 5. Track the progress of the uploads in the Google Drive interface.
Share the post with your friends and family to help them out:
How to Restore Backup from Google Drive to PC
Once you have a backup ready, be prepared to restore the backup from Google Drive to your computer!
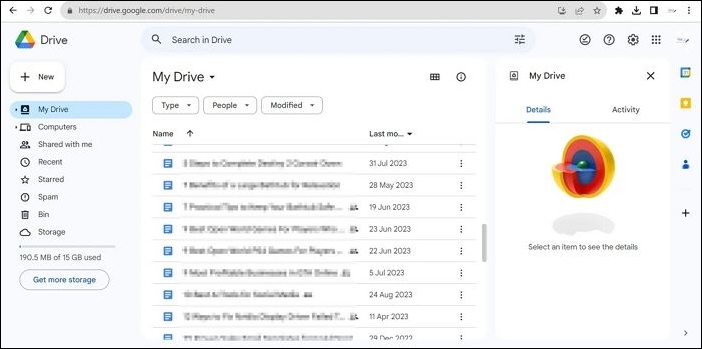
Step 1. Go to https://drive.google.com/drive.
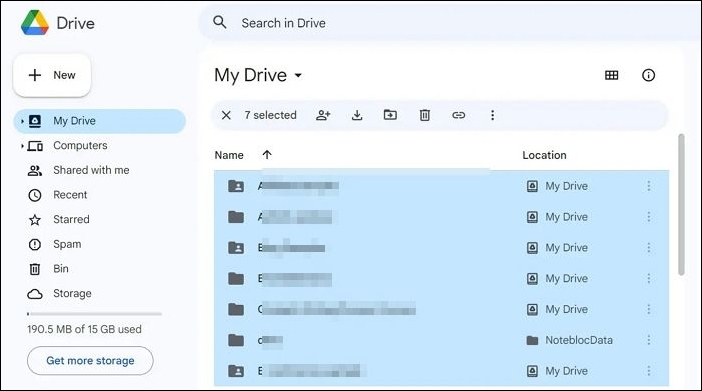
Step 2. Select the folders you want to restore from your drive.
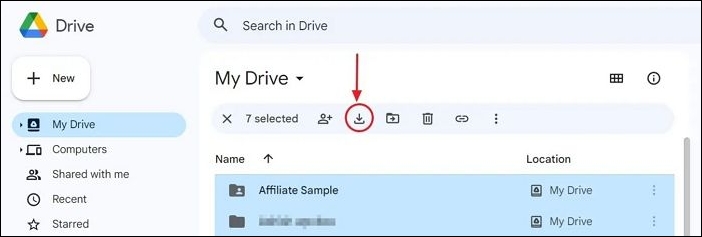
Step 3. Click on the download icon and save them onto your PC.
Step 4. All files and folders will be downloaded and compressed into a ZIP file on your PC.
Once all your files and folders are in your computer, you can easily connect an external device to transfer them.
Conclusion
Backing up your USB drive to Google Drive is a proactive way to ensure your data's safety and accessibility. If you are looking for the perfect solution to backup USB to Google Drive, one of the best choices is EaseUS Todo Backup. This robust tool lets you transfer valuable information to Google Drive quickly. Embrace the power of cloud storage and take control of your data's safety and convenience.
Secure Download
FAQs on Backup USB to Google Drive
Here is the list of commonly asked questions on how to sync external drives like USB to Google Drive or any Files and folders to Google Drive.
1. How do you move files from Google Drive to USB?
To move files from Google Drive to a USB drive, download them from Google Drive, insert the USB drive, copy or cut the files, and paste them into the USB drive's folder. Further, eject the USB drive safely before removing it.
2. Can you format a USB flash drive without losing data?
Formatting implies that you will end up losing all your data. However, if you don't want that, you can use software like EaseUS Todo Backup to save all your data into your drive before formatting.
3. Can you download Google Drive to an external hard drive?
You can do that by selecting and downloading the files from the drive to your computer. Afterward, you must copy them from your computer to the external hard drive using your operating system's file management tools.
4. How to download from Google Drive to an external hard drive?
Simple steps can help get data from Google Drive to an external hard drive. Select Files from Google Drive and right-click to choose the Download options. Connect the external device on your computer and copy and paste all the desired files from the PC to an external drive.
Was this page helpful? Your support is truly important to us!

EaseUS Todo Backup
EaseUS Todo Backup is a dependable and professional data backup solution capable of backing up files, folders, drives, APP data and creating a system image. It also makes it easy to clone HDD/SSD, transfer the system to different hardware, and create bootable WinPE bootable disks.
Secure Download
-
Updated by
![]()
Larissa
Larissa has rich experience in writing technical articles and is now a professional editor at EaseUS. She is good at writing articles about data recovery, disk cloning, disk partitioning, data backup, and other related knowledge. Her detailed and ultimate guides help users find effective solutions to their problems. She is fond of traveling, reading, and riding in her spare time.…Read full bio -
Written by
![]()
Jerry
"I hope my articles can help solve your technical problems. If you are interested in other articles, you can check the articles at the bottom of this page, and you can also check my Facebook to get additional help."…Read full bio
Related Articles
![]() How to Backup Laptop to Google Drive Step by Step
How to Backup Laptop to Google Drive Step by Step![]() Restore Windows 10 System Image to New Hard Drive with In-Depth Guide
Restore Windows 10 System Image to New Hard Drive with In-Depth Guide![]() How to Do a System Backup on Windows 10 [2024 New Tutorial]
How to Do a System Backup on Windows 10 [2024 New Tutorial]![]() Windows Backup vs. Professional Backup Software (Which Should I Use?)
Windows Backup vs. Professional Backup Software (Which Should I Use?)![]() Fix 'Recovery Drive Please Wait' [Step-by-Step Guide]
Fix 'Recovery Drive Please Wait' [Step-by-Step Guide]![]() How to Backup PST File with 3 Outlook PST Backup Tools
How to Backup PST File with 3 Outlook PST Backup Tools


EaseUS Todo Backup

Smart backup tool for your files, disks, APPs and entire computer.
Topic Clusters


Interesting Topics