Page Table of Contents
Updated on Feb 26, 2024
There is no doubt that Star Wars Jedi: Survivor is an excellent sequel to this game IP. At the beginning of the game, Cal inherited the special ability from the previous game, such as a two-stage jump, reverse sliding zipline, and special lightsaber action and the subsequent game process is also full of surprises.
Meanwhile, the map of this game is also more accessible, and the newly added Meditation Point teleportation also makes the map exploration very silky smooth. The game's graphics have also become more realistic due to the iteration of technology.

Since this game is a third-person action-adventure game, players will often spend dozens of hours experiencing the full plot of the game, which is essential to protect the save files.
This post will bring you how to backup Star Wars Jedi: Survivor saves so that you can enjoy the game better.
The Importance of Backing Up Star Wars: Jedi Survivor
Why do we need to back up Star Wars: Jedi Survivor save files?
The most criticized drawback of Star Wars Jedi: Survivor is that when the game save is lost for some reason, players cannot find a way to recover these files.
Due to EA's restrictions, Steam players cannot rely on Steam Cloud Backup either. Once the game save fails to load, players have to start the game from scratch. This is total torture.
And when you encounter these situations, your game save file is likely to be lost.
- Computer Failure: When your PC encounters problems such as malware invasion, hardware corruption, system errors, etc., your game files are likely to crash or even be permanently lost.
- Game malfunction: Currently, the optimization of Star Wars Jedi: Survivor is not enough, and many players have reported encountering situations such as game blue screen, lag, and inability to load stories. This may also result in lost saves.
- Adding Mods: Nexus Mods and other websites provide many available mods for Star Wars Jedi: Survivor. But these mods will likely conflict with the game code after game updates, resulting in lost saves.
"Troopers" includes 3 outfits, Stormtrooper, Scout Trooper and Patrol Trooper for the Outfit Manager to use in #JediSurvivor https://t.co/o3aJjBLJba
— Nexus Mods (@NexusSites) May 30, 2023
How to Save Star Wars: Jedi Survivor
Star Wars: Jedi Survivor is set up differently from other PC games in that it does not support players to save their progress from the game menu anytime and anywhere. If you'd like to save the progress of Star Wars: Jedi Survivor, you need to reach the Meditation Point and interact with it, which is the most reliable way to save this game.

Of course, Star Wars: Jedi Survivor will also automatically save your progress at various story points, but relying on this method alone will be very risky.
If you don't interact with any Meditation Points when Cal's Health Point clears, you could be transported directly to the beginning of the level and need to start the game from the beginning. This is certainly an outcome that most players would not want to accept.
The Star Wars: Jedi Survivor save file will change after each save game progress. If you don't want to lose your game progress for the reasons mentioned in the last section, then you need an effective game backup solution. Keep reading!
Backup Star Wars: Jedi Survivor Manually
The simplest way to back up Star Wars: Jedi Survivor saves is to manually copy files or the entire folder and save them on other storage media, including local disks, cloud space, or single external hard drives.
You just need to navigate to Star Wars: Jedi Survivor saves file location, copy the folder, and then paste it to the destination you choose.
Star Wars: Jedi Survivor saves file location is under the local C drive. The complete path is as follows:

In order to deal with various contingencies, we recommend you create a scheduled backup of your game data. However, it is really annoying if you are asked to make a manual backup after every game end. To overcome this problem, you should use a professional backup tool and set up a smart backup plan for your game files.
Backup Star Wars: Jedi Survivor Automatically
From the perspective of effectiveness, simplicity, flexibility, and security, the best way to back up Star Wars: Jedi Survivor saves is to use professional tools such as EaseUS Todo Backup to create advanced backup plans.
Secure Download
EaseUS Todo Backup is a well-received backup software for gamers and is perfect for backup PC game saves. It has extremely powerful backup features and supports various advanced backup options.
For gamers, EaseUS has an incremental backup mode that will come in handy. If you set up a backup schedule based on incremental backups depending on how often you play the game, EaseUS will automatically update your copy of game saves to the latest state every time the game progresses.
Also, EaseUS will provide you with 250GB of free cloud space. You don't need to prepare additional storage media, you can save copies of all your game files in the cloud space. That not only decreases the burden on your computer memory but also makes it easier for you to restore game data on different devices at any time.
Besides backing up games, EaseUS is certainly capable of more backup tasks, and you can learn more about its features below.
🔎Compatibility
- Windows 11/10/8/7
- EaseUS Todo Backup for Mac offered
💡Key Features of EaseUS Todo Backup
- Multiple types of backup supports
- Excellent backup speeds
- Security Zone Backup
- Compress backup
- Clone a hard drive/OS/Partition
- Migrate the system
- Universal Restore
- 250G free Cloud storage provided
Check out the particular steps of how to back up Star Wars: Jedi Survivor saves with EaseUS Todo Backup Home.
Step 1. Open EaseUS Todo Backup Home, and find the Star Wars: Jedi Survivor saves location.
Step 2. Click Select backup contents> File options, and choose the saves folder to back up according to the game file location.

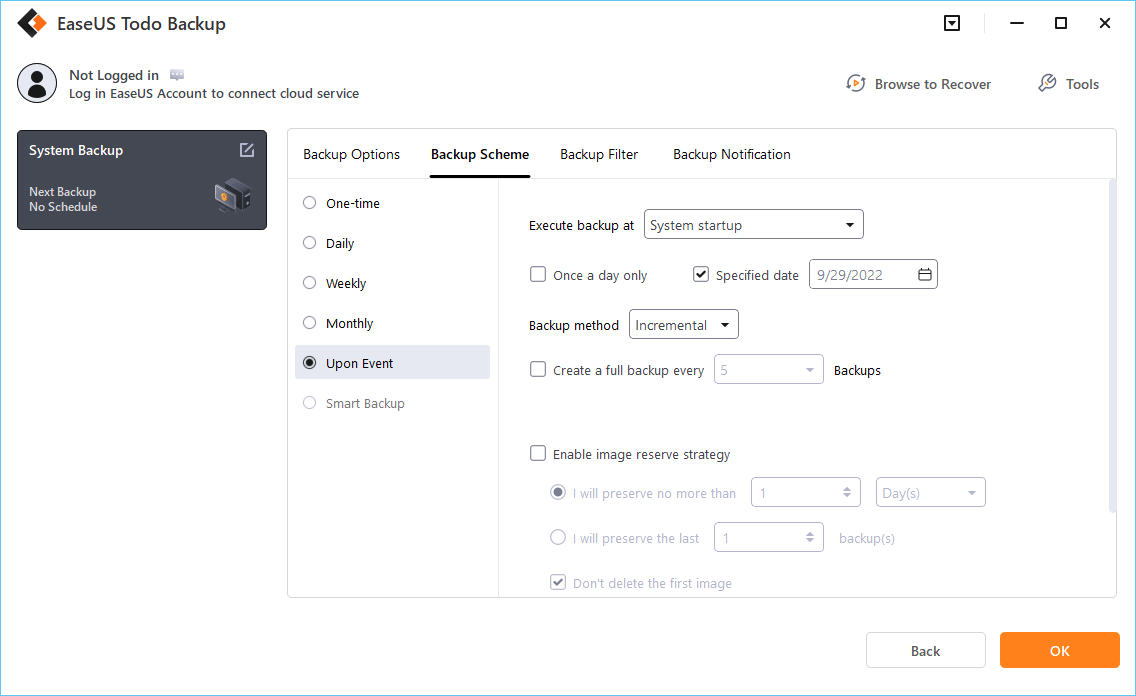
Step 3. Hit the Options> Backup Scheme buttons to set your own backup cycle with incremental backup type.
Step 4. Select a backup stored path from a local drive, EaseUS free cloud, Nas, or Security Zone. Then click the "Backup now" button to start the backup job now.

Conclusion
Star Wars: Jedi Survivor is a very worthwhile game to try. But currently, the optimization of this game is not perfect enough, and you will encounter many situations where you can lose game progress. To prevent you from restarting the game, EaseUS has brought you a solution for how to backup Star Wars: Jedi Survivor saves.
If you want to complete this task more easily, you can have EaseUS Todo Backup automatically backup all game files for you.
Get more games backup methods, do not pass these posts!
FAQs
1. Where are Jedi Survivor save games?
The Star War: Jedi Survivor save file location is under the local C disk. You can navigate to C disk> Users> UserName> Saved Games> Respawn> JediSurvivor.
2. Can you have 2 saves on Jedi Survivor?
Yes, you can have 2 or more saves on Star War: Jedi Survivor. It provides multiple save slots for you to have different playthroughs. Continue just goes the latest save you played.
Was this page helpful? Your support is truly important to us!

EaseUS Todo Backup
EaseUS Todo Backup is a dependable and professional data backup solution capable of backing up files, folders, drives, APP data and creating a system image. It also makes it easy to clone HDD/SSD, transfer the system to different hardware, and create bootable WinPE bootable disks.
Secure Download
-
Updated by
![]()
Rel
Rel has always maintained a strong curiosity about the computer field and is committed to the research of the most efficient and practical computer problem solutions.…Read full bio
Related Articles
![]() [Backup Question] How Often Should I Create A System Image
[Backup Question] How Often Should I Create A System Image![]() How to Backup Files to QNAP NAS (Quick & Easy)👍
How to Backup Files to QNAP NAS (Quick & Easy)👍![]() Top 10 Best OS Imaging Software for Windows 10/11 [Free Trials]
Top 10 Best OS Imaging Software for Windows 10/11 [Free Trials]![]() Where Does Windows 10 Backup Save to? Get Full Answer
Where Does Windows 10 Backup Save to? Get Full Answer![]() Fully Ghost Windows 10 64 Bit/32 Bit with Windows 10 Ghost Software
Fully Ghost Windows 10 64 Bit/32 Bit with Windows 10 Ghost Software![]() How to Backup Outlook Emails to USB [2024 Latest Guide]
How to Backup Outlook Emails to USB [2024 Latest Guide]


EaseUS Todo Backup

Smart backup tool for your files, disks, APPs and entire computer.
Topic Clusters


Interesting Topics