Dealing with problems while signing into iMessage on your Mac might be inconvenient, particularly if you depend on it for smooth communication across your Apple devices. If you can't sign into iMessage on Mac, don't worry! Check out the following fixes to solve this issue:
| Workable Solutions | Step-by-step Troubleshooting |
|---|---|
| Fix 1. Check Your Apple ID | Open the Messages application and head over to Settings by pressing the option right...Full steps |
| Fix 2. Check the Internet Connection | Connect to a trustworthy Wi-Fi network by clicking the top-right icon. Check your internet...Full steps |
| Fix 3. Check Apple System Status Page | Visit the Apple System Status page in a Mac browser. Scroll through services to find iMessage...Full steps |
| Fix 4. Check Date & Time Settings | Open System Settings on your Mac, and go to General > Date & Time in System Settings....Full steps |
| More Fixes | Update Message, reset NVRAM, boot your Mac into Safe Mode, and check Software Update...Full steps |
Whether it's an erroneous Apple ID, a network issue, or software-related issues, various circumstances might prevent you from using iMessage. This post will lead you through eight practical remedies for the "can't sign into iMessage on Mac" issue, ensuring your messaging app is back up and running properly.
Fix 1. Check Your Apple ID
When you can't log into iMessage on your Mac or your iMessage is not working, checking your Apple ID may solve this error. Sign-in troubles may occur if your Apple ID is old or wrong. Follow these steps to sign in with the right Apple ID:
Step 1. Open the "Messages" application and head over to "Settings" by pressing the "Messages" option right next to the Apple symbol.
Step 2. In the Settings window, you will see "iMessages" on the top menu; select it and check your signed-in Apple ID account.
Are you tired of 'Update Apple ID settings' stuck on your Mac? Worry no more! Read the 6 easy solutions to fix this issue.

6 Ways to Fix ⚠️Update Apple ID Settings Stuck Mac
This article discusses simple ways to fix the "Update Apple ID settings stuck on a Mac" issue. Read more >>
Fix 2. Check the Internet Connection on Your Mac
iMessage needs a reliable internet connection. Signing in may be difficult due to your internet connection. To rule out network issues, try to connect to a trustworthy Wi-Fi network by clicking the top-right Wi-Fi icon.
Check your internet speed by visiting a website or using Speedtest to find sluggish or inconsistent connections. If the iMessage can't sign on Mac issue is caused by an unstable internet connection, try this:
Step 1. Restart your router and rejoin your Mac if Wi-Fi is unreliable.
Step 2. See whether a wired connection fixes the problem. Changing networks is another option.
Step 3. Sign in to iMessage again in the Mac Messages app when your internet stabilizes.
If you think this post is helpful, share it with your friends on SNS.
Fix 3. Check the Apple System Status Page
Your Mac may be unable to sign into iMessage because the Apple iMessage server is temporarily down. To rule this out, check the Apple System Status page for real-time updates on Apple services, including iMessage.
Step 1. Visit the Apple "System Status" page in your browser.
Step 2. Scroll through services to find "iMessage." If it has a green dot, iMessage is working.

A yellow or red dot indicates continuous difficulties or outages. If an outage is reported, wait until Apple fixes it - you cannot.
Fix 4. Check Date & Time Settings
Incorrect Mac date and time settings might cause iMessage login troubles. Since iMessage needs proper synchronization with Apple's servers, checking your Mac's date and time may fix it.
Step 1. Open "System Settings" on your Mac.
Step 2. Go to "General" and select "Date & Time" in System Settings.
Step 3. Check "Set date and time automatically." This syncs your Mac with Apple servers.
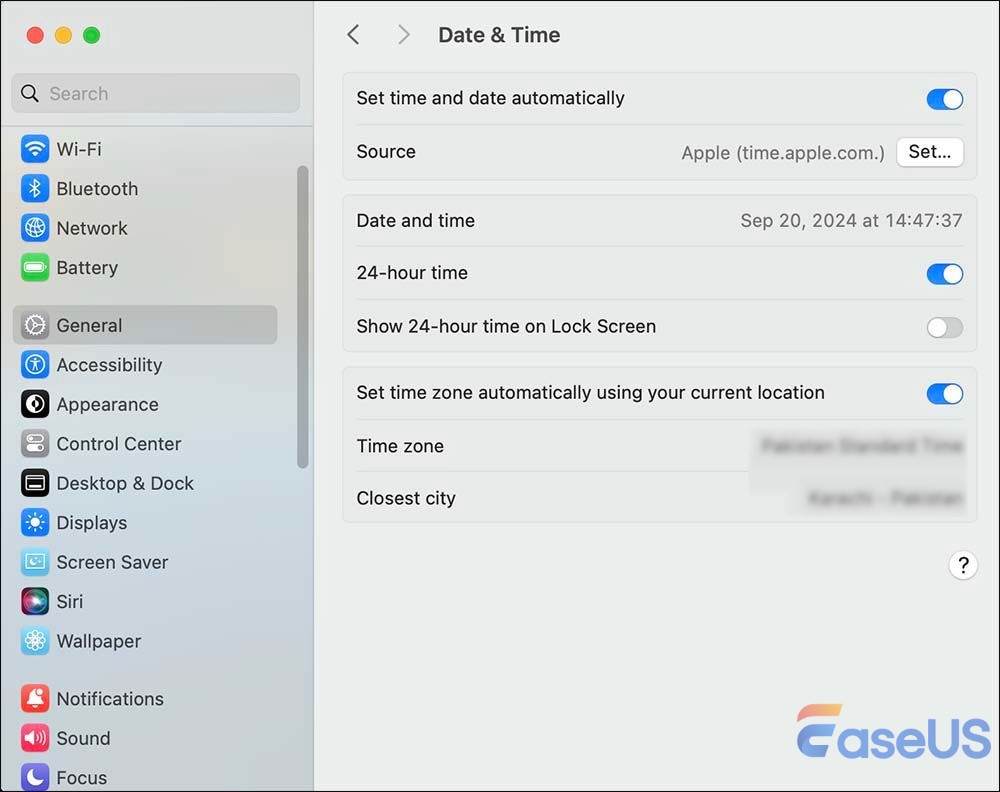
Step 3. Enable the "Set time zone automatically using the current location" to let the system confirm your time zone automatically.
Step 5. After confirmation, "Restart" your Mac and sign in to iMessage again.

Fix 5. Update the iMessage App
An outdated iMessage app may cause Mac iMessage sign-in troubles. The Messages app is updated automatically with system updates, so it's always better to keep your macOS updated to the latest version.
However, sometimes, iCloud does not properly sync iMessage, so you can update the messages app manually to sync with iCloud. Check out how to update iMessage.
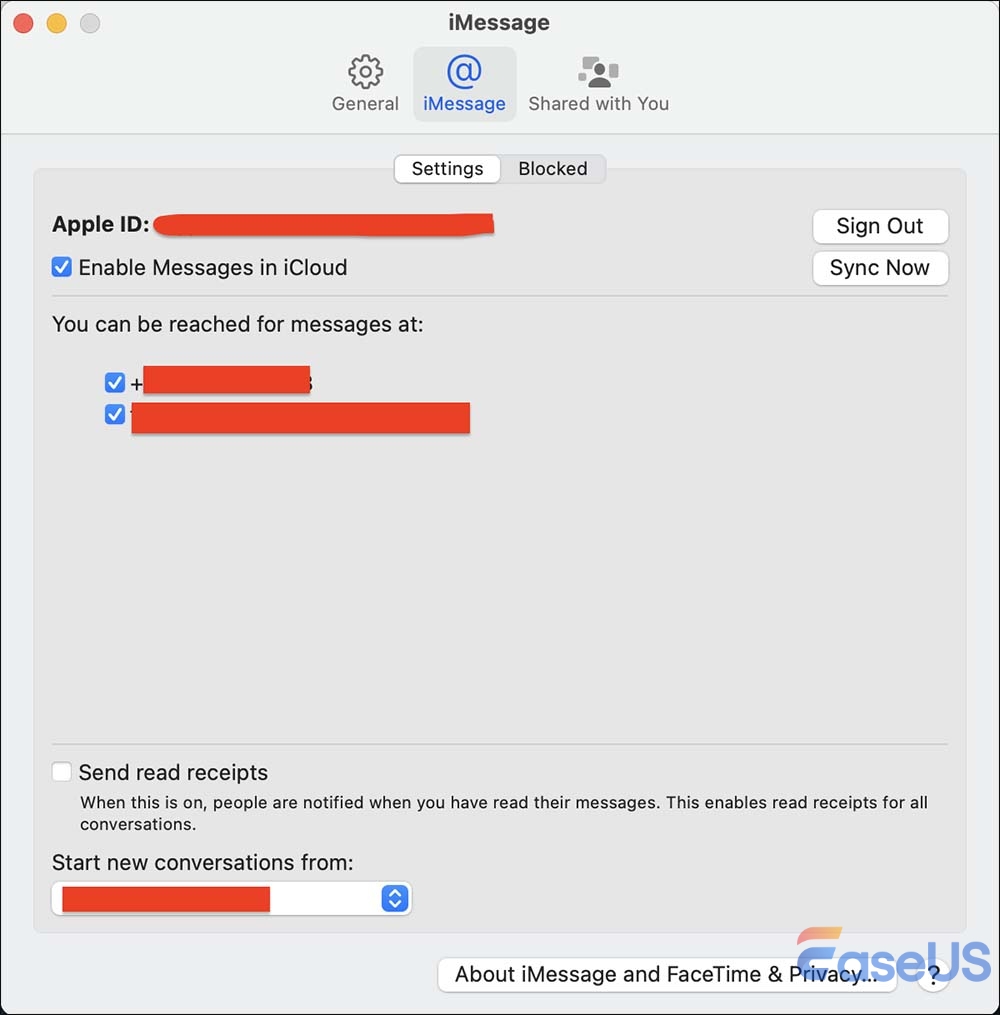
Step 1. Open the "Messages" app and select "Settings" from the messages menu.
Step 2. Now, head to "iMessage" and ensure the "Enable Message in iCloud" is checked.
Step 3. Press the "Sync Now" button to sync all your messages from the iCloud servers and view all new messages.

Fix 6. Reset NVRAM
Damaged NVRAM settings might cause Mac iMessage difficulties. Resetting NVRAM fixes the "can't sign into iMessage" issue. Display resolution, startup disc, and sound volume are stored in NVRAM. NVRAM reset instructions are below.
Step 1. Click "Apple Menu > Shut Down" to shut down your Mac.
Step 2. After starting your Mac, hold "Option + Command + P + R".

Step 3. Hold the keys for 20–30 seconds until your Mac restarts and makes the starting sound.
Step 4. Release keys after restarting. NVRAM will be reset, and sound volume and display resolution may return to default.
After restarting your Mac, sign into iMessage again. Resetting NVRAM fixes system incompatibilities that prevent iMessage from operating.
Fix 7. Boot Mac into Safe Mode
Booting your Mac into Safe Mode may assist in discovering third-party applications or extensions causing iMessage sign-in issues. Troubleshooting is simpler in Safe Mode because it only loads necessary system files. To boot your Mac into Safe Mode:
Step 1. Click "Apple > Shut Down" to shut down your Mac.
Step 2. Turn on your Mac and hold "Shift" immediately.
Step 3. Hold Shift until the login screen appears, then release it. The screen should display Safe Boot in the upper right corner.
Step 4. Log in to boot your Mac into Safe Mode.
- Notice:
- Once in Safe Mode, sign into “iMessage.” Third-party software may be to blame if it works. To leave Safe Mode, pick Restart from the Apple menu.
Fix 8. Check Software Update
Outdated macOS versions might cause iMessage difficulties. Maintaining your machine with software upgrades might assist in fixing sign-in issues. How to check macOS updates and update Mac:
Step 1. Select "System Settings" from the top-left Apple menu.
Step 2. Select "Software Update" under General in System Settings.
Step 3. Your Mac checks for updates. If available, install updates by clicking "Update Now".
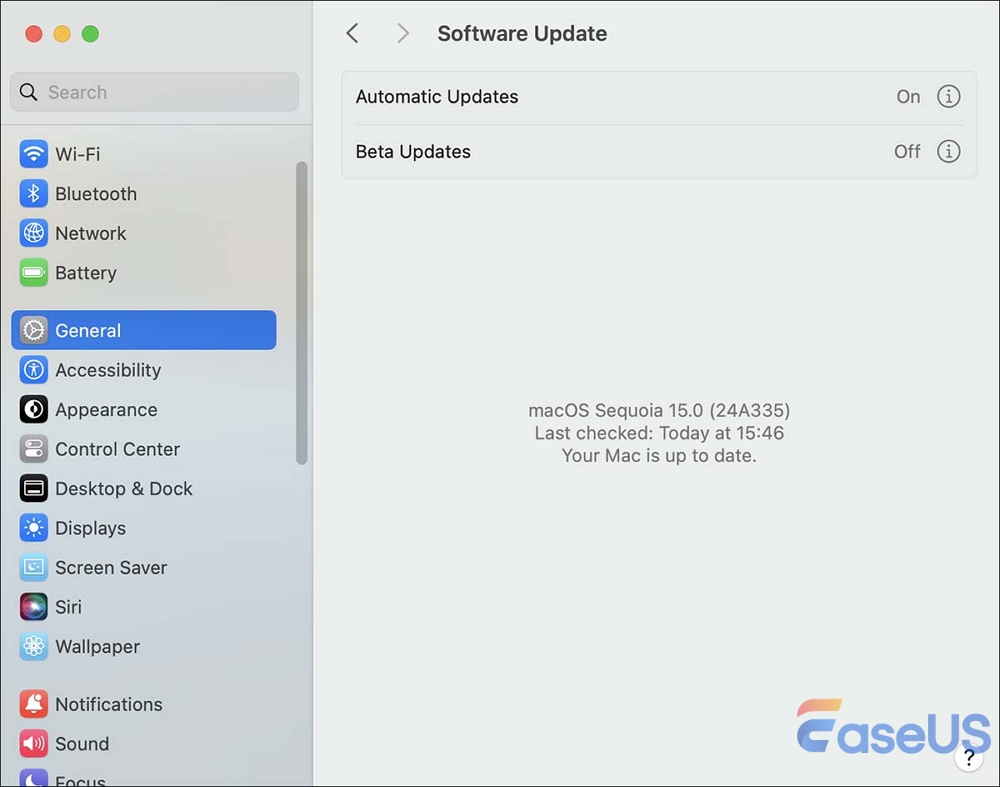
Step 4. Mac restarts after the Update. Sign in to iMessage again to check if it works.
For optimal performance and iMessage compatibility, update macOS regularly.
Bonus Tip: Recover Missing iMessage on Mac
Important messages might sometimes be mistakenly deleted or disappear owing to system difficulties. If you've lost important iMessages on your Mac, there's a strong option for recovering them: EaseUS Data Recovery Wizard for Mac.
EaseUS Data Recovery Wizard for Mac can recover deleted or lost information, including recovering deleted iMessages, from different storage media and recover lost data securely, efficiently, and easily. This software facilitates file recovery after accidental deletion, formatting, or macOS crashes.
To recover your misplaced iMessages, follow the step-by-step instructions below using EaseUS Data Recovery Wizard for Mac. You'll have your texts back in no time!
Step 1. Select the location and scan
Launch EaseUS Data Recovery Wizard for Mac and choose the disk where you lost data. Then, click "Search for lost files" to start scanning.

Step 2. Filter and preview lost files
After the scan, use the file format filter on the left or upper right corner to find the deleted files you need.

Step 3. Recover lost data or files
You can double-click a file to preview its content, or choose multiple files to recover them at once. Click "Recover" to restore the lost data to a local or cloud drive.

Conclusion
This article has provided various practical solutions for Mac iMessage sign-in issues. Try verifying your Apple ID, internet connection, app update, and NVRAM reset to restore complete iMessage functioning. EaseUS Data Recovery Wizard for Mac is a complete, dependable, easy-to-use solution for recovering misplaced iMessages. We suggest downloading and testing this program for Mac data loss. With its comprehensive capabilities and excellent speed, EaseUS can restore your data in a few easy steps.
Can't Sign into iMessage on Mac FAQs
Let's have a look at the most searched queries of users regarding can't sign into iMessage on Mac error:
1. Why won't my iMessage connect to my Mac?
Several factors might prevent iMessage from connecting to your Mac. Incorrect Apple ID settings, network difficulties, or a system-wide Apple server issue may cause it. This problem may usually be fixed by checking your Apple ID credentials, internet connection, and Apple System Status page. Setting NVRAM or upgrading macOS may help if the issue continues.
2. Why is my Apple ID not signing in to iMessage?
Your Apple ID may only sign in to iMessage if your credentials are correct, your account is locked, or your device isn't online. Double-check your credentials and internet connection. Two-factor authentication might affect Apple ID and iMessage logins, so check it.
Was This Page Helpful?
Brithny is a technology enthusiast, aiming to make readers' tech lives easy and enjoyable. She loves exploring new technologies and writing technical how-to tips. In her spare time, she loves sharing things about her game experience on Facebook or Twitter.
Related Articles
-
How to Fix Nikon 'This Memory Card Cannot Be Used' Error
![author icon]() Jean/2025-01-24
Jean/2025-01-24 -
Mac Internet Recovery Mode, How to Start Up [Full Guideline]
![author icon]() Jaden/2025-02-25
Jaden/2025-02-25 -
How to Fix Verifying Microsoft Word Mac Stuck
![author icon]() Dany/2025-01-24
Dany/2025-01-24 -
How to Install Windows 10 on New PC [Step-by-Step Guide]
![author icon]() Jean/2025-01-24
Jean/2025-01-24
EaseUS Data Recovery Services
EaseUS data recovery experts have uneaqualed expertise to repair disks/systems and salvage data from all devices like RAID, HDD, SSD, USB, etc.