Start Your Free Trial!
Sign up to our newsletter, stay updated on news and exclusive offers from EaseUS. Don't worry, if you change your mind, you can unsubscribe at any time, free of charge. We value your privacy (Privacy Policy).
If you encounter the error 'Screen Recording screen recording didn't save' and have no idea how to resolve it, read this tutorial for detailed answers.
Table of Contents
![]() About the Author
About the Author
![]() Reviews and Awards
Reviews and Awards
QuickTime Player is a reliable tool for screen recording and video editing on Mac, but it's not immune to issues. The screen recording capability may malfunction when you attempt to record your screen.
Errors such as "screen recording didn't save due to: failed due to asset writer failing to save" and "QuickTime Player encountered an error while recording your screen" are displayed when screen recording fails. If you're facing these problems, don't worry - this guide will help you locate unsaved recordings and resolve the issue to save or export your QuickTime files successfully.

Several factors can prevent QuickTime from saving your screen recording or edited video. Common causes include:
Thus, use the Command + S keys while creating a screen capture, or click File in the menu bar and select the "Save" option to save the screen capture to your Mac. Regardless of the cause, the solutions below will help you recover unsaved Quicktime recordings and fix the issue.
If your Mac fails to save your screen recording or export a trimmed video, try the following methods:
✅1. Try Image/Video Recovery Software
When you find the screen recording didn't save and you haven't backed up your Mac, Don't be panic; you can restore screen captures without a backup. Third-party data recovery tools can be used to accomplish this.
You can recover unsaved files from your Mac using EaseUS Data Recovery Wizard for Mac. I've been using EaseUS for a long time and highly recommend it.
Here are the steps:
Step 1. Scan for lost photos
Select the location where your valuable photos were lost and click the "Search for lost files" button.

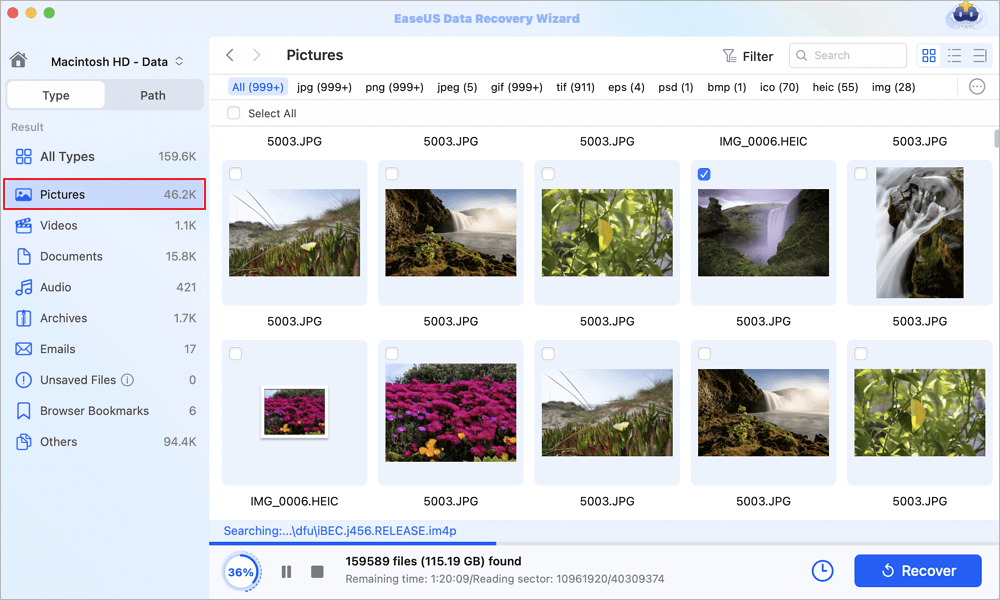
Step 2. Select wanted photos
EaseUS Data Recovery Wizard for Mac will immediately start a scan on your selected disk volume. Meanwhile, the scanning results will be presented in the left pane. By Path and Type, you can quickly filter the photos you've lost earlier.
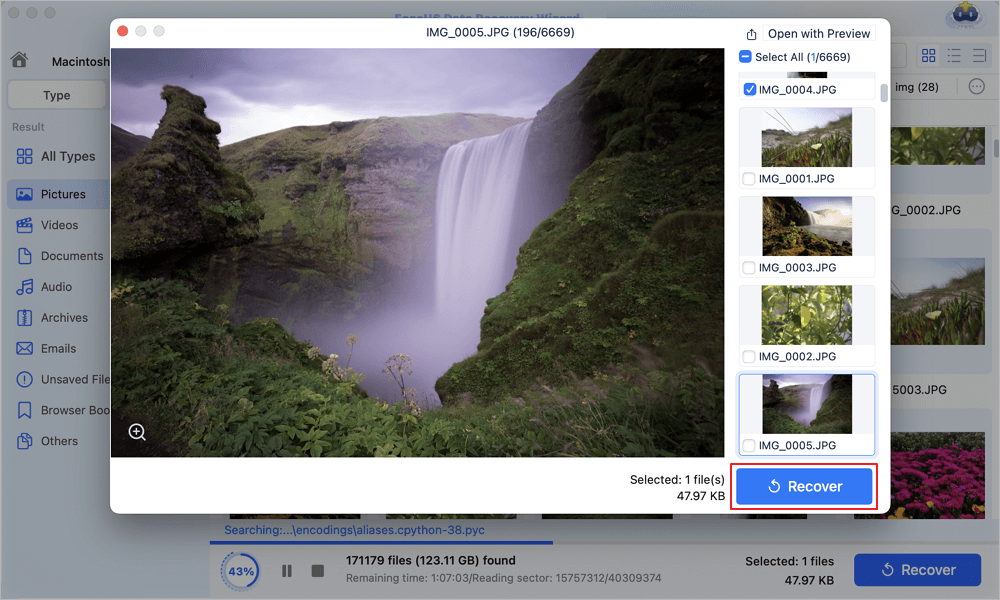
Step 3. Recover lost photos
Select the target photos and click the "Recover" button to get them back at once.
Many Mac users have proved the efficacy of the tool. If you want to resolve the Mac files recovery issue, share it on Facebook, Twitter, Instagram, and other social media platforms!
2. Locate the Recording in the AutoSave Folder
When you click the Stop button, QuickTime should automatically save your recording. If the preview doesn't appear due to errors like "Cannot Open," the recording might still be in the AutoSave folder. This folder stores recordings that couldn't be saved due to unexpected issues, such as a Mac recovery after shutdown or closed computer lid during recording.
Steps to Find the Unsaved Recording:
~/Library/Containers/com.apple.QuickTimePlayerX/Data/Library/Autosave Information/

~/Library/ScreenRecordings/
Time Machine is a backup feature in macOS that automatically saves copies of your files. It creates incremental backups, allowing you to restore files from specific points in time.
1. Automatic Backup
If Time Machine is set up and running, your screen recordings and other files will automatically be backed up. No additional steps are needed.
2. Manual Backup
Despite being a potent tool, QuickTime Player occasionally has trouble saving recorded or altered videos. Following the abovementioned procedures, you can fix common problems and recover unsaved recordings. If the issue continues, update macOS, reinstall QuickTime, or use another screen recording program.
If you still have some questions about screen recording file recovery, check the quick answers below to help yourself out:
1. Can I back up screen recordings to a network drive?
Yes, Time Machine supports network-attached storage (NAS) devices. Set up the NAS in Time Machine settings.
2. How often does Time Machine back up my files?
Time Machine backs up your files hourly, daily, and weekly, depending on the time elapsed since the last backup.
3. Can I recover screen recordings from a specific date?
Yes, Time Machine allows you to browse backups by date and restore files from a specific point in time.
Was This Page Helpful?
Jaden is one of the editors of EaseUS, who focuses on topics concerning PCs and Mac data recovery. Jaden is committed to enhancing professional IT knowledge and writing abilities. She is always keen on new and intelligent products.
EaseUS Data Recovery Wizard Pro has a reputation as one of the best data recovery software programs on the market. It comes with a selection of advanced features, including partition recovery, formatted drive restoration, and corrupted file repair.
Read MoreEaseUS Data Recovery Wizard is a powerful system recovery software, designed to enable you to recover files you’ve deleted accidentally, potentially lost to malware or an entire hard drive partition.
Read MoreEaseUS Data Recovery Wizard is the best we have seen. It's far from perfect, partly because today's advanced disk technology makes data-recovery more difficult than it was with the simpler technology of the past.
Read MoreEaseUS Data Recovery Wizard Pro has a reputation as one of the best data recovery software programs on the market. It comes with a selection of advanced features, including partition recovery, formatted drive restoration, and corrupted file repair.
Read MoreEaseUS Data Recovery Wizard is a powerful system recovery software, designed to enable you to recover files you’ve deleted accidentally, potentially lost to malware or an entire hard drive partition.
Read MoreRelated Articles
eMMC Data Recovery: How to Recover Data from eMMC
![]() Jaden/Mar 18, 2025
Jaden/Mar 18, 2025
How to Recover Deleted System Files Mac [New Updated]
![]() Jaden/Feb 25, 2025
Jaden/Feb 25, 2025
How to Recover Unsaved Word Document on Mac | 9 Ways
![]() Tracy King/Mar 25, 2025
Tracy King/Mar 25, 2025
5 Ways to Recover Files from USB Drive [2025 Update]
![]() Tracy King/Mar 26, 2025
Tracy King/Mar 26, 2025
Copyright © 2004 - 2025 EaseUS. All rights reserved.
CHOOSE YOUR REGION
Start Your Free Trial!
Sign up to our newsletter, stay updated on news and exclusive offers from EaseUS. Don't worry, if you change your mind, you can unsubscribe at any time, free of charge. We value your privacy (Privacy Policy).
Start Your Free Trial!
Sign up to our newsletter, stay updated on news and exclusive offers from EaseUS. Don't worry, if you change your mind, you can unsubscribe at any time, free of charge. We value your privacy (Privacy Policy).