Start Your Free Trial!
Sign up to our newsletter, stay updated on news and exclusive offers from EaseUS. Don't worry, if you change your mind, you can unsubscribe at any time, free of charge. We value your privacy (Privacy Policy).
Page Table of Contents
How to Clone a Mac Hard Drive Using TerminalHOT
Bonus Tip: Clone Mac Hard Drive Using EaseUS Partition Master for MacHOT
ConclusionHOT
About the Author
Hot Topics
Updated on Apr 28, 2025
Cloning a hard drive is the best way to immediately backup your Mac data. This helps you upgrade to a new drive or prepare for a sudden failure. Once you have a clone of the old hard drive and move it to the new one, you won't have to reinstall macOS or apps.
In this step-by-step guide from EaseUS, we'll learn to clone your Mac Hard Drive using Terminal with all the prerequisites to consider beforehand. For fast cloning, I have added the best solution further.
We'll use a macOS Command line called dd or disk duplication. This command can clone your Mac hard Drive to a target drive. You can further keep this backup or use it when needed.
But the catch is that it does take longer to proceed. You'll have to tweak many options to clone the HDD successfully. Additionally, you must enter every value carefully; a small mistake can cause a defect in the operation and your data. In simple words, it is not a beginner-friendly option.
But, if you want a risk-free and fast way to do so, EaseUS Partition Master for Mac is the solution that I have discussed below. If you want to check it out, jump to the next section or continue using this traditional method:
🚩Points to remember:
If you miss any one of these things, the hard drive cloning may fail or won't work:
We'll use rdisk or raw disk command instead of disk command to clone faster.
Let's start the cloning procedures:
Step 1. Connect a source or an External Hard Drive to your macOS, and a prompt will appear on the screen. Select Ignore to proceed to the next step.
Step 2. Open the Terminal app to send instructions for cloning the drive. A new interface will open where we'll write command lines and scripts.
Step 3. Enter a command line diskutil list and press enter. It'll open a list of disks attached to your Mac (both internal and external)

Step 4. You'll see details about each drive and its storage on the screen. Here, you need to identify the name or location of the source disk (that you'll copy to a target disk) and the target disk. For instance, you may copy a source disk /dev/disk1 to the target disk /dev/disk2.
Step 5. To unmount the target disk, enter the command diskutil unmountdisk /dev/rdisk2. You can replace the last “disk2” text with your specific disk name.

Step 6. Once you unmount the disk, it's time to copy the source or Mac Hard Drive to the desired Drive. For this enter a command: sudo dd if=/dev/rdisk1 of=/dev/rdisk2 bs=1m. The rdisk1 is the source, and the rdisk2 is the destination drive.
Step 7. For standard disk cloning (e.g., external hard drives, SSDs, or partitions), using bs=1m is appropriate. If the disk you're cloning contains a lot of tiny files, in this case, use small block sizes (e.g., bs=512 or bs=4k) that will handle the data better.
This command will begin the cloning. However, there's no prompt to get feedback about the progress. However, press Ctrl + T in the terminal for a periodic update.
Once the cloning process finishes, the command will exit, and you'll be on the shell prompt. There's no completion prompt to ensure the cloning is done; you have to check it manually. Hence, for fast and easy progress, refer to the next part.
EaseUS Partition Master for Mac is a complete solution for cloning a Mac Hard Drive to a desired location. This program is simple, unlike the dd command, which requires understanding command lines. Whether you are a seasoned developer or a newbie user, cloning will go effortlessly.
Regardless of your macOS or drive specification, its compatibility is insane. Here is a quick overview:
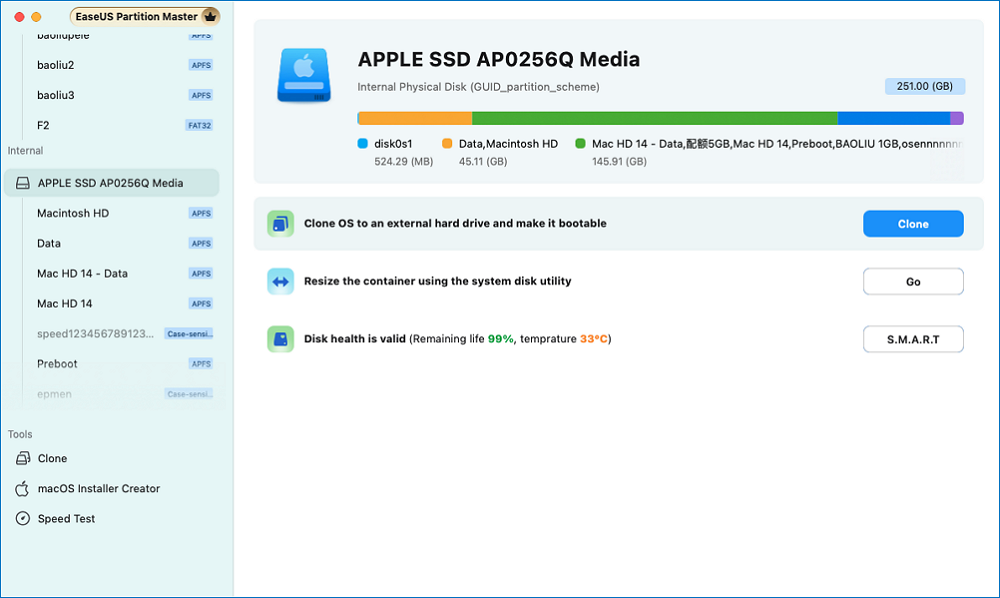
Step 1. Install and connect another new disk to Mac computer, run EaseUS Partition Master for Mac, then, click "Clone" under the Abilities section. Click the "+" icon to browse and locate the macOS disk and target new disk.

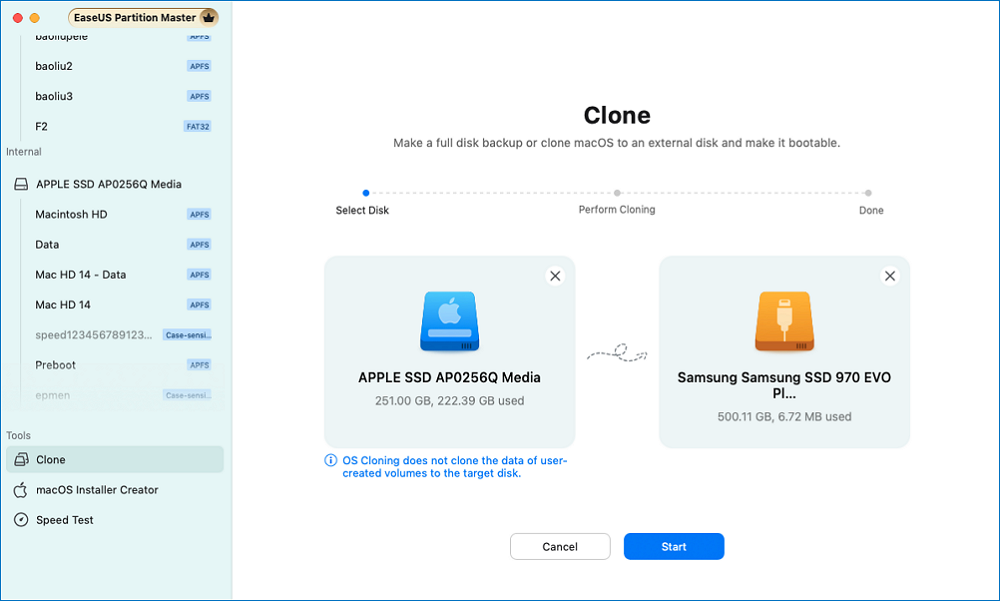
Step 2. Select the Source and the Destination disk and click "Select" to confirm.

Step 3. Confirm if you've selected the correct macOS OS disk and the new target disk you'd like to clone and upgrade the macOS disk to. Then, click "Start" and click "Yes" to confirm if EaseUS Partition Master for Mac requests you to confirm the operation.

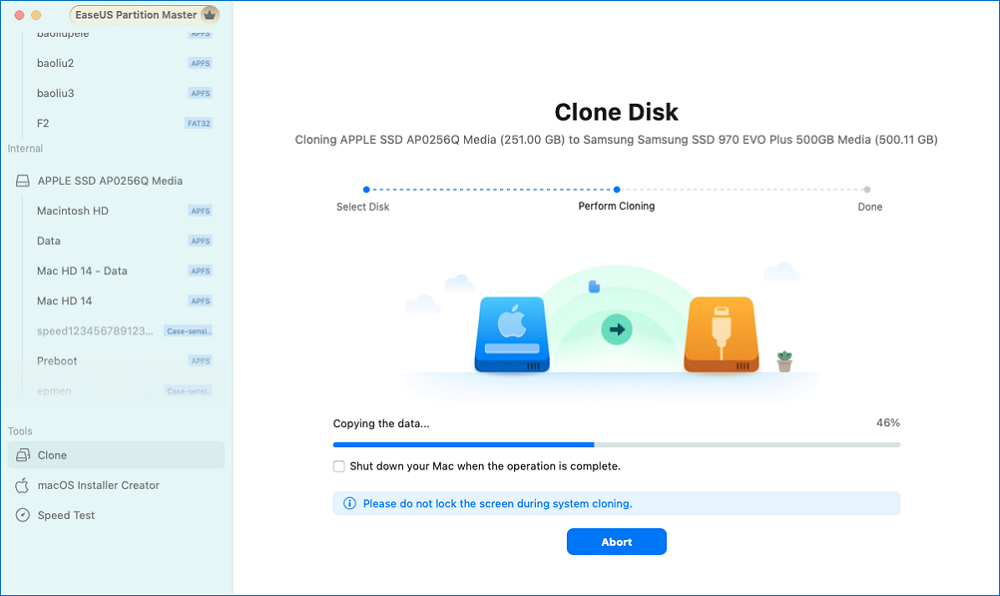
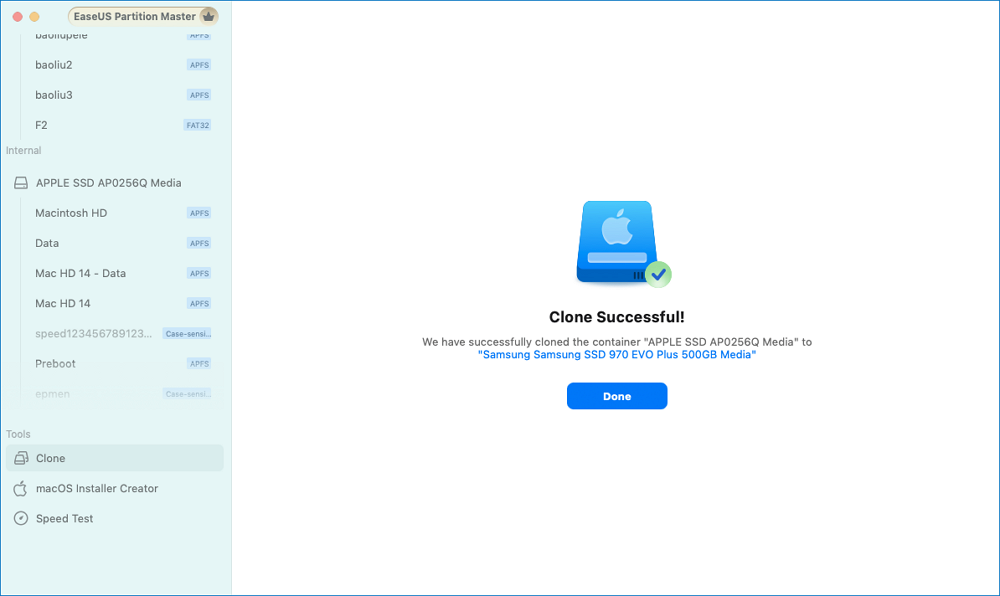
Step 4. Wait patiently and let EaseUS Partition Master for Mac to complete cloning the old macOS disk to the new target disk.

To clone macOS to a new SSD or upgrade a Mac hard drive, EaseUS Partition Master for Mac is a reliable tool.
These steps will help you clone a Mac Hard Drive using the Terminal app with the precautions. In summary, once you open the terminal, notice the details of your external and internal hard disks. Unmount the external or target disk and enter the DD command to finish the cloning.
Since the command line is tricky, entering the wrong value or location can disrupt the process. Additionally, the Terminal usually takes longer to proceed. Hence, a dedicated program such as the EaseUS partition with high compatibility and a user-friendly interface can turn the table around.
How to clone a hard drive on Mac using terminal command lines? Check the following FAQs to learn more details about this topic.
1. How to copy files to an external hard drive in a Mac using Terminal?
To clone files to a target drive, use the following steps:
Step 1. Open the Terminal app and run a command: diskutil list. It will show details of connected disks and their locations.
Step 2. Identify the external hard drive's mount point, such as /Volume/ExternalDriveName.
Step 3. Enter a command to copy a single file: cp /path/to/singleFile.txt /Volume/ExternalDriveName/singleFile.txt. Replace the line /path/to with the file path and singleFile.txt with the file name and extension.
Step 4. To copy a complete folder, enter cp -R /path/to/FolderName/ /Volumes/ExternalDriveName/FolderName/ on the command line. Replace FolderName with your Folder name using the appropriate path.
2. What is the best way to clone a disk between two Macs?
There are many ways to clone a disk between two Macs, including Disk Utility and Terminal, but the best way is to use EaseUS partition software for Macs.
3. Can you make a complete copy of your Macbook Pro hard disk and send it to an external drive using a terminal?
Yes, copying the Macbook Pro hard disk to an external drive using the terminal is possible. You only need to use the DD command, unmount the target disk, and copy the source disk to it.
How Can We Help You
Sherly joined EaseUS in 2022 and she has always loved writing articles and enjoys the fun they bring. She receives professional training here, focusing on product performance and other relative knowledge. She has written over 200 articles to help people overcome computing issues.
It won't hot image your drives or align them, but since it's coupled with a partition manager, it allows you do perform many tasks at once, instead of just cloning drives. You can move partitions around, resize them, defragment, and more, along with the other tools you'd expect from a cloning tool.
Read MoreI love that the changes you make with EaseUS Partition Master Free aren't immediately applied to the disks. It makes it way easier to play out what will happen after you've made all the changes. I also think the overall look and feel of EaseUS Partition Master Free makes whatever you're doing with your computer's partitions easy.
Read MorePartition Master Free can Resize, Move, Merge, Migrate, and Copy disks or partitions; convert to local, change label, defragment, check and explore partition; and much more. A premium upgrade adds free tech support and the ability to resize dynamic volumes.
Read MoreIt won't hot image your drives or align them, but since it's coupled with a partition manager, it allows you do perform many tasks at once, instead of just cloning drives. You can move partitions around, resize them, defragment, and more, along with the other tools you'd expect from a cloning tool.
Read MoreI love that the changes you make with EaseUS Partition Master Free aren't immediately applied to the disks. It makes it way easier to play out what will happen after you've made all the changes. I also think the overall look and feel of EaseUS Partition Master Free makes whatever you're doing with your computer's partitions easy.
Read MoreRelated Articles
How to Repair Bad Sectors on SD Card [Step-by-Step Guide]
![]() Sherly/2025/04/28
Sherly/2025/04/28
Format 128GB USB to FAT32 with USB Formatter and PowerShell
![]() Daisy/2025/04/28
Daisy/2025/04/28
How to Wipe Hard Drive From BIOS - 4 Safe Ways 💡
![]() Sherly/2025/04/28
Sherly/2025/04/28
How to Repair Bitlocker Encrypted Drive in Windows 11/10
![]() Cici/2025/04/28
Cici/2025/04/28
EaseUS Partition Master

Manage partitions and optimize disks efficiently
Your best companion for disk partitioning, MBR to GPT/GPT to MBR conversion,even OS migration
CHOOSE YOUR REGION
Start Your Free Trial!
Sign up to our newsletter, stay updated on news and exclusive offers from EaseUS. Don't worry, if you change your mind, you can unsubscribe at any time, free of charge. We value your privacy (Privacy Policy).
Start Your Free Trial!
Sign up to our newsletter, stay updated on news and exclusive offers from EaseUS. Don't worry, if you change your mind, you can unsubscribe at any time, free of charge. We value your privacy (Privacy Policy).