
Content
Page Table of Contents
About the Author
Hot Topics
- Stage 1. Connect the New SSD to the Mac
![clone macos to new ssd]()
- Stage 2. Install the Cloning Software
- Stage 3. Clone macOS to New SSD
- Stage 4. Replace the Old Disk
Are you running out of disk space on your Mac? Or do you want to upgrade the macOS disk to a larger SSD? To achieve this without data loss, the best way is to clone the macOS disk to a new SSD.
Fortunately, cloning your MacOS to a new SSD is relatively easy. In this guide, EaseUS will show you the right tool and the required steps to transfer everything from your old drive to the new one. It'll also make your Mac run faster than ever before.
How to Clone macOS to New SSD? - 4 Stages
Now, while following the steps that I mentioned below, there are certain things you'll need:
First, a new SSD is a solid-state drive where you'll store the Data from your Mac's drive. We'll connect the SSD to the Mac; hence, prepare an Adapter or Enclosure if your Mac doesn't have the USB Port or the one that your SSD needs. Further, we'll use a tool or built-in software for risk-free cloning, EaseUS Partition Master for Mac.
Lastly, for formatting, we'll erase the SSD Data. Hence, drive and back up everything before taking the first step.
Stage 1. Connect the New SSD to the Mac
You have taken the time to consider it, and now it's time to link the SSD with your device.
Step 1: Take the new SSD and cable to do this. Connect the SSD with a cable, and plug its other end into your Mac's USB port. You'll get a free port on the side of your MacBook. Use an adapter or USB hub if you can't connect the SSD because the USB port is absent.
Step 2: A USB or similar icon on the Mac screen. This will show if everything you have done is perfect and the SSD is formatted. If this is not the case, the next step will reveal what to do.
Step 3: If you didn't find the drive icon or the Mac didn't detect the SSD, open the Disk Utility App by heading to the menu or using Finder. Select the new drive (SSD) from the App's left menu.
Step 4: Select the Erase button from the top menu, choose a compatible format (ExFAT) from the list, and click the Erase option.

Stage 2. Install the Cloning Software
A lot of software is used when cloning macOS, but the one I found works the best is EaseUS Partition Master for Mac. Why? It's compatible with macOS 10.15 (Catalina), macOS 11 (Big Sur), macOS 12 (Monterey), macOS 13 (Ventura), macOS 14 (Sonoma), and macOS 15 (Sequoia), so your Mac will easily read it.
Additionally, it supports HFS, HFS+, APFS, FAT, exFAT, and NTFS file systems and Supported Architectures: Intel-based Macs, M1 Macs, M2 Macs, and M3 Macs that your MacBook is compatible with.
So here are the steps to install the software on Mac:
Step 1: Open a browser, for instance, Safari, and search EaseUS Partition Master. Or visit https://www.easeus.com/.
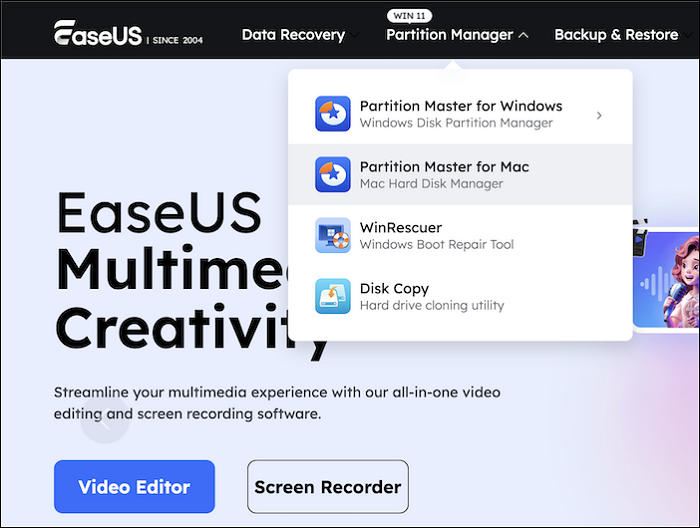
Step 2: Navigate to the header and hover over Partition Manager. A drop-down menu will open. Select Partition Master for Mac and wait until it downloads.
Step 3: Open the Finder and head to the download directory after downloading. You'll find a file that has just been downloaded that ends with .dmg, a file extension for MacOS to install a program.
Step 4: Once you get the file, double-click on it, and a prompt will show on the dashboard. As the prompt shows, drag the EaseUs software icon to the right side.
Step 5: A new icon will appear on the home screen after installation. It would be best to click on it and select Eject.
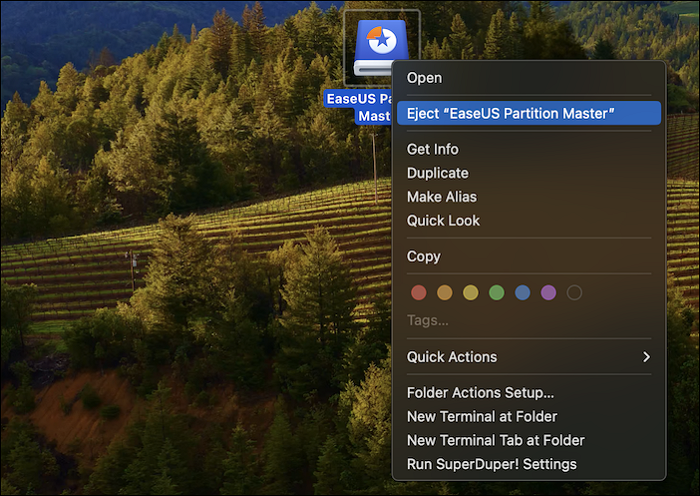
After doing so, go to the App section and open the EaseUs software.
Stage 3. Clone macOS to New SSD
If you want to keep and copy existing data to a new drive, close the macOS to a new SSD. Once you do that, you can always boot from that. Here is how to clone macOS to the new SSD using EaseUS Partition Master for Mac.
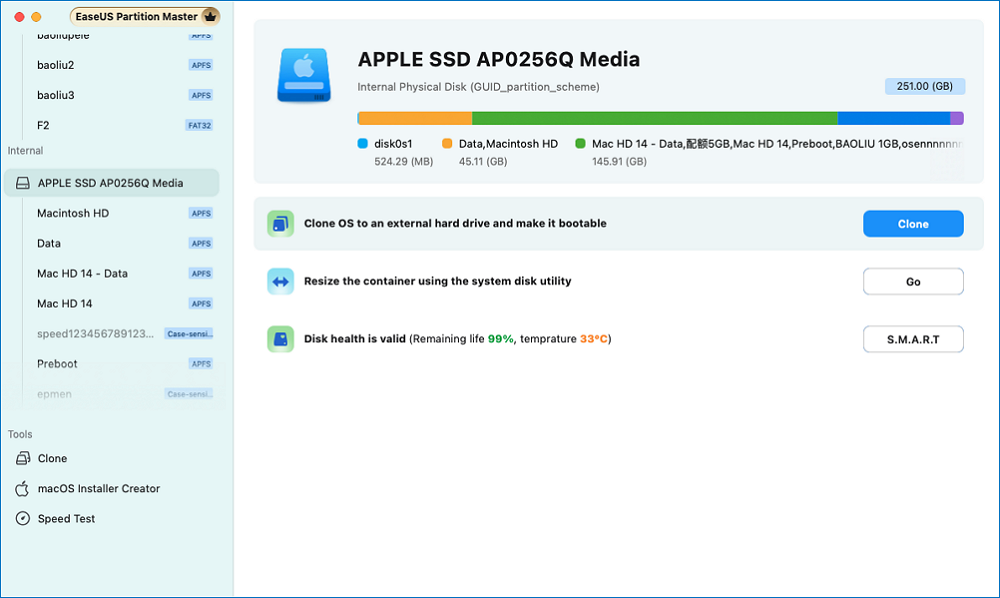
Step 1. Install and connect another new disk to Mac computer, run EaseUS Partition Master for Mac, then, click "Clone" under the Abilities section. Click the "+" icon to browse and locate the macOS disk and target new disk.
Step 2. Select the Source and the Destination disk and click "Select" to confirm.
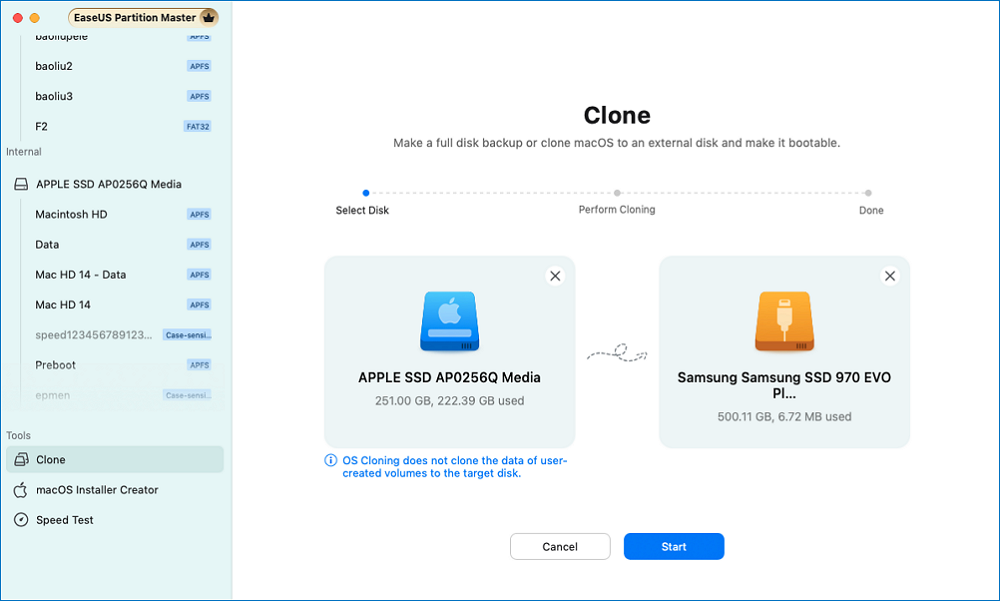
Step 3. Confirm if you've selected the correct macOS OS disk and the new target disk you'd like to clone and upgrade the macOS disk to. Then, click "Start" and click "Yes" to confirm if EaseUS Partition Master for Mac requests you to confirm the operation.
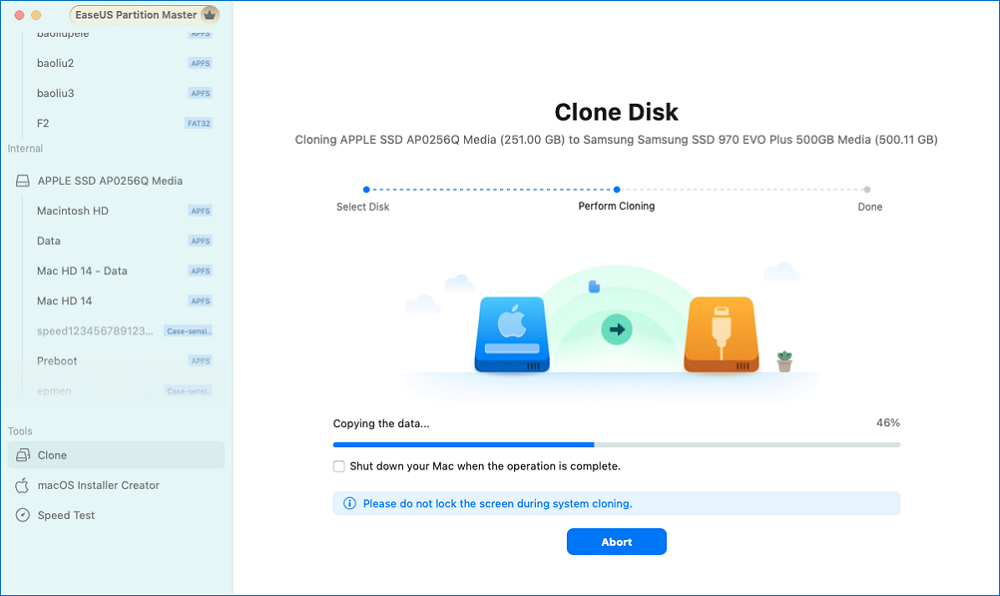
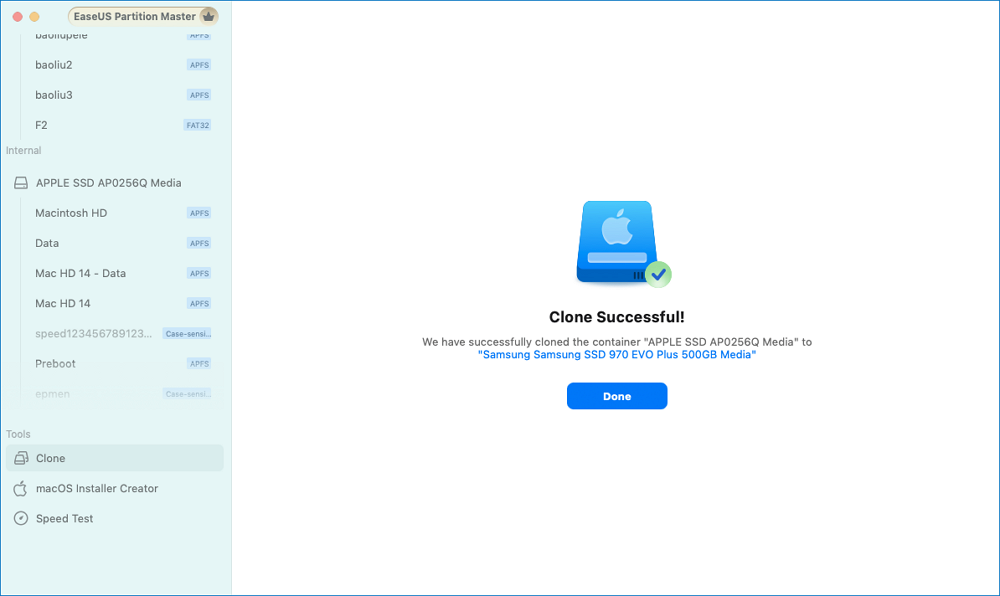
Step 4. Wait patiently and let EaseUS Partition Master for Mac to complete cloning the old macOS disk to the new target disk.
EaseUS Partition Master for Mac can clone a Mac hard drive to an external hard drive. If you are looking for a Mac disk cloning tool, download it to help.
Stage 4. Replace the Old Disk
After you clone the MacOS to the SSD, you can remove the traditional Hard disk with this SSD. You'll get all the files and data in the Macbook.
Here are the steps to replace the disk:
Step 1: Turn the Macbook upside down and take a screwdriver suitable to remove the screws from the base. Take the base out of the Macbook.
Step 2: You can see the hard drive. Unplug the battery connector using a physical tool, such as a screwdriver.
Step 3: Loosen the four screws on the hard drive and lift the plastic tab slowly and carefully. It's still connected to a drive cable, so remove it. After that, you can remove the hard drive altogether.
Step 4: Take the SSD. Connect it to the driver cable that we have unplugged before. Add the four screws, and don't forget to reconnect the battery connector. Join the base of your MacBook.
Step 5: Now, turn on the Mac in the internet recovery mode. For this, press the power button and then the Command + Option + R buttons. Once a globe appears on the screen, release the keys and further install the MacOS.
Here is the video tutorial from YouTube:
Conclusion
Eventually, I broke down the steps to clone your MacOS to the new SSD in those stages. To clone the hard drive flawlessly without losing any critical data, EaseUS Partition Master is the go-to software to install, as it supports most file systems and clones the drive faster than the other tools. In summary, back up the SSD if it has some files, connect it to your Macbook, and format the drive to be compatible with your device.
Further, install the EaseUs partition master and effortlessly clone everything from your Mac to the drive. Unplug the SSD, take the screwdriver, open the back of your Mac, replace the old hard drive with the new SSD, turn on the Mac in recovery mode, and install MacOS using the WiFi network. That's it.
So, after going through each step, you have finally cloned the MacOS to the new driver and improved the overall performance of your MacBook. If you like this guide, don't forget to share it with your friends to prevent them from running into the same trouble.
FAQs About Clone macOS Drive to New SSD
We have elaborated on how to clone macOS to a new SSD and replace the old disk with the new SSD. Check the answers below if you have any further questions.
1. What is the best way to clone macOS to a new SSD?
The best and fastest way to clone MacOS to a new SSD is to use EaseUS Partition Master software. It supports almost all MacOS versions and proceeds without error.
2. How do you install macOS on a new SSD?
Regardless of the MacOS version you have, the process is the same. Here are the points to install MacOS on the SSD:
Step 1: After adding the SSD to your Mac, open it in recovery mode by pressing the power button, followed by Command + Option and R. Then, join your WiFi network.
Step 2: Select Reinstall MacOS and then a Continue option on a prompt.
Step 3: Follow on-screen prompts, select the SSD, and then an install option.
Step 4: Wait until it downloads and installs the MacOS. If you have a backup on an external drive, connect it to the Mac and load the Data needed.
3. How do you clone a Mac hard drive to an SSD using Disk Utility?
The steps I'll show are simple; you need to connect the New SSD to your Mac and do the following:
Step 1: If you get an error message stating that the SSD is not readable, go to the Disk Utility App and select the new SSD. Select the correct format for your old hard drive and click the Erase option. This will format the SSD.
Step 2: Restart the Mac in recovery mode and select the Disk Utility option. Select the new SSD from the menu and click the Restore option.
Step 3: Choose the drive to Copy and select the Restore option. Please wait until it copies the information, and that's it.
How Can We Help You
About the Author
Oliver is an EaseUS professional writer who dares explore new areas. With a passion for solving tech issues with straightforward guides for common users, Oliver keeps honing his writing craft by developing in-depth solutions for disk and partition management, computer boot-up issues, file transfer, etc.
Sherly joined EaseUS in 2022 and she has always loved writing articles and enjoys the fun they bring. She receives professional training here, focusing on product performance and other relative knowledge. She has written over 200 articles to help people overcome computing issues.
Product Reviews
-
I love that the changes you make with EaseUS Partition Master Free aren't immediately applied to the disks. It makes it way easier to play out what will happen after you've made all the changes. I also think the overall look and feel of EaseUS Partition Master Free makes whatever you're doing with your computer's partitions easy.
Read More -
Partition Master Free can Resize, Move, Merge, Migrate, and Copy disks or partitions; convert to local, change label, defragment, check and explore partition; and much more. A premium upgrade adds free tech support and the ability to resize dynamic volumes.
Read More -
It won't hot image your drives or align them, but since it's coupled with a partition manager, it allows you do perform many tasks at once, instead of just cloning drives. You can move partitions around, resize them, defragment, and more, along with the other tools you'd expect from a cloning tool.
Read More
Related Articles
-
How to Fix Unexpected Store Exception in Windows 10/11
![author icon]() Roxanne/2025/01/23
Roxanne/2025/01/23 -
How to Speed Up Hard Drive in Windows 11/10/8/7 [100% Working Solutions]
![author icon]() Sherly/2025/03/13
Sherly/2025/03/13 -
How to Clone Mac Hard Drive | 2025 Full Guide
![author icon]() Roxanne/2025/02/25
Roxanne/2025/02/25 -
How to Disable Login Screen in Windows 10 (Without Password)
![author icon]() Roxanne/2025/01/23
Roxanne/2025/01/23
Hot Topics in 2024


EaseUS Partition Master

Manage partitions and optimize disks efficiently