
Content
Page Table of Contents
About the Author
Hot Topics

Cloning a Mac hard drive involves making an exact replica from your internal Mac storage onto another storage device, in this case, an external SSD. This replication contains everything, including the operating system, programs, stored files, and settings, mirroring the structure of your entire Mac system.
There are several reasons why you would want to clone your Mac hard drive to an external SSD, such as having a full-featured data backup to cope with system crashes and performing system migration to a new device. Now, continue reading this article from EaseUS to learn the detailed steps.
- Notice:
- Please ensure that your external SSD has enough space before you start the cloning process. It should have at least the same storage as your Mac's Hard drive, if not larger, to ensure a successful cloning.
#1. Clone Mac Hard Drive to External SSD via Automatic Tool
Now that you've understood the significance and advantages of cloning your Mac hard drive to an external SSD. Let's check out how to do it efficiently. Although there are various manual methods available, using an automatic software tool can drastically make this process simple and lower the chances of mistakes.
One such user-friendly and effective tool is the EaseUS Partition Master for Mac. This powerful software streamlines the cloning process, making it accessible even for those with limited technical expertise. Not only does it offer a clear interface, but it also skips the manual operation of erasing the SSD before cloning, saving you time and potential headaches.
Let's see the steps to Clone a Mac Hard Drive to an External SSD via EaseUS Partition Master for Mac:
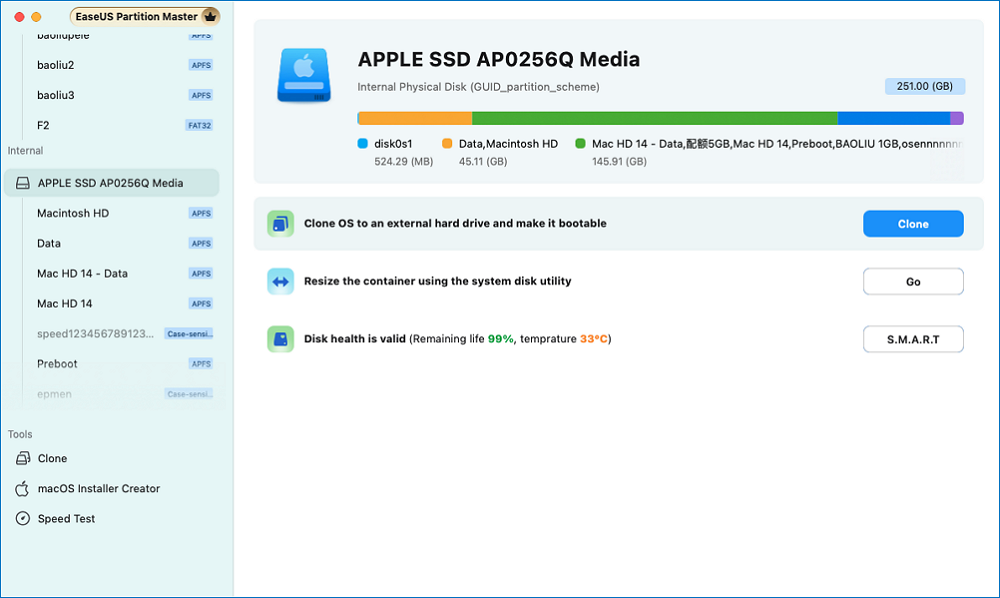
Step 1. Install and connect another new disk to Mac computer, run EaseUS Partition Master for Mac, then, click "Clone" under the Abilities section. Click the "+" icon to browse and locate the macOS disk and target new disk.
Step 2. Select the Source and the Destination disk and click "Select" to confirm.
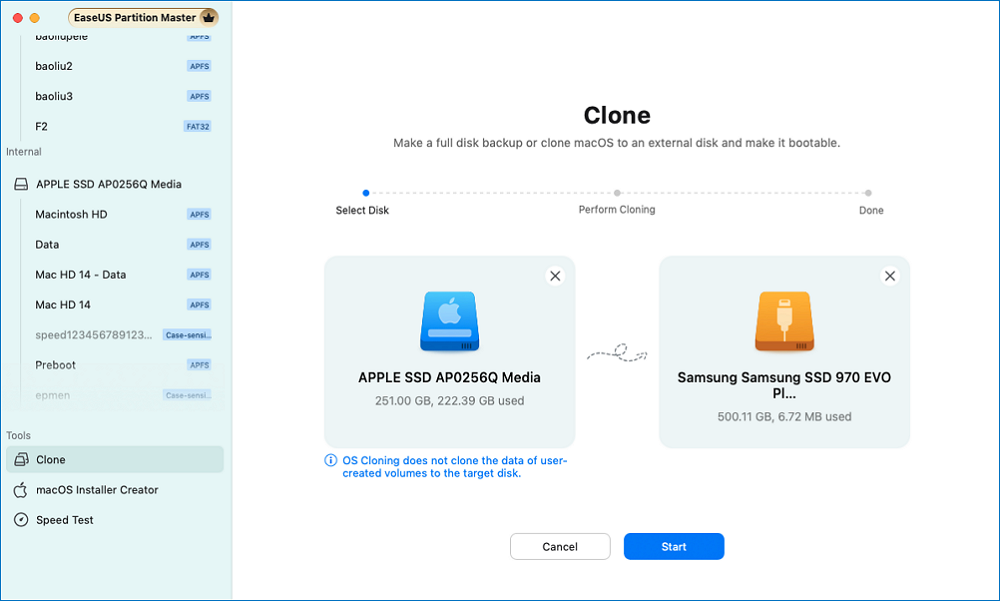
Step 3. Confirm if you've selected the correct macOS OS disk and the new target disk you'd like to clone and upgrade the macOS disk to. Then, click "Start" and click "Yes" to confirm if EaseUS Partition Master for Mac requests you to confirm the operation.
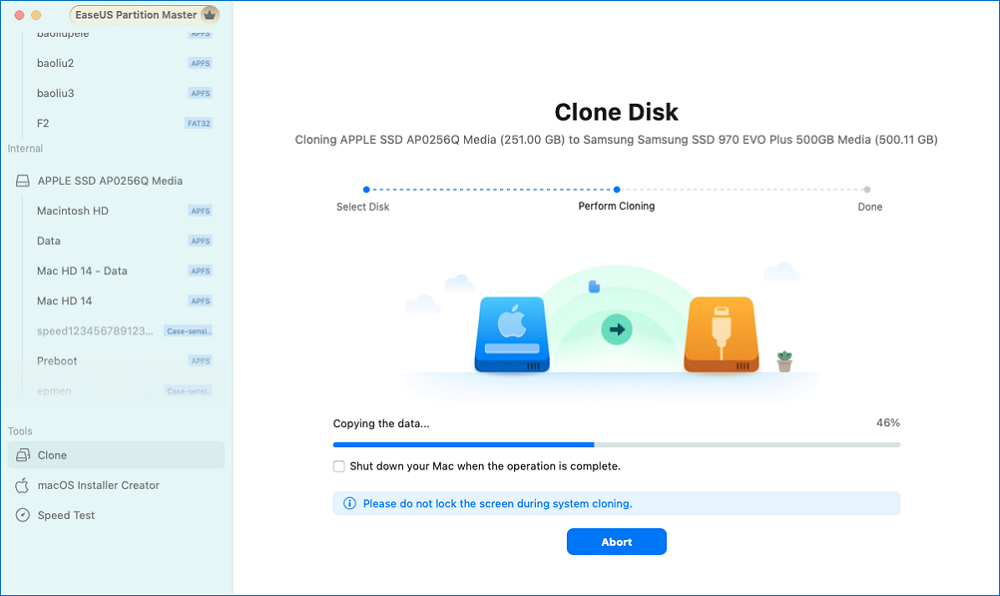
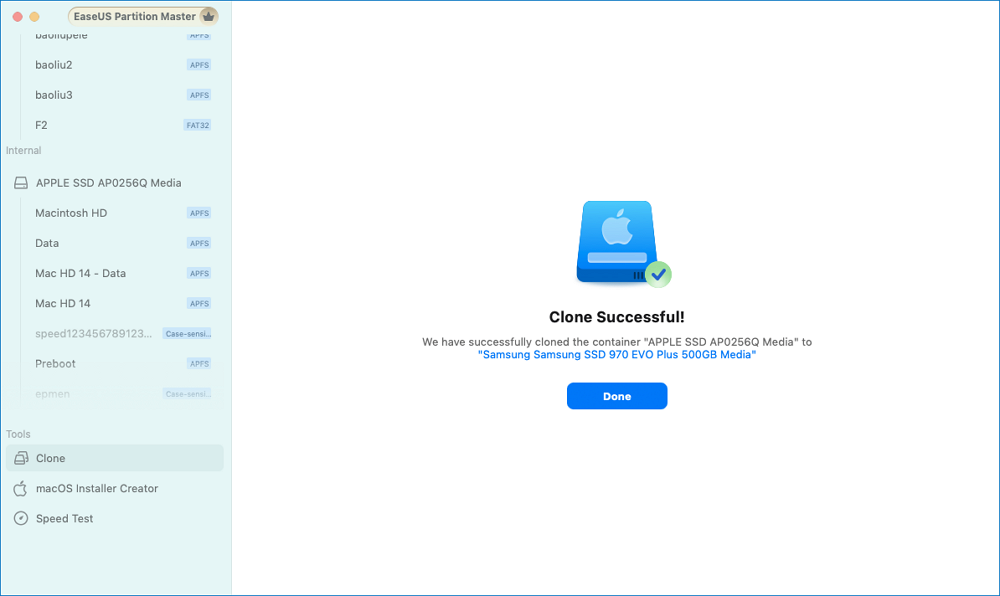
Step 4. Wait patiently and let EaseUS Partition Master for Mac to complete cloning the old macOS disk to the new target disk.
Besides cloning a disk, this tool also has the abilities to:
- Clone SD card on Mac
- Read and write NTFS drives
- Convert FAT drives to exFAT format
- Create a bootable installer for macOS
- Decrypt Bitlocker-encrypted drives
#2. Clone Mac Hard Drive to External SSD via Disk Utility
Even though automatic tools are more convenient, but if you want a solution that doesn't involve installing anything, then macOS has its built-in automatic tool. Disk Utility, a versatile software that every Mac comes with, is capable of cloning your hard drive to an external SSD.
Follow these steps to Clone the Mac Hard Drive to External SSD via Disk Utility:
Stage 1. Format the External SSD
The first step in the process is to Format the External SSD. Here are the steps:
Step 1. Connect your External SSD to your Mac.
Step 2. Now go to Disk Utility ("Applications" > "Utilities" > "Disk Utility").
Step 3. On the left-hand side, Select your External SSD from the list of drives.
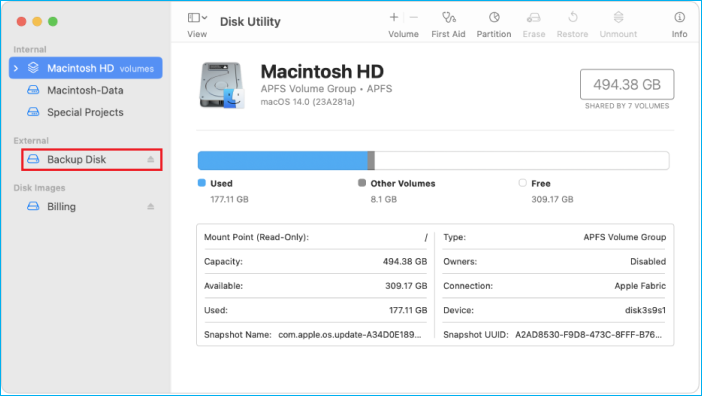
Step 4. Then, choose "Erase" at the top part of the Disk Utility window.
Step 5. Give your drive a name and select Mac OS Extended (Journaled) as its format.

Step 6. Finally, click on "Erase" to format the external SSD. Then, click "Done" once the process is complete.
Stage 2. Clone the Mac hard drive
The second and final step in the process is to Clone the Mac Hard Drive. Here are the steps:
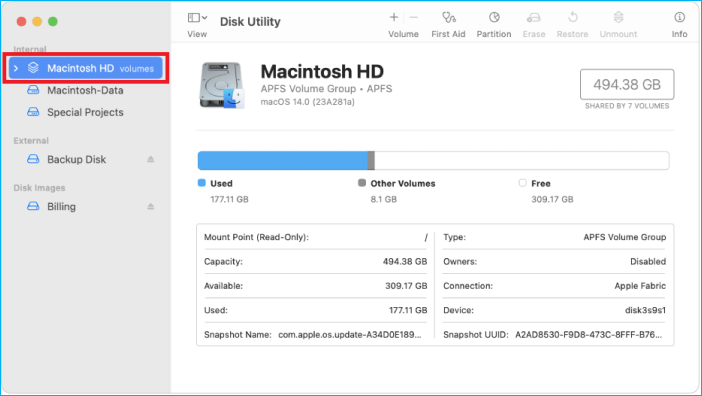
Step 1. On the Disk Utility, choose your Mac's internal drive from the list.
Step 2. Click on the "Restore" button at the upper section of the screen.
Step 3. In the "Restore from" section, ensure your Mac's internal drive is selected.
Step 4. In the "Restore to" section, choose your external SSD.
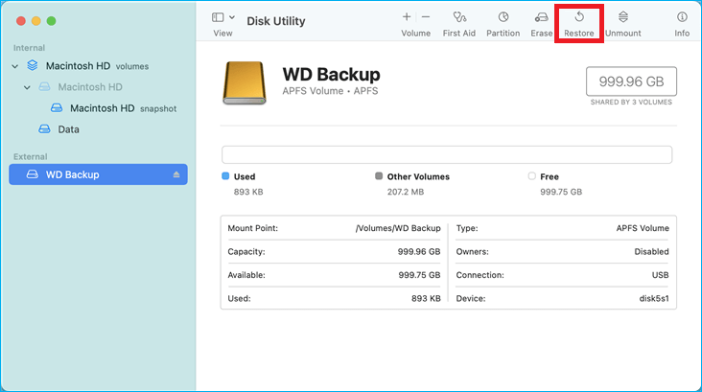
Step 5. Lastly, click on "Restore" to start the cloning process.
Step 6. As the cloning begins, Disk Utility will present a status bar that slowly fills up as the cloning progresses. Once completed, Click on "Done."
You can check this article for a tutorial if you plan to upgrade the SSD for your Mac device.
How to Upgrade SSD for Mac | Tutorial
This article will show you how to upgrade SSD for Mac with a comprehensive guide. It provides detailed instructions and offer tips for improving your Mac's performance and storage.

Additional Tip 1: How to Boot Your Mac from External SSD
Once you have successfully copied your Mac hard drive to an external SSD, start up your Mac from the newly made clone. This is useful for verifying the integrity of the clone or for using it as a temporary startup disk.
Check out the steps below to boot your Mac from External SSD:
Step 1. Plug your external SSD into the Mac.
Step 2. Restart your Mac, or if it is Off, Turn it on.
Step 3. As soon as you switch on the Mac, hold down the Option (Alt) key.
Step 4. Keep holding this option button until you see a screen with all available startup disks (Startup Manager).
Step 5. Use the arrow keys to select the external SSD you want for booting. It will appear as a drive icon, possibly labeled with the name you gave it during cloning.
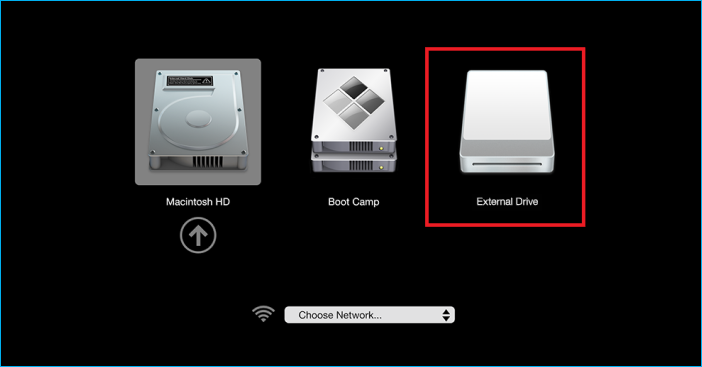
Step 6. Press Return or click the arrow below the drive icon to boot from the selected external SSD.
Note: Now, the operating system and data on the external SSD will be used to start up your Mac.
Step 7. If you want to boot from your internal drive again in the future, repeat this process by choosing the internal drive, or simply go to "System Preferences" > "Startup Disk," choose the internal drive, and select "Restart."
Additional Tip 2: How to Restore External SSD to A New Mac
After cloning your Mac hard drive onto an external SSD, use this clone for a new Mac setup or system restoration after a system failure. This process enables you to move everything from your previous machine, including data files, programs, and preferences, to another computer.
Follow these steps to restore External SSD to a new Mac:
Step 1. Connect the External SSD containing the clone to your New Mac.
Step 2. Power on or restart the new Mac.
Step 3. Immediately after that, hold down the Command (⌘) + R keys to boot into Recovery mode.
Step 4. Let go of those keys once you see an Apple logo or a spinning globe instead.
Step 5. In the macOS utility window, select "Restore From Time Machine Backup."
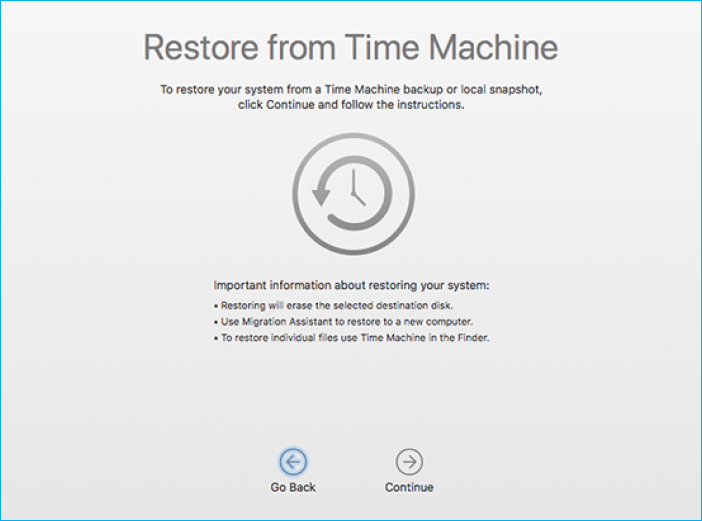
Step 6. Hit "Continue," and on the "Select Backup Source" screen, choose your external SSD clone.
Step 7. Select the most recent backup date and time, then continue by clicking "Continue."
Step 8. Select the destination disk where you wish to restore the backup. This will usually be the new Mac's internal drive.
Step 9. Next, select "Restore" and confirm that you want to erase the destination disk.
- Notice:
- This will begin the restoration process; depending on the amount of data, it might take several hours to finish. Restart your Mac once the restoration is over.
Many users are looking for a simple guide to clone a Mac hard drive to an external SSD. Click the share button below to help them out.
Conclusion
All in all, this tutorial guide takes you through the various methods by which you can clone a Mac hard drive to an external SSD, from automatic tools to the manual built-in disk utility of a Mac. We've also covered how to boot from the cloned SSD and restore it to a new Mac.
Overall, this article aimed to provide users with comprehensive guidance on creating reliable backups and facilitating system migrations.
We recommend using EaseUS Partition Master for Mac for a more convenient and feature-loaded experience. Its advanced features, such as partition management and file system conversion, make it an invaluable tool for maintaining your Mac's storage health beyond just cloning.
FAQs on Clone Mac Hard Drive to External SSD
-
Q1. Can I clone my Mac hard drive to an external drive?
- Yes, you can clone your Mac's hard drive onto an external device. This method makes a replica of your Mac's internal drive, including the operating system, programs, and all of your data. You can perform this with built-in utilities like Disk Utility or third-party applications such as EaseUS Partition Master for Mac. Cloning to an external drive is an excellent approach to backing up your entire system or preparing for a hardware update.
-
Q2. Why can't I copy files from Mac to external HDD?
-
There can be several reasons why you are not able to copy your files from Mac to external HDD, starting from:
- File system compatibility. Make sure that your external HDD is formatted using a file system supported by macOS (like APFS, Mac OS Extended, or exFAT).
- Permissions issues. Confirm whether you have the required permissions to read on your Mac and write on the external drive.
- Drive errors. The external HDD might have issues. To check and fix them, run First Aid in Disk Utility.
- Software conflicts. Pull out any antivirus or security applications that could be disrupting file transfer.
Even after that if the problem doesn't get solved, use a different USB port or cable, or try testing the external HDD on another system to rule out hardware issues.
-
Q3. What happens if you restore in Disk Utility in Mac?
- The "Restore" button in Disk Utility on a Mac is used to clone or copy the contents of one disk or partition to another, effectively creating an exact replica of the source on the destination drive
How Can We Help You
About the Author
Updated by Tracy King
Tracy became a member of the EaseUS content team in 2013. Being a technical writer for over 10 years, she is enthusiastic about sharing tips to assist readers in resolving complex issues in disk management, file transfer, PC & Mac performance optimization, etc., like an expert.
Oliver is an EaseUS professional writer who dares explore new areas. With a passion for solving tech issues with straightforward guides for common users, Oliver keeps honing his writing craft by developing in-depth solutions for disk and partition management, computer boot-up issues, file transfer, etc.
Product Reviews
-
I love that the changes you make with EaseUS Partition Master Free aren't immediately applied to the disks. It makes it way easier to play out what will happen after you've made all the changes. I also think the overall look and feel of EaseUS Partition Master Free makes whatever you're doing with your computer's partitions easy.
Read More -
Partition Master Free can Resize, Move, Merge, Migrate, and Copy disks or partitions; convert to local, change label, defragment, check and explore partition; and much more. A premium upgrade adds free tech support and the ability to resize dynamic volumes.
Read More -
It won't hot image your drives or align them, but since it's coupled with a partition manager, it allows you do perform many tasks at once, instead of just cloning drives. You can move partitions around, resize them, defragment, and more, along with the other tools you'd expect from a cloning tool.
Read More
Related Articles
-
Administrator Password: 2025 Complete Guide on Mastering It
![author icon]() Tracy King/2025/03/29
Tracy King/2025/03/29 -
How to Free Up Space on C Drive in Windows 11/10 [8 Efficient Ways]
![author icon]() Sherly/2025/01/23
Sherly/2025/01/23 -
How to Format 2TB Hard Drive to FAT32? Here Is A Quick Guide - EaseUS
![author icon]() Tracy King/2025/03/29
Tracy King/2025/03/29 -
MBR or GPT for SSD, Which Is Better and How to Choose?
![author icon]() Tracy King/2025/03/28
Tracy King/2025/03/28
Hot Topics in 2024


EaseUS Partition Master

Manage partitions and optimize disks efficiently