Start Your Free Trial!
Sign up to our newsletter, stay updated on news and exclusive offers from EaseUS. Don't worry, if you change your mind, you can unsubscribe at any time, free of charge. We value your privacy (Privacy Policy).
Page Table of Contents
How to Check Disk Space on My MacHOT
How to Free Up Disk Space on Mac - 7 WaysHOT
ConclusionHOT
FAQs About How to Free Up Storage Space on MacHOT
About the Author
Hot Topics
Updated on Apr 28, 2025
In our daily use of devices, including Macs, we create, download, and delete files. However, many users forget to clear the Trash or uninstall unused apps, leading to a gradual buildup of unnecessary data. Over time, system junk, caches, and leftover files accumulate, consuming valuable storage and affecting performance. A nearly full disk can significantly slow down your Mac, making it crucial to manage and optimize your storage effectively.
In this guide, EaseUS will introduce tried-and-tested methods to free up space on your Mac, including removing unnecessary files, uninstalling unused apps, and optimizing storage settings without risking the loss of your important data. Follow this guide to ensure your Mac runs smoothly and maintains enough space for essential tasks and files.
First, it's crucial to understand what's occupying your Mac's storage. With EaseUS Partition Master for Mac, you can quickly analyze your disk space and identify unnecessary files or apps that can be safely removed. This powerful tool simplifies disk management for both Mac and Windows users.
Here's how to check your disk space using EaseUS Partition Master For Mac:
Now that you've checked the disk space on your Mac and identified unnecessary data and apps let's learn effective methods to free up space. In this section, we will explore various ways to free up storage, ensuring your Mac runs smoothly and stays free of unnecessary clutter.
When users delete unnecessary files on Mac, they are not actually deleted but exist in the Trash/Bin. Emptying the Trash will permanently delete those files and free up space.
Follow the steps:
Step 1. Open the Trash by clicking its icon in the Dock.
Step 2. Review the files in the Trash and confirm you no longer need them.
Step 3. Right-click on the Trash icon and select Empty Trash.

Another efficient way is to move your files and data to an external hard drive. To make this process easier, EaseUS Partition Master For Mac can help you quickly identify large, unneeded files in your Downloads folder and elsewhere on your Mac. With this tool, you can scan your entire storage and find leftover files that are taking up space, making cleanup much more efficient than doing it manually.
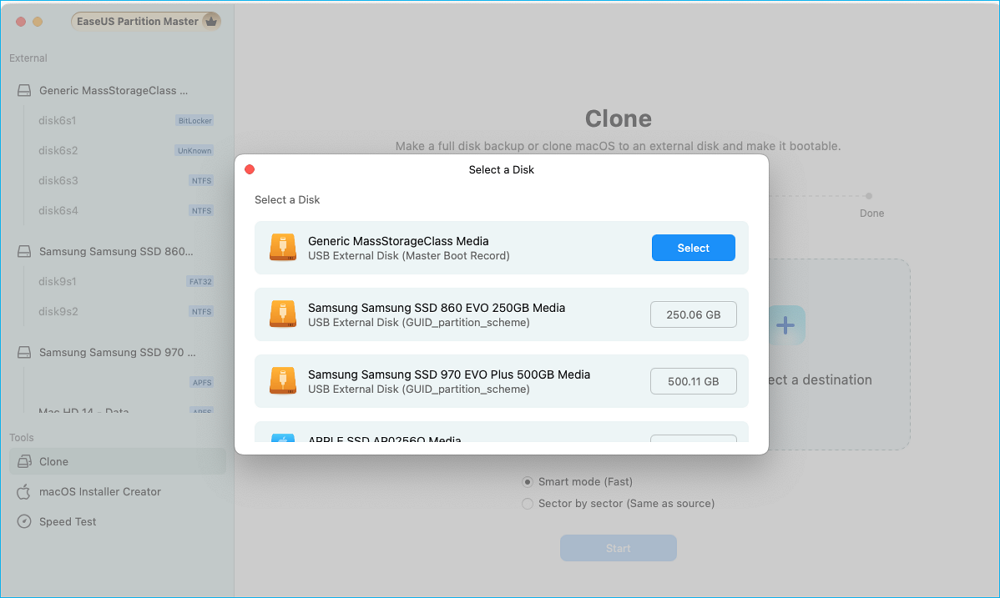
Step 1. Connect your removable device to Mac and run EaseUS Partition Master.
Click "Clone" at the left pane under the Abilities section, click the "+" icon to select a source external device you want to clone.

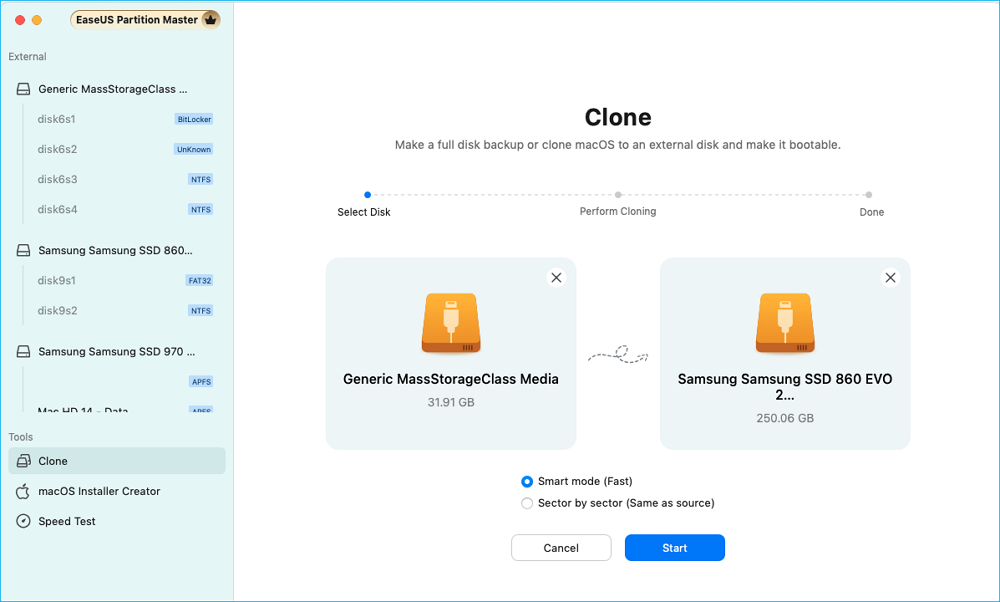
Step 2. Select a new target disk as destination to clone the selected removable disk - external HDD/SSD, USB, or SD card.
When both source and target external storage devices are selected, click "Start" to begin.

Step 3. Click "Yes" when EaseUS Partition Master for Mac request you to confirm the operation.
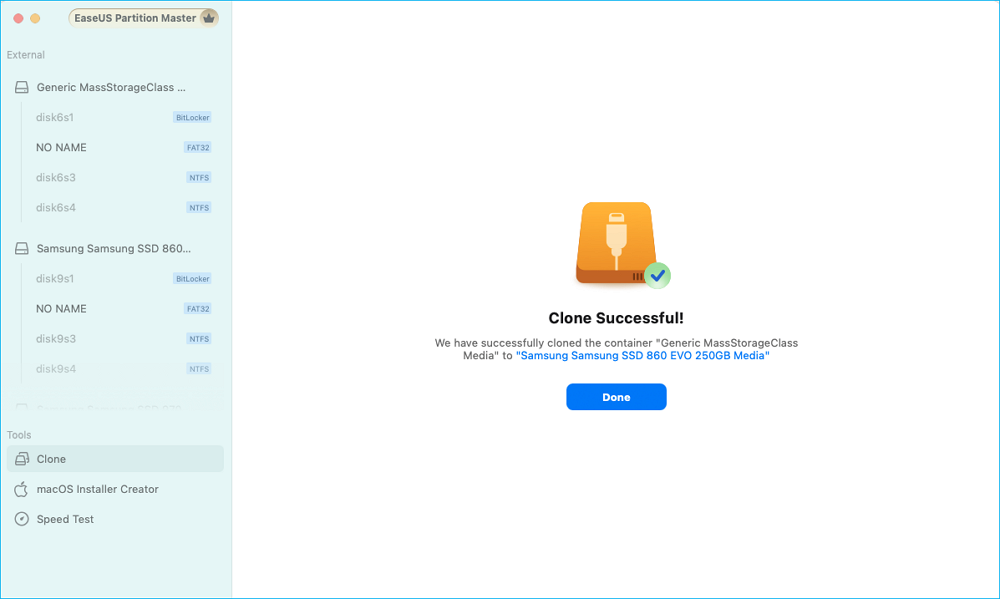
Step 4. Wait patiently to let EaseUS Partition Master for Mac to complete the cloning process.

Key Features of EaseUS Partition Master:
Try EaseUS Partition Master for Mac to simplify clearing up storage and optimizing your device.
System junk files are temporary files generated by macOS to facilitate system operations. However, many of these files become unnecessary once their tasks are completed and then consume storage space. Therefore, deleting these junk files can free up space.
Follow the steps:
Step 1. Go to the Go menu in the top navigation bar.
Step 2. Select Go to Folder and enter ~/Library/Caches to locate your system caches.
Step 3. Right-click and select Move to Bin.

Step 4. Make sure to clear Trash/Bin.
Clearing browser caches can also liberate your Mac from the occupancy. Browsers like Chrome, Safari, and Mozilla Firefox store temporary files from the websites you visit. Here's how to clear Chrome cache:
Step 1. Open Chrome and click on the three-dot menu in the top-right corner.
Step 2. Navigate to Settings > Privacy and Security > Delete Browsing Data.
Step 3. Choose the Cached images and files option and set the time range. Click Delete Data to remove the cache.

Unused and excessive apps and programs occupy significant space on your Mac. Removing apps you no longer use is an effective way to free up storage. Your Downloads folder is often filled with files that you no longer need. Over time, this folder can take up significant space, especially with large files like installers and documents:
Follow the steps:
Step 1. Open Finder and go to the Applications.
Step 2. Review your apps and drag any unused ones to the Trash.

Step 3. Empty the Trash to permanently remove them.
Moving your essential data/files to iCloud is a useful way to preserve data and free up disk space. iCloud offers synchronization across Apple devices to store documents, photos, and media. This flexible solution helps you manage your storage more efficiently.
Follow the steps to set up iCloud storage on your Mac:
Step 1. Click the Apple menu in the top-left corner of your screen and choose System Settings.
Step 2. At the top of the left sidebar, click your profile name to open your Apple ID settings.
Step 3. In the settings menu, locate and select the iCloud option to manage your iCloud preferences.
Step 4. Enable the Optimize Mac Storage feature to automatically move documents and desktop files to iCloud, freeing up space on your device.

Before going through the last solution, you can share this useful tutorial first:
Duplicate photos occupy unnecessary space. Duplicate photos can be deleted on a Mac, similar to how users delete other files. Still, it typically requires a more deliberate process to identify and remove duplicates.
Follow the steps:
Step 1. Navigate to the folder where your photos are stored.
Step 2. Figure out the duplicate photos/file names.
Step 3. Manually delete the duplicates by dragging them to the Trash, then empty the Trash.
Alternatively, use a third-party tool to identify and delete duplicate photos.
A heavily occupied disk on a Mac slows down performance. However, clearing unnecessary files, emptying the Trash, and optimizing your storage can free up disk space.
For an effortless way to optimize and manage your storage space on a Mac, EaseUS Partition Master for Mac is your go-to solution. With its user-friendly interface and powerful features, you can quickly identify and remove unwanted files, organize your disk, and keep your Mac performing at its best.
Have more queries? Check out these FAQs!
1. Why is my Mac disk space full?
Over time, your Mac's storage fills up due to system junk, caches, unused apps, and large or duplicate files. Regularly clearing these files and optimizing storage can prevent this.
2. How do I make Mac running faster?
To improve your Mac's performance, consider these tips:
3. Does emptying the cache speed up Mac?
Yes, clearing the cache can temporarily boost your Mac's performance, but cache files will rebuild over time.
How Can We Help You
Roxanne is one of the main contributors to EaseUS and has created over 200 posts that help users solve multiple issues and failures on digital devices like PCs, Mobile phones, tablets, and Macs. She loves to share ideas with people of the same interests.
Cici is the junior editor of the writing team of EaseUS. She accepted the systematic training on computers at EaseUS for over one year. Now, she wrote a lot of professional articles to help people resolve the issues of hard drive corruption, computer boot errors, and disk partition problems.
It won't hot image your drives or align them, but since it's coupled with a partition manager, it allows you do perform many tasks at once, instead of just cloning drives. You can move partitions around, resize them, defragment, and more, along with the other tools you'd expect from a cloning tool.
Read MoreI love that the changes you make with EaseUS Partition Master Free aren't immediately applied to the disks. It makes it way easier to play out what will happen after you've made all the changes. I also think the overall look and feel of EaseUS Partition Master Free makes whatever you're doing with your computer's partitions easy.
Read MorePartition Master Free can Resize, Move, Merge, Migrate, and Copy disks or partitions; convert to local, change label, defragment, check and explore partition; and much more. A premium upgrade adds free tech support and the ability to resize dynamic volumes.
Read MoreIt won't hot image your drives or align them, but since it's coupled with a partition manager, it allows you do perform many tasks at once, instead of just cloning drives. You can move partitions around, resize them, defragment, and more, along with the other tools you'd expect from a cloning tool.
Read MoreI love that the changes you make with EaseUS Partition Master Free aren't immediately applied to the disks. It makes it way easier to play out what will happen after you've made all the changes. I also think the overall look and feel of EaseUS Partition Master Free makes whatever you're doing with your computer's partitions easy.
Read MoreRelated Articles
macOS Clone Drive to SSD Tutorial with How-To Guide
![]() Tracy King/2025/04/28
Tracy King/2025/04/28
How to Fix "Local Disk D Almost Full" in Windows 11/10/8/7 [Step-by-Step Guide]
![]() Sherly/2025/04/28
Sherly/2025/04/28
How to Partition Hard Drive (including C drive) in Windows 11/10 Without Formatting
![]() Brithny/2025/04/28
Brithny/2025/04/28
How to Format SD Card to FAT32 Successfully? [2025]
![]() Daisy/2025/04/28
Daisy/2025/04/28
EaseUS Partition Master

Manage partitions and optimize disks efficiently
Your best companion for disk partitioning, MBR to GPT/GPT to MBR conversion,even OS migration
CHOOSE YOUR REGION
Start Your Free Trial!
Sign up to our newsletter, stay updated on news and exclusive offers from EaseUS. Don't worry, if you change your mind, you can unsubscribe at any time, free of charge. We value your privacy (Privacy Policy).
Start Your Free Trial!
Sign up to our newsletter, stay updated on news and exclusive offers from EaseUS. Don't worry, if you change your mind, you can unsubscribe at any time, free of charge. We value your privacy (Privacy Policy).