Start Your Free Trial!
Sign up to our newsletter, stay updated on news and exclusive offers from EaseUS. Don't worry, if you change your mind, you can unsubscribe at any time, free of charge. We value your privacy (Privacy Policy).
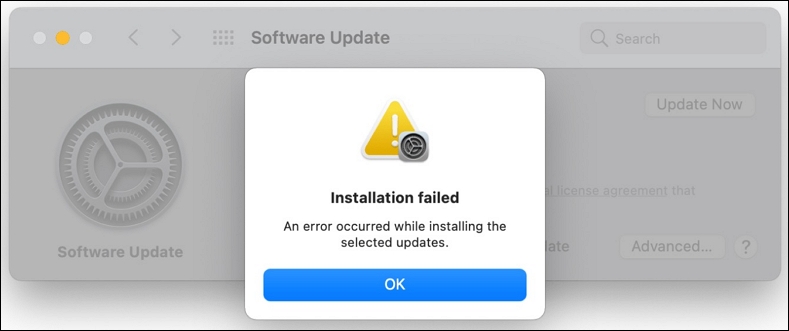
macOS Sonoma installation failed? This article will demonstrate four practical solutions for resolving the macOS Sonoma installation error and getting your Mac operating with the new OS.
The methods mentioned in this article will equip you with the tools to tackle installation issues head-on and get your Mac up and running with the latest macOS Sonoma release. Let's begin!
| Workable Solutions | Step-by-step Troubleshooting |
|---|---|
| Fix 1. Restart Mac | Click on the Apple logo, and choose Restart from the menu. Click Restart again to confirm...Full steps |
| Fix 2. Check Mac Storage | Select About This Mac from the Apple logo, and Mac estimates available capacity...Full steps |
| Fix 3. Check Mac Compatibility | Click the Apple logo to open About This Mac. A window will display your Mac's information...Full steps |
| Fix 4. Create macOS Sonoma Bootable Installer | Download a file, and it will be downloaded to your Downloads subdirectory on your Mac...Full steps |
Why macOS Sonoma installation failed? Because it's still in the testing phases. Insufficient disk space, mismatched hardware, damaged data, and network troubles may lead to installation failure on your Mac.

There are various probable causes for macOS Sonoma installation failure, including:
💾Low storage space: You must have adequate free storage space to download and clean install macOS Sonoma. The installation requires at least 20 GB of free space.
If your Mac deleted files not freeing space, you should know that moving files to Trash not really deleting data, and they still remain on your Mac. Read this article to delete files on your Mac and free up space permanently.

How to Permanently Delete File on Mac/MacBook Air/iMac
This article will introduce 4 proven ways to permanently delete files on Mac, MacBook Air, and iMac. Read more >>
🤖Software incompatibility: Not all Mac models are supported by macOS Sonoma. Mac users can't install macOS Sonoma update if their Mac isn't on the list:
If your Mac is not on the list, don't worry, and read this article to install macOS 14 Sonoma on unsupported Mac models.

How to Install macOS Sonoma on Unsupported Mac [macOS 14 Available Now]
This article will guide you on how to install macOS 14 Sonoma on an unsupported Mac with a step-by-step tutorial. Read more >>
🍏Not registering as an Apple developer: macOS Sonoma is presently in beta, which is only accessible to registered developers with an Apple ID. You cannot download macOS 14 or install the update if you do not have a developer account.
😫No backup: Before installing any big update, backup your data with Time Machine if anything goes wrong. You may lose some crucial data or settings during the installation, and you can recover files after factory reset Mac.
❌Corrupted installer: The installation file can get corrupted or damaged during the download or transfer procedure. This might result in installation difficulties or failures. To resolve this, delete and reinstall the installation app from the App Store.
🌐Network problems: A sluggish or inconsistent internet connection might disrupt installation. While downloading or confirming the installation file, you can experience difficulties. To circumvent this, utilize your Wi-Fi or internet connection rather than a public or shared one.
⚠️System issues: Certain problems with your Mac's hardware or software might prevent the installation from succeeding. For example, you can disable FileVault or the Firewall, reset NVRAM/PRAM or SMC, and generate a new macOS Sonoma USB installer.
⏱️Temporary errors: The installation can sometimes fail owing to transitory issues unrelated to your Mac or the installer file. These issues can be fixed after some time, so hard restart MacBook and apply the update later.
The process of installing a new OS is normally straightforward. However, complications can arise on occasion. Don't panic if you're having macOS Sonoma issues; there are workable alternatives to get you back on track.
Here we'll go through four tried-and-true solutions to installation problems so you can have macOS Sonoma up and running on your Mac.
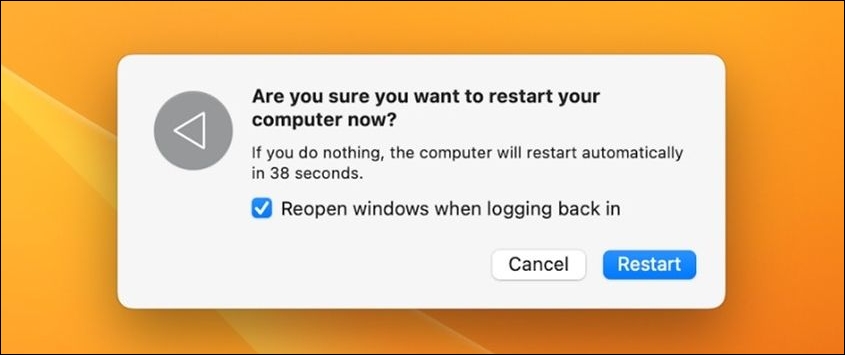
A simple restart can sometimes cure numerous problems on your Mac, including installation troubles. When you restart your Mac, it will clean its memory and process stuff at regular speed. There are various ways to restart your Mac, which might be handy if you cannot use specific commands or apps due to computer troubles. Here's the easiest one:
Step 1. Click on the Apple logo in the toolbar of your Mac.
Step 2. Choose "Restart" from the menu. Click "Restart" again to confirm, and your Mac will instantly restart.

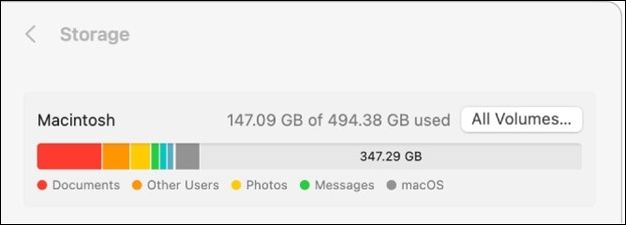
You must have sufficient space on the Mac startup disk to download and install the macOS Sonoma update. At least 20 GB of free space is required for implementation. If you need space, remove or move unnecessary files. To check RAM on Mac storage space, follow these steps:
Step 1. Select "About This Mac" from the Apple logo in the upper-left corner of the screen.
Step 2. After selecting "Storage", the Mac estimates available capacity.

macOS Sonoma isn't going to work with every Mac out there. To see whether your device is compatible with Sonoma, follow the steps below:
Step 1. Click the Apple logo in the top left corner to open "About This Mac". A window will display your Mac's name, CPU, RAM, serial number, etc.
Step 2. Check the "Model Name" or "Model Identifier" to see whether your gadget works.
Share this article on social media to help others learn how to fix the macOS Sonoma installation failed error on their Mac.
You can construct a USB Installer Boot disk if you wish to install or upgrade to macOS Sonoma. This will expedite the OS installation process on Intel and M1/M2 Macs. The instructions below demonstrate how to create macOS Sonoma bootable USB:
Step 1. Download a file named InstallAssistant.kg. When complete, the file will be downloaded to your Downloads subdirectory.

Step 2. Install the InstallAssistant.pkg file that can be found in your Downloads folder. This Apple package installer will transfer the "Install macOS Sonoma Beta app" to the Applications subdirectory.

To Install macOS Sonoma from USB, create your USB Installer now that the Install macOS Sonoma application is in your Applications folder. The USB flash drive must be at least 16 GB in capacity, as the Sonoma installer is between 12 and 14 GB.
Step 1. Connect the USB flash drive.
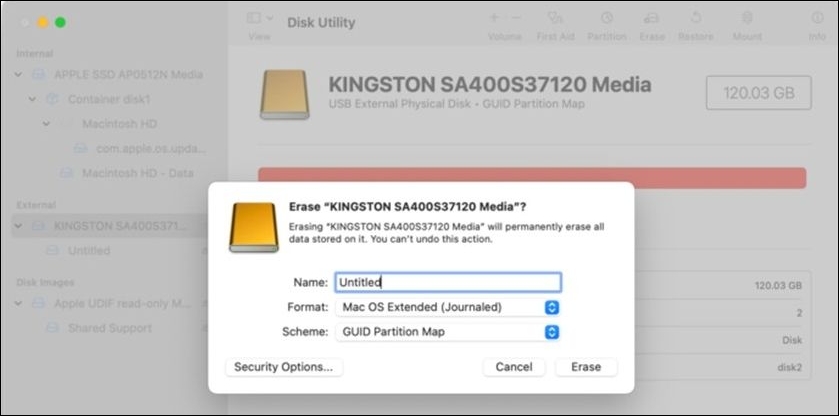
Step 2. Click the "View" icon after launching Disk Utility. Select "Show All Volumes" and select the USB drive's name at the upper level.
Step 3. Typically, "Top-level drive" refers to the USB Drive. Click the "Erase" button to delete the contents of your USB Flash drive.

Step 4. Open Terminal from the /Applications/Utilities folder.
Step 5. Type sudo followed by a space.
Note: The installer application for macOS Sonoma should be dragged into the Terminal window.
Step 6. The complete command is sudo /Applications/Install macOS 14 Beta.app/Contents/Resources/createinstallmedia.
Step 7. Add the –volume option before dragging your USB Flash Drive into the terminal window. When prompted, type in your account's password and press enter.
Note: The complete command will look like this:
sudo /Applications/Install\ macOS\ 14\ Beta.app/Contents/Resources/createinstallmedia --volume /Volumes/Untitled
To automatically create a bootable macOS installer, we highly recommend you use software like EaseUS Data Recovery Wizard for Mac. You can download and install this tool by clicking the button down here and follow the steps below:
Step 1. Select a macOS version
Select a macOS version from the list, or click the "Refresh" option to get the downloaded macOS version. Or you can add a macOS installer from your disk by clicking the "Add" button. Insert a USB flash drive larger than 16 GB to save the macOS installer.

Step 2. Erase the USB flash drive
After choosing the USB flash drive, click the "Erase and create" option in the pop-up window to format your USB flash drive quickly, and then click the "Create macOS installer" button to continue.

Step 3. Create the macOS installer boot drive
Wait for the process to complete, and click the "Finish" button. Your macOS installer boot drive has been successfully created!

macOS Sonoma is the most recent iteration of Apple's Mac operating system. It includes many new features and enhancements, including Universal Control, AirPlay for Mac, Focus mode, and a redesigned Safari.
Installing the beta version of macOS Sonoma can result in software flaws, system instability, and even data loss on your Mac. If you still wish to test the beta version of macOS Sonoma, you must follow Apple's official instructions and ensure that your Mac meets the minimum requirements.
Or you can read the article below to downgrade Sonoma to Ventura.

Downgrade macOS Sonoma to Ventura | Uninstall Sonoma Beta
This article discusses 3 practical methods to downgrade macOS Sonoma to Ventura. Read more >>
Suppose you updated Mac and lost everything, don't worry; using professional data recovery software can help you retrieve your lost data and recover deleted files macOS Sonoma.
EaseUS Data Recovery Wizard for Mac is a robust and trustworthy software that can recover lost data efficiently. It will aid you if you delete crucial files by error, experience data corruption, or encounter formatting problems with its user-friendly interface and sophisticated scanning algorithms.
It can recover permanently deleted files Mac, including photos, videos, documents, etc. And it can recover lost files after macOS Ventura update and macOS Sonoma upgrade. Check out the following steps:
Step 1. Select the location
Select the disk where you lost data after updating to macOS Sonoma/Ventura/Monterey/Big Sur. Then, click "Search for lost files".

Step 2. Find lost data after the scan
EaseUS Data Recovery Wizard for Mac will immediately scan your selected disk volume and display the scanning results on the left pane. Use the file type and file path to find wanted data on Mac.

Step 3. Recover data after macOS update
Select the target files that were unknowingly lost during or after the update and click the "Recover" button to get them all back.

The innovations of macOS Sonoma Beta are appealing, but users should be mindful of the dangers of encountering bugs, experiencing system instability, and losing data.
If you insist on moving on, you should equip yourself with a solid data recovery solution, such as EaseUS Data Recovery Wizard for Mac. During the beta testing of macOS Sonoma, you can rest easy knowing that EaseUS has your back with its robust and dependable recovery features.
Here are some questions people frequently ask related to macOS Sonoma installation failure:
1. How to install macOS Sonoma on my Mac?
To install macOS Sonoma on your Mac:
Step 1. Go to the Apple Developer site and sign up for an account.
Step 2. Navigate to "Settings > General".
Step 3. Click the "Software Update" button.
Step 4. Choose the "i" symbol to the right of the Beta Updates section.
Step 5. Click the "macOS Sonoma Developer Beta" button. "macOS 14 Beta" should now display; choose "Upgrade Now".
Step 6. Select "Install Now" after it has finished downloading.
2. Why is macOS Sonoma failing to install?
There are multiple potential causes for macOS Sonoma installation failure. Common causes include insufficient disk space, hardware incompatibility, and network issues. Check the storage capacity of your Mac, ensure compatibility with Apple's official system requirements, and establish a stable internet connection.
3. Is my Mac too old to install Sonoma?
macOS Sonoma can have system requirements that restrict its compatibility with previous Mac models:
If your Mac is not specified, it does not meet the required specifications for Sonoma.
Was This Page Helpful?
Finley is interested in reading and writing articles about technical knowledge. Her articles mainly focus on file repair and data recovery.
Brithny is a technology enthusiast, aiming to make readers' tech lives easy and enjoyable. She loves exploring new technologies and writing technical how-to tips. In her spare time, she loves sharing things about her game experience on Facebook or Twitter.
Related Articles
Can I Upgrade My Motherboard and CPU Without Reinstalling Windows 10? [New Updated 2025]
![]() Tracy King/2025-01-24
Tracy King/2025-01-24
How to Solve Kindle not showing up on PC
![]() Daisy/2025-01-24
Daisy/2025-01-24
Fixed: How to Recover Files When Windows 10 Desktop Icons Are Missing
![]() Brithny/2025-01-24
Brithny/2025-01-24
Windows Update Keeps Crashing My PC [Causes & 8 Fixes]🔥
![]() Jerry/2025-01-24
Jerry/2025-01-24
EaseUS Data Recovery Services
EaseUS data recovery experts have uneaqualed expertise to repair disks/systems and salvage data from all devices like RAID, HDD, SSD, USB, etc.
CHOOSE YOUR REGION
Start Your Free Trial!
Sign up to our newsletter, stay updated on news and exclusive offers from EaseUS. Don't worry, if you change your mind, you can unsubscribe at any time, free of charge. We value your privacy (Privacy Policy).
Start Your Free Trial!
Sign up to our newsletter, stay updated on news and exclusive offers from EaseUS. Don't worry, if you change your mind, you can unsubscribe at any time, free of charge. We value your privacy (Privacy Policy).