Start Your Free Trial!
Sign up to our newsletter, stay updated on news and exclusive offers from EaseUS. Don't worry, if you change your mind, you can unsubscribe at any time, free of charge. We value your privacy (Privacy Policy).
Jaden updated on Feb 25, 2025 | Home >Computer Instruction
You're not the only one whose Mac has become slower after updating to macOS Sequoia. Performance problems are common for many users after significant updates. Dealing with a slow Mac can be frustrating, especially if it's your primary device. But don't worry!
You can improve its performance with a few easy adjustments. We'll explore common slowdown reasons and provide practical tips to optimize your Mac. Let's begin exploring the Sequoia runs slow after update issue and its solutions!
Don't panic if your Mac has slowed down since installing macOS Sequoia! This is a frequent problem that has a few easy steps to fix. To restore your Mac's smooth operation, follow these steps.
The best fix for a slow Mac is usually a quick restart, especially after updating to macOS Sequoia. By clearing out short-term data and refreshing it, a computer restart helps to resolve minor problems and improve speed. Let's examine if resuming your Mac will make things run more quickly.
Step 1. Access the Apple menu.
Step 2. Select "Restart" from the drop-down menu.

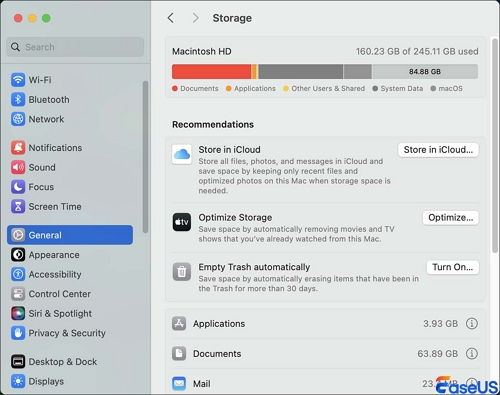
Your Mac needs ample space to run efficiently, especially after a significant update. Having adequate space can significantly improve performance. Let's examine how to check your Mac's storage and make necessary space adjustments.
Step 1. Access the Apple menu.
Step 2. Select "System Settings." Go to the "General" section.
Step 3. Click on "Storage." Once the information loads, you'll see a colorful breakdown of your disk space.
Clearing the cache on Mac is an excellent technique for improving performance after insatlling to macOS Sequoia. Cached files can build up over time, using valuable disk space and hindering your system. Clearing these files will free up space and improve your Mac's speed. Let's have a look at how to delete the cache on your Mac.
Step 1. Open Finder and click on "Go" in the top menu.
Step 2. Select "Go to Folder" and type "~/Library/Caches/", then click "Go".
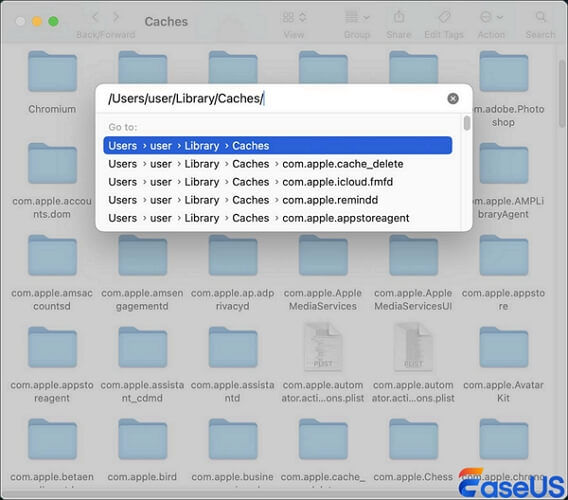
Step 3. Open each folder, select cache files, drag them to Trash, and empty Trash to delete.
Many Mac users have proved the efficacy of the post. If you want to macOS issue, share it on Facebook, Twitter, Instagram, and other social media platforms!
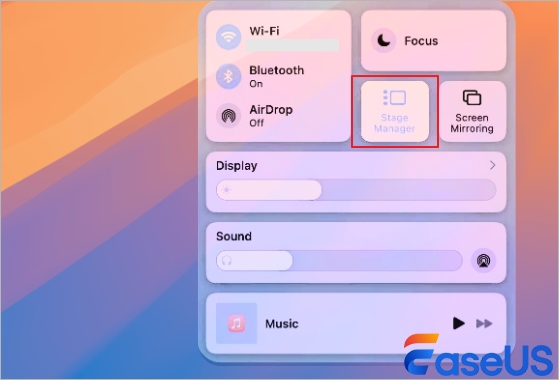
A new tool in macOS Sequoia called Stage Manager is meant to make it easier for you to arrange your windows and apps. Stage Manager can help you organize your desktop, become more productive, and improve performance. Check out the steps for turning on Stage Manager on Mac.
Step 1. Access Control Center.
Step 2. Click "Stage Manager" in the Control Centre to turn the feature on instantly.
Your Mac's SMC, PRAM, or NVRAM can be reset to address several performance problems, such as lags when updating to macOS Sequoia. These resets can assist in resolving issues with power, batteries, and system configurations. Here's how to reset your Mac's NVRAM.
Step 1. Shut down your Mac completely.
Step 2. Hold the power button, and it will power on again.
Step 3. Immediately press and hold the Option, Command, P, and R keys together.
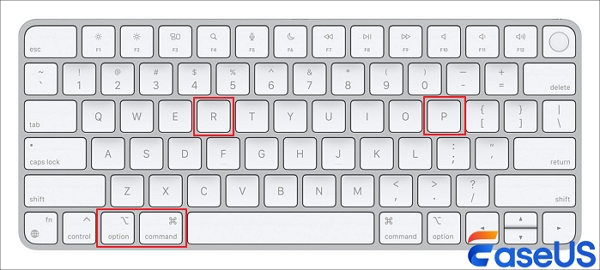
Step 4. Continue holding the keys for about 20 seconds, then release them. Allow your Mac to start up normally.
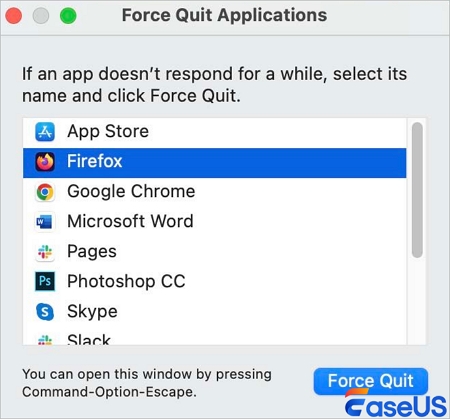
Your Mac's speed can be enhanced by forcing the closing of ineffective apps, particularly after updating to macOS Sequoia. Any app that stops working can cause your system to lag. Here's how to force quit on Mac.
Step 1. Press the Option, Command, and Esc keys together.
Step 2. Choose the unresponsive app in the Force Quit window.
Step 3. Click "Force Quit" to close the app.
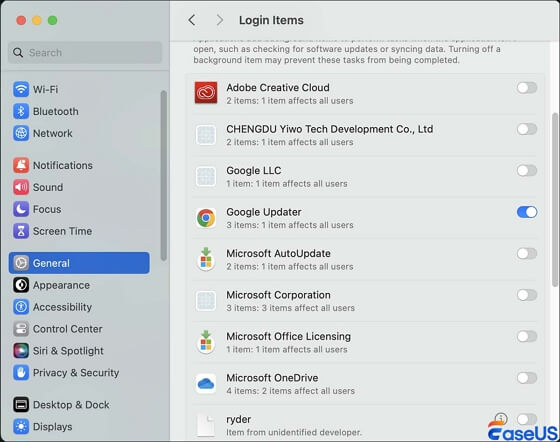
Optimizing your Mac's startup configuration can significantly affect how well it runs, especially when you update to macOS Sequoia. Optimizing which applications open first can help lower system load and accelerate boot times. You can ensure your Mac runs more quickly and smoothly by tweaking the startup configuration. Here are its simple steps:
Step 1. Click on the Apple menu and select "System Settings."
Step 2. Go to the "General" and select "Login Items."
Step 3. To remove items from the startup list, select the items you want to remove and click the "-" button.
Updating to macOS Sequoia can occasionally result in unexpected data loss. To avoid this, you must back up your files before upgrading. In the unlikely event that the Mac update deletes everything without a backup, don't panic!
Robust recovery programs like EaseUS Data Recovery Wizard for Mac can easily recover data. With a 99.7% data recovery rate, you can retrieve deleted data on Mac Sequoia quickly. Whether the files you lost are documents, photos, or any other personal information, EaseUS Data Recovery Wizard can assist you.
Follow the steps below to use this software for data recovery.
Step 1. Select the location
Select the disk where you lost data after updating to macOS Sonoma/Ventura/Monterey/Big Sur. Then, click "Search for lost files".

Step 2. Find lost data after the scan
EaseUS Data Recovery Wizard for Mac will immediately scan your selected disk volume and display the scanning results on the left pane. Use the file type and file path to find wanted data on Mac.

Step 3. Recover data after macOS update
Select the target files that were unknowingly lost during or after the update and click the "Recover" button to get them all back.

Several factors contribute to this issue, which we'll explore below:
If none of the above work, please consider downgrading Sequoia to Sonoma.
In conclusion, navigating the macOS Sequoia update can present challenges like slowed performance or potential data loss. You must back up your data and remain aware of the simple and common issues. If something goes wrong, particularly following an update, and you cannot make backups, EaseUS Data Recovery Wizard for Mac is recommended. Before going through the upgrade process and even after the process has been completed, you must be prepared for any odd situations. You can use efficient, simple recovery solutions such as EaseUS.
Here are some commonly asked questions about slow performance after updating to macOS Sequoia:
1. Why is my Mac so slow all of a sudden after the update?
Your Mac may slow down after an update due to increased system demands, incompatible apps, or background processes consuming resources. Restarting your Mac or clearing cache files often improves performance.
2. Why is my Mac so slow after the Big Sur update?
The Big Sur update might slow down your Mac if it needs help with new system requirements or app compatibility issues. Resetting the PRAM/NVRAM or optimizing startup items could speed it up.
3. What are the problems with the macOS Sonoma 14.4 1 upgrade?
Users have reported issues with battery drain, app crashes, and Bluetooth connectivity problems after upgrading to macOS Sonoma 14.4.1. Checking for software updates or resetting system settings may resolve these issues.
Was This Page Helpful?
Jaden is one of the editors of EaseUS, who focuses on topics concerning PCs and Mac data recovery. Jaden is committed to enhancing professional IT knowledge and writing abilities. She is always keen on new and intelligent products.
Related Articles
External Hard Drive Heating Up: Everything You Should Know
![]() Cici/2025-01-24
Cici/2025-01-24
[Linux Format Disk Guide] How to Format Disk in Linux
![]() Tracy King/2025-01-24
Tracy King/2025-01-24
MacBook Error Code 50: How to Fix the Mac Error on External Hard Drive
![]() Jaden/2025-02-25
Jaden/2025-02-25
How to Open Google Drive on My Computer [Updated 2025]
![]() Daisy/2025-01-24
Daisy/2025-01-24
EaseUS Data Recovery Services
EaseUS data recovery experts have uneaqualed expertise to repair disks/systems and salvage data from all devices like RAID, HDD, SSD, USB, etc.
Copyright © 2004 - 2025 EaseUS. All rights reserved.
CHOOSE YOUR REGION
Start Your Free Trial!
Sign up to our newsletter, stay updated on news and exclusive offers from EaseUS. Don't worry, if you change your mind, you can unsubscribe at any time, free of charge. We value your privacy (Privacy Policy).
Start Your Free Trial!
Sign up to our newsletter, stay updated on news and exclusive offers from EaseUS. Don't worry, if you change your mind, you can unsubscribe at any time, free of charge. We value your privacy (Privacy Policy).