Start Your Free Trial!
Sign up to our newsletter, stay updated on news and exclusive offers from EaseUS. Don't worry, if you change your mind, you can unsubscribe at any time, free of charge. We value your privacy (Privacy Policy).
You can recover deleted screenshots on Mac with software, Time Machine, iCloud, Mac Undo option, or from the Trash. Our most recommended solution is recovering deleted screenshots on your Mac with EaseUS Data Recovery Wizard for Mac.
Table of Contents
![]() About the Author
About the Author
![]() Reviews and Awards
Reviews and Awards
Mac users can press Command + Shift + 3 to take a screenshot on Mac, and sometimes you cannot find the screenshots you need. This might be due to the following reasons:
If you lose screenshots or files on Mac due to the above reasons, you can still recover deleted screenshots on Mac with five simple methods. We will introduce each way in the following parts.
The first and quickest method to recover deleted screenshots on Mac is by applying the screenshots recovery tool – EaseUS Data Recovery Wizard for Mac can recover deleted files Mac safely and fast for you.
It won't be a wrong choice to choose EaseUS Data Recovery Wizard for Mac to retrieve files:
You can quickly get back your screenshots or other deleted files on Mac by following the three steps below:
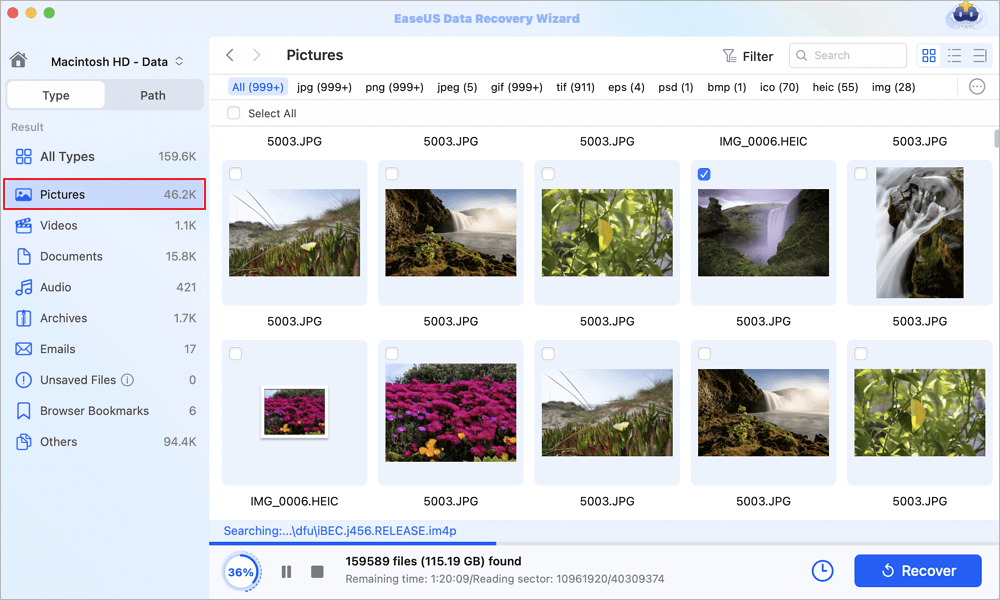
Step 1. Scan for lost photos
Select the location where your valuable photos were lost and click the "Search for lost files" button.

Step 2. Select wanted photos
EaseUS Data Recovery Wizard for Mac will immediately start a scan on your selected disk volume. Meanwhile, the scanning results will be presented in the left pane. By Path and Type, you can quickly filter the photos you've lost earlier.
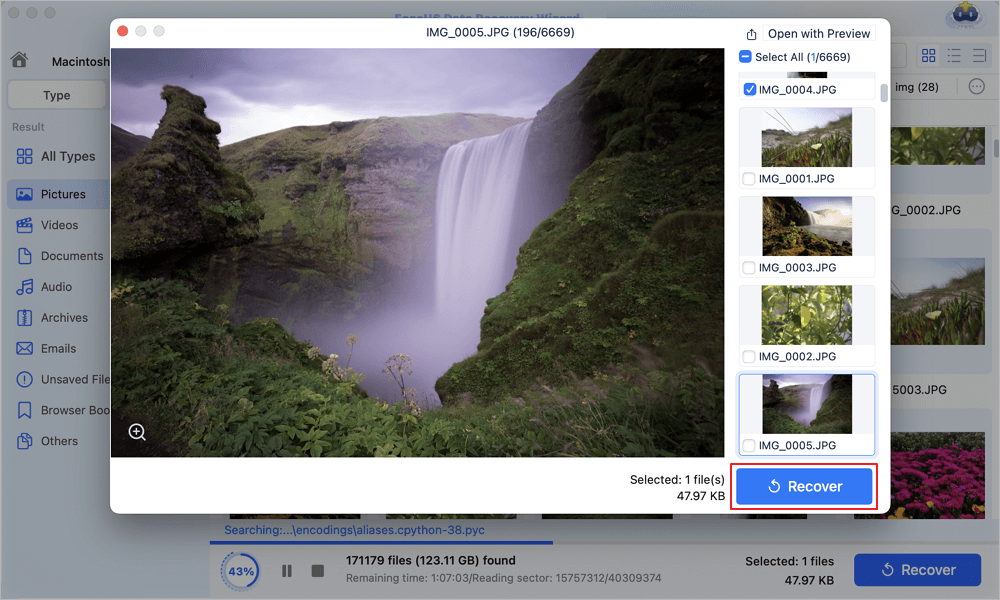
Step 3. Recover lost photos
Select the target photos and click the "Recover" button to get them back at once.
If you are a Mac user with good data backup habits, we believe you can recover deleted screenshots from Mac Time Machine backup. It doesn't matter if you don't know how to recover data with Time Machine. We will show you the detailed steps. You just need to follow this tutorial, and then you can recover deleted screenshots on Mac:
Step 1. Type in Time Machine in the Spotlight.
Step 2. Launch Time Machine on Mac
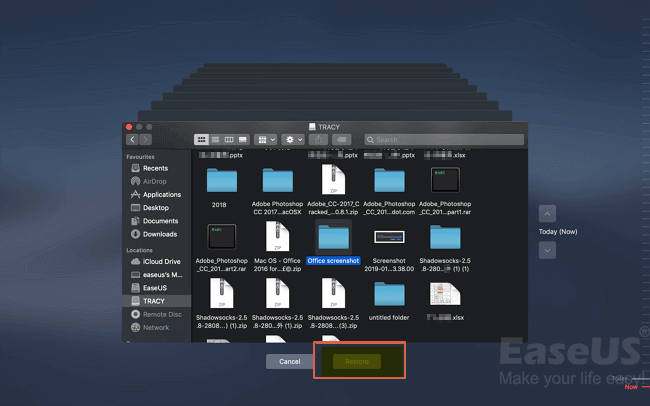
Step 3. Filter the files with the specific time on the right side.
Step 4. Choose the screenshots you want to recover and click "Restore".
Where is Trash on Mac? The fastest way to find the Trash on Mac is by searching "Trash" in the Spotlight. The trash folder will keep all the deleted files for a short time, and you can restore files in the Trash when you regret deleting them. You just need a few clicks to recover deleted screenshots on Mac from Trash Bin:
Step 1. Launch the Trash Bin by searching it in the Spotlight.
Step 2. Scroll down to find the screenshots you delete.
Step 3. Right-click the screenshot and click "Put Back".

Note: If you delete screenshots and empty the Trash with the Move to Trash shortcut on Mac, you should return to Method 1.
Sometimes you accidentally delete the screenshot, and you can recover it immediately with the macOS Undo option. We will tell you how to recover accidentally deleted screenshots on Mac with Undo option:
Step 1. After deleting essential screenshots. Click "Edit" from the menu bar.
Step 2. Click "Undo Move of xxx", and you can recover your deleted screenshots immediately. You can also use Command + Z to undo the deletion.

After signing in to an Apple account, you will also have 5 GB iCloud storage space to store your Mac devices' data. Let us find out how to recover deleted screenshots on Mac from iCloud:
Step 1. Enter iCloud.com, and sign in with your Apple account.
Step 2. Click "Account Settings" under your profile photo.

Step 3. Click "Restore Files" in the advanced options. Then you can select and recover deleted screenshots.

We have discussed five simple solutions to recover deleted screenshots. You can recover with Time Machine, iCloud, Mac Undo option, or from the Trash. Our most recommended solution is recovering deleted screenshots on your Mac with EaseUS Data Recovery Wizard for Mac. Download and experience this recovery tool now.
You can learn more questions and answers about recovering deleted screenshots on Mac by continuing reading in this part.
Can I recover deleted screenshots on Mac without the software?
You can recover deleted screenshots on Mac without the software, and we have four solutions to help you:
Can I recover deleted photos from iCloud on Mac?
Yes, it is available to recover deleted files from iCloud. How to recover deleted photos from iCloud on Mac?
How do I recover deleted screenshots on Mac after emptying the Trash?
After emptying the Trash on Mac, you should recover deleted screenshots with EaseUS Data Recovery Wizard for Mac.
How to take a screenshot on Mac?
You can take screenshots on your Mac by pressing Shift + Command + 3 keys. If you need to capture a portion of the screen, you can press Shift + Command + 4.
Was This Page Helpful?
Dany is an editor of EaseUS who lives and works in Chengdu, China. She focuses on writing articles about data recovery on Mac devices and PCs. She is devoted to improving her writing skills and enriching her professional knowledge. Dany also enjoys reading detective novels in her spare time.
EaseUS Data Recovery Wizard Pro has a reputation as one of the best data recovery software programs on the market. It comes with a selection of advanced features, including partition recovery, formatted drive restoration, and corrupted file repair.
Read MoreEaseUS Data Recovery Wizard is a powerful system recovery software, designed to enable you to recover files you’ve deleted accidentally, potentially lost to malware or an entire hard drive partition.
Read MoreEaseUS Data Recovery Wizard is the best we have seen. It's far from perfect, partly because today's advanced disk technology makes data-recovery more difficult than it was with the simpler technology of the past.
Read MoreEaseUS Data Recovery Wizard Pro has a reputation as one of the best data recovery software programs on the market. It comes with a selection of advanced features, including partition recovery, formatted drive restoration, and corrupted file repair.
Read MoreEaseUS Data Recovery Wizard is a powerful system recovery software, designed to enable you to recover files you’ve deleted accidentally, potentially lost to malware or an entire hard drive partition.
Read MoreRelated Articles
Fix Microsoft Word Not Responding Mac [Top 4 Ways]
![]() Finley/Nov 27, 2024
Finley/Nov 27, 2024
How to Restore Mac from Time Machine [Full Guide]
![]() Brithny/Nov 27, 2024
Brithny/Nov 27, 2024
Fix 'Can't Be Opened Because It Is from an Unidentified Developer'
![]() Jaden/Nov 27, 2024
Jaden/Nov 27, 2024
Recover Files After Reinstalling macOS (macOS 14 Applicable)
![]() Jaden/Nov 27, 2024
Jaden/Nov 27, 2024
Copyright © 2004 - 2025 EaseUS. All rights reserved.
CHOOSE YOUR REGION
Start Your Free Trial!
Sign up to our newsletter, stay updated on news and exclusive offers from EaseUS. Don't worry, if you change your mind, you can unsubscribe at any time, free of charge. We value your privacy (Privacy Policy).
Start Your Free Trial!
Sign up to our newsletter, stay updated on news and exclusive offers from EaseUS. Don't worry, if you change your mind, you can unsubscribe at any time, free of charge. We value your privacy (Privacy Policy).