- Video Recovery
- SD Card Recovery
- Recycle Bin Recovery
- Recover Data from USB
- Recover Deleted Emails
- Hard Drive Not Showing Up in Windows
- Recover Unsaved Word Documents
- Recover Deleted Files in Windows 10
- Recover Files from Virus Infected Hard Drive
- Best Free Photo Recovery Software
- Recover Files from Formatted Hard Drive
In this article, you'll learn:
- View and Recover Disappeared Folders/Files on Mac🔥
- How to Unhide Folders in Mac Permanently
- How to Hide Folders & Files on Mac
- Unhide Folders Mac FAQs
Entire libraries and directories on your Mac are concealed from view. But those folders aren't hidden solely to keep your folders looking tidy. Those hundreds of files are what keep your operating system running smoothly.
I have a folder that seems to have "hidden" itself. I used TinkerTool to show hidden files, and I can see it. But in a file browser (such as an Import box), the folder is still not showing up. I cannot seem to access the folder through an alias in the latter case. How can I "unhide" the folder permanently?
- from Apple Community
However, when you want to unhide folders Mac to view or edit some files you wanted but failed like the above user's saying in Apple Community, what should you do? This article offers you effective solutions to preview, recover and unhide your disappeared folders and files on Mac.
Before unhiding and editing the hidden folders on Mac, you should know the following -
- 🍎Apple hides folders to prevent inadvertent damage to the operating system.
- 💣There are hazards to system errors before you do anything.
- ⛑️Only delete folders that you are certain are safe to delete.
- 🔙If you accidentally remove vital files, recover deleted files on Mac immediately.
View and Recover Disappeared Folders/Files on Mac
As we mentioned previously, you can recover your accidentally deleted folders on Mac. In other circumstances, the files were hidden due to a malware assault or an error in the macOS. Thus, you may want the assistance of third-party data recovery tools to retrieve your files. We propose EaseUS Data Recovery Wizard for Mac in this case. This application allows you to quickly locate and recover Mac's disappeared folders. Here are some of EaseUS Data Recovery Wizard's remarkable capabilities.
- Recover Trash Mac: restore data lost due to an empty Trash Bin, unintentional deletion, or other causes.
- During the recovery procedure, it is possible to recover unsaved Word Mac, Excel, and PDF files.
- There are only three steps to the rehabilitation process. Simple and straightforward.
- Users can preview all recovered files folders.
This software is a trial version that you can use to scan and preview all lost folders without payment. You can pay to restore the lost folders and files after ensuring this software indeed works.
Step 1. Scan for deleted files
Select the hard drive, external drive, or SSD where your important data & files were deleted and click "Search for lost files".

Step 2. Filter the lost files
The software will run quick and deep scans and work hard to find as many deleted files as possible on the selected volume. Filter wanted files through the "Type" and "Path" options.

Step 3. Recover deleted files
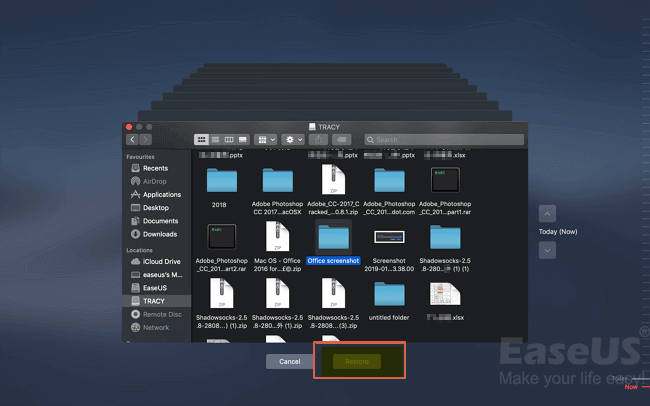
Double-click the deleted files to preview. Then, click the "Recover" button to get them back.

How to Unhide Folders in Mac Permanently
This part teaches you how to view and unhide hidden folders on your Mac using the Finder, Terminal, or Shortcut. Remember that changing, renaming, or deleting hidden folders on your Mac can result in major problems, so proceed with caution. Firstly, you can watch a video tutorial to learn how to show hidden folders.
- 00:00 - What this video is about
- 00:25 - Hide Files on MacBook M1 pro
- 01:12 - See Hidden files on M1 MacBook Pro
- 01:44 - Unhide Files MacBook Pro M1
- Solution 1. Show Hidden Folders Mac: Finder
- Solution 2. View Hidden Folders Mac: Terminal
- Solution 3. Unhide Folders MacBook: Shortcut
🔎Solution 1. Show Hidden Folders Mac: Finder
The easiest method is using Mac Finder to show hidden folders:
Step 1. On your Mac's Dock, select the "Mac Finder" icon. This will launch a new Finder window.
![]()
Step 2. Click the "Go" button. It's located at the top of the screen in the menu bar. This brings up a drop-down menu.
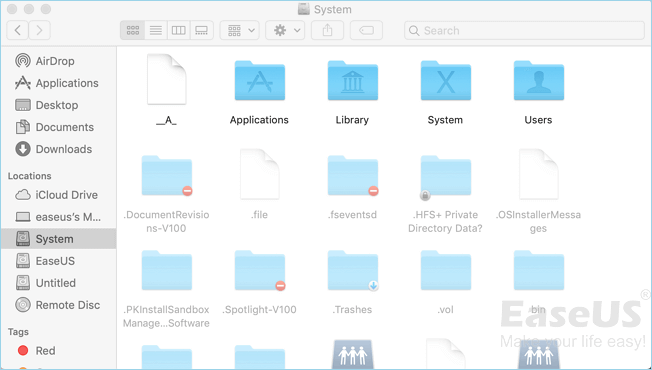
Step 3. Select "Computer". This option is located around halfway down the "Go" drop-down menu.

Step 4. Double-click the symbol for your hard disk where the hidden folders exist.
Step 5. Hold down Shift + Command +. This operation will display hidden files folders on your Mac's hard drive. Hidden folders and files will be grayed out.

🎛️Solution 2. View Hidden Folders Mac: Terminal
Another method is to use the Mac Terminal to display hidden folders:

How to Open Terminal on Mac and How to Use It
How to open Terminal on Mac? You may believe that utilizing the Terminal will be challenging. It can handle Mac's tasks. Read more >>
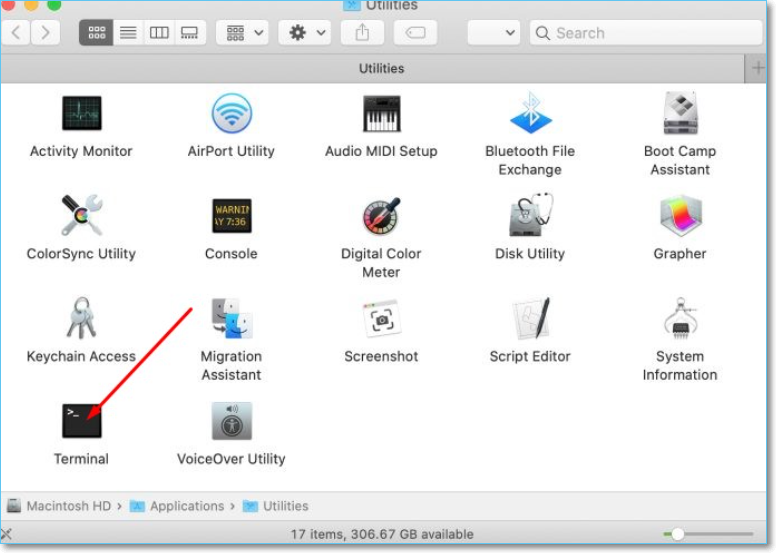
Step 1. Type Terminal into Mac's search bar to launch it. Alternatively, click "Go" in the menu bar, then select "Applications," scroll down to "Utilities," expand the folder, then click on "Terminal."
Step 2. Type defaults write com.apple.Finder AppleShowAllFiles true and hit "Enter."

Step 3. Enter killall Finder.
Step 4. Hit "Enter" one more.
The hidden folders should be accessed in the Finder when you run the script.
Let us learn more ways to unhide folders on Mac. What's more, don't forget to mark this passage by sharing it on Facebook, Twitter, or SNS.
🎯Solution 3. Unhide Folders MacBook: Shortcut
This method demonstrates how to utilize the Mac keyboard to locate hidden folders rapidly. Here are the specific steps.
Step 1. Open the folder in which you wish to look for hidden folders.
Step 2. Press the Command + Shift +.(period) keys simultaneously.

Step 3. The concealed folders will appear in the folder as transparent.
Step 4. Press the Command + Shift +.(period) combination again to hide the folders.

6 Best Ways to Restore Disappeared Desktop on Mac
This page guides you to turn the icons back on Mac immediately. Learn how to restore missing desktop files and icons on Mac with EaseUS Data Recovery Wizard for Mac.

How to Hide Folders & Files on Mac
Employing the keyboard shortcut: Command + Shift +.(period) combination is simple but not always safe. The Terminal command is the best option that can be used to hide folders and files on Mac.
This method may appear complicated, but don't worry; follow the steps and essential commands, and you'll be OK.
Step 1. Launch Terminal.
Step 2. Enter chflags hidden.

Step 3. Drag the folders to be hidden into the Terminal window.
Step 4. Make a new folder and move all of the files you wish to hide there.
Step 5. To hide the folders and files, press the "Enter" key.
Conclusion
Here's everything you need to know about showing hidden folders on Mac. Whether your folders have been lost or hidden by the system, this article will help you recover them. Please be cautious when dealing with hidden folders. If you don't know what you're doing, you can easily cause major damage. If you lost your vital data or system files, you could try the professional data recovery software - EaseUS Data Recovery Wizard for Mac.
Unhide Folders Mac FAQs
Here are 4 additional questions about unhiding folders on Mac. Check here for the answers.
1. How do I unhide hidden folders?
At the exact moment, press the "Command" + "Shift" + "." (period) keys. The concealed files will appear in the folder as transparent.
2. How do I see all folders on Mac?
To open a Finder window on your Mac, click the Finder icon in the Dock. To temporarily display the path bar, click View > Show Path Bar or hit the Option key.
The location and nested folders that contain your file or folder are displayed near the bottom of the Finder window.
3. Is there a hidden folder on Mac?
You can open your Macintosh HD folder in Finder by clicking your hard drive under Locations. To bring up the hidden files, use Command + Shift +. (period). You may do the same thing from the Documents, Applications, and Desktop folders.
4. Why did my hidden files on Mac disappear?
This could be due to files being mistakenly lost or deleted during any operation or you being unable to restore them due to a password. There is no need to panic since EaseUS Data Recovery Wizard for Mac can easily restore files and directories. You will easily recover all of your lost files.
Was This Page Helpful?
Jaden is one of the editors of EaseUS, who focuses on topics concerning PCs and Mac data recovery. Jaden is committed to enhancing professional IT knowledge and writing abilities. She is always keen on new and intelligent products.
-
EaseUS Data Recovery Wizard is a powerful system recovery software, designed to enable you to recover files you’ve deleted accidentally, potentially lost to malware or an entire hard drive partition.
Read More -
EaseUS Data Recovery Wizard is the best we have seen. It's far from perfect, partly because today's advanced disk technology makes data-recovery more difficult than it was with the simpler technology of the past.
Read More -
EaseUS Data Recovery Wizard Pro has a reputation as one of the best data recovery software programs on the market. It comes with a selection of advanced features, including partition recovery, formatted drive restoration, and corrupted file repair.
Read More
Related Articles
-
How to Recover SD Card with Bad Sectors on Mac
![author icon]() Jaden/Feb 25, 2025
Jaden/Feb 25, 2025 -
Mac Pages AutoSave | Feature to Recover Unsaved Documents in Pages
![author icon]() Brithny/Feb 25, 2025
Brithny/Feb 25, 2025 -
2025 Tips| How to Recover Unsaved Photoshop (PSD) Files on Mac
![author icon]() Tracy King/Feb 25, 2025
Tracy King/Feb 25, 2025 -
How to Recover ARW Files Mac | Sony RAW Image Recovery
![author icon]() Dany/Nov 27, 2024
Dany/Nov 27, 2024