Start Your Free Trial!
Sign up to our newsletter, stay updated on news and exclusive offers from EaseUS. Don't worry, if you change your mind, you can unsubscribe at any time, free of charge. We value your privacy (Privacy Policy).
Page Table of Contents
How to Convert exFAT to NTFS Without Losing Data HOT
What's the Difference Between exFAT and NTFSHOT
ConclusionHOT
About the Author
Hot Topics
Updated on Apr 28, 2025
Technology advances every day, and file system conversion has become a frequent need of users. Conversion of the exFAT file system to NTFS is one of the cases. Windows operating system users need the NTFS file system for advanced features and data security.
But the big question is, how can this conversion be done without data loss? In this article, EaseUS will introduce some options for converting exFAT to NTFS without hassle. You can follow the steps below to convert your file system safely. Below is a brief list of them.
Let's be honest: you can only convert exFAT to NTFS directly by formatting the drive. The formatting operation will inevitably lead to data loss. Therefore, users are required to back up important files before conversion.
Here, we offer four practical methods for you to realize this conversion by formatting exFAT disk drives to NTFS.
If you want to convert exFAT to NTFS without losing your essential data, EaseUS Partition Master Professional can be a good option. This powerful software can format exFAT partitions for NTFS. It allows you to use it for NTFS conversion tasks on your own. It is suitable for all levels of users, whether beginners, amateurs, and professional computer users. It is very easy to use, with a simple interface and clear instructions. It only takes a few clicks to execute the task. Moreover, using a third-party tool can save you time. You don't have to spend time typing complex commands. This tool can do all the tasks for you.
You can download this powerful tool to simplify the process.
It is very important to back up or copy the essential files from the exFAT partition to other locations. You can use EaseUS Partition Master to copy a partition to another hard drive using its advanced disk cloning feature. Once your data is placed in another location, you can follow these quick steps to convert your exFAT drive.
Here is a guide for you:
Step 1. Right-click the hard drive partition and choose the "Format" option.
Step 2. In the new window, you can set a new name for your selected hard drive partition. Then click the "OK" button.
Step 3. Click the "Execute 1 Task(s)" button, then click "Apply" to start formatting the hard drive partition.
Furthermore, EaseUS Partition Master offers a user-friendly interface that is simple enough for anyone to use. Irrespective of your level of competence in IT or your fear of encountering computer issues, this applies to you.
What's more, it can also provide you with other practical operations, such as:
If you find EaseUS Partition Master helpful in converting exFAT to NTFS, feel free to share it and help more people.
File Explorer, a built-in file management tool in Windows, can also be used to convert exFAT to NTFS. Here's how to do it:
Step 1. Manually open File Explorer on your Windows computer, or Press "Win + E" to open it directly.
Step 2. On the left-hand menu, click "This PC." Then, navigate to the exFAT drive you want to convert.
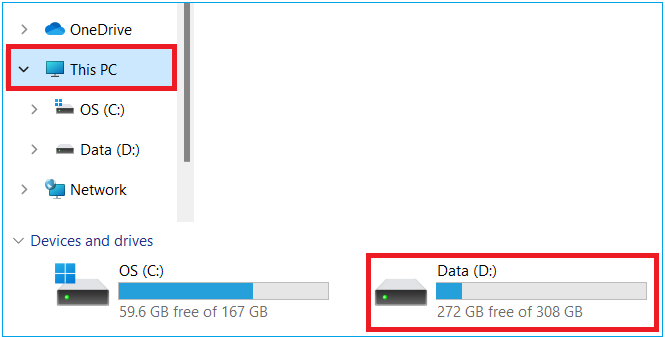
Step 3. Right-click on the drive and select "Format".
Step 4. On the opened menu, you will see multiple formatting options. Simply choose "NTFS" as the file system.
Step 5. Now, click "Start" to begin the formatting process.
If your File Explorer is not showing, read the article below for help.
How to Fix C Drive Not Showing in File Explorer
EaseUS will explore reliable methods to address and resolve the issue of the C drive not showing in File Explorer, ensuring you can regain access to your critical data and system functionalities.
Disk Management is another built-in Windows tool that can help you convert exFAT to NTFS. This method also erases all the data from the disk. So, make sure to back up your data. Follow these steps:
Step 1. Press "Win + X" and select "Disk Management" from the list.
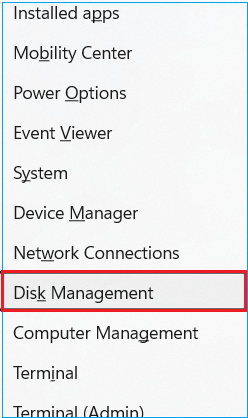
Step 2. Locate the exFAT partition you want to convert.
Step 3. Right-click the partition and select "Format".

Step 4. Select "NTFS" as the file system in the format window and click "OK".
Step 5. Confirm the action and wait for the process to complete. Remember to back up your data before starting.
Click the buttons to get help when you encounter problems when using Disk Management:
For those comfortable with command lines, Command Prompt offers a straightforward and efficient method to convert exFAT to NTFS. Here's a step-by-step guide to help you through the process:
Step 1. Press "Win + R" to open the Run dialog box. Type "cmd" and press Enter to open Command Prompt.
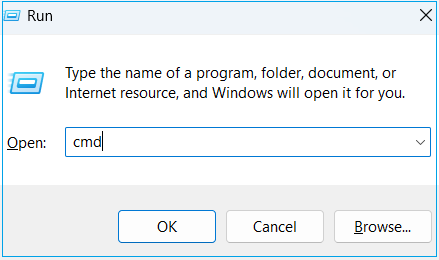
Step 2. Once the Command Prompt window is open, type the command format [drive letter]: /fs:ntfs. Be sure to replace [drive letter] with the actual drive letter of the exFAT partition you wish to convert. For example, if your drive letter is E, the command would look like this: format E: /fs:ntfs.
Step 3. Press Enter and follow the on-screen prompts to format the drive to NTFS. Depending on the size of your drive, this process may take a few minutes.
Tips and Warnings:
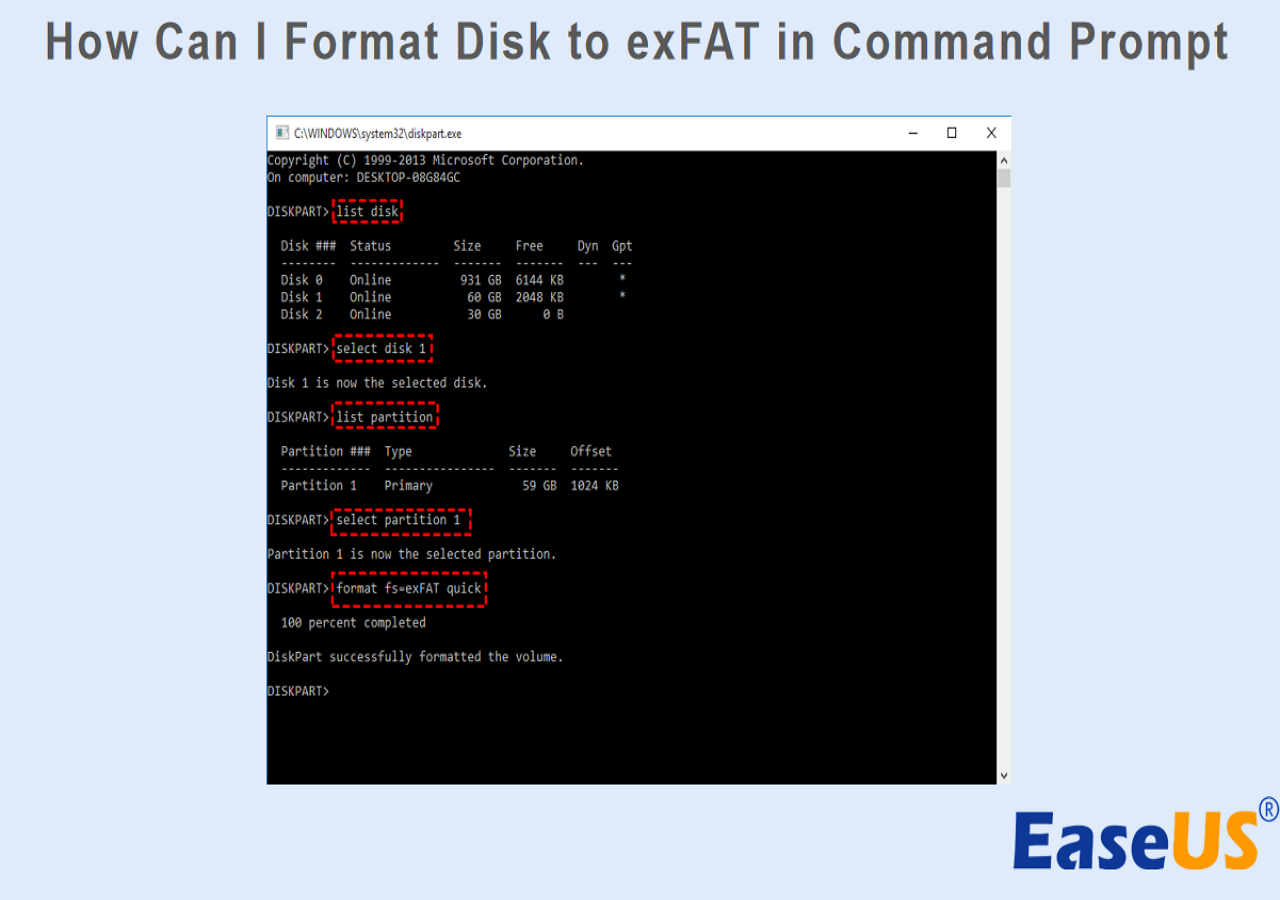
If you are interested in converting a drive to exFAT using Command Prompt, check the guide below:
How Can I Format Disk to exFAT in Command Prompt
Want to format your disk to exFAT easily? Discover how to do it using CMD or the user-friendly EaseUS Partition Master and select the method that suits your requirements.
Understanding the differences between exFAT and NTFS helps you decide which file system suits your needs.
NTFS is primarily intended for Windows computers, although its use can be on other operating systems. To read NTFS files on a macOS device, you require other applications that can enable you to access files in this format. In contrast, the exFAT file system works with significantly more operating systems than the NTFS file system. This also makes it a good choice to format USB/external hard drive to exFAT to use it on both Windows and Mac OS.
In terms of security, NTFS stands out as the better filesystem. It has additional options, such as permission and password to files, that assist in safeguarding your files from corruption or invasion. However, exFAT does not offer these enhanced security features and is more prone to data corruption.
NTFS excels in managing large files and maintaining system performance, making it suitable for internal drives on a Windows PC. You can also resize NTFS partition to get more space. While exFAT is slower in response speed and less efficient in handling large files.
NTFS is best suited for internal drives requiring robust data protection and fast read-and-write speeds. exFAT is commonly used for external storage drives due to its compatibility.
In other words, choosing NTFS can provide better data protection and performance for your internal drives.
We hope the guide successfully helped you convert the drive into your desired format. It will help you to get a good file management system and enhance data security. We discussed the four methods of converting exFAT to NTFS. Among these methods, EaseUS Partition Master is the simplest method. It is more friendly to a non-savvy user. Most importantly, before you format the drive, you must back up all the files to avoid data loss.
Don't forget to share this article with others who might find it helpful.
Some of the most common questions and answers people ask about converting from exFAT to NTFS are below. Read through and learn more if you are interested.
1. Is exFAT better than NTFS for Windows 11?
Generally, the NTFS file system is better for Windows users. It offers rich features and easy functionality, making it a good choice for users. However, if we talk about the compatibility of exFAT, it is given to Windows, Mac OS, Linux, and many other storage device operating systems. ExFAT is, therefore, more suitable for external hard drives which are used on different operating system platforms.
2. How to convert NTFS to exFAT on Mac?
If you have an NTFS drive and wish to convert it to exFAT on your Mac, you have utilized Disk Utility. After selecting the NTFS disk, you name the drive, click "Erase," choose "exFAT" from the list of formats and erase it. Since this method erases all data on the disk, you must back up your contents beforehand.
3. Is there a way to format an exFAT external SSD to NTFS?
Yes, converting an exFAT external SSD to NTFS format on a Windows computer is possible. For this purpose, there are numerous built-in utilities. Using File Explorer is the easiest option. Disk Management is another in-build tool. It is a more advanced storage drive user interface.
How Can We Help You
Updated by Tracy King
Tracy became a member of the EaseUS content team in 2013. Being a technical writer for over 10 years, she is enthusiastic about sharing tips to assist readers in resolving complex issues in disk management, file transfer, PC & Mac performance optimization, etc., like an expert.
Cici is the junior editor of the writing team of EaseUS. She accepted the systematic training on computers at EaseUS for over one year. Now, she wrote a lot of professional articles to help people resolve the issues of hard drive corruption, computer boot errors, and disk partition problems.
It won't hot image your drives or align them, but since it's coupled with a partition manager, it allows you do perform many tasks at once, instead of just cloning drives. You can move partitions around, resize them, defragment, and more, along with the other tools you'd expect from a cloning tool.
Read MoreI love that the changes you make with EaseUS Partition Master Free aren't immediately applied to the disks. It makes it way easier to play out what will happen after you've made all the changes. I also think the overall look and feel of EaseUS Partition Master Free makes whatever you're doing with your computer's partitions easy.
Read MorePartition Master Free can Resize, Move, Merge, Migrate, and Copy disks or partitions; convert to local, change label, defragment, check and explore partition; and much more. A premium upgrade adds free tech support and the ability to resize dynamic volumes.
Read MoreIt won't hot image your drives or align them, but since it's coupled with a partition manager, it allows you do perform many tasks at once, instead of just cloning drives. You can move partitions around, resize them, defragment, and more, along with the other tools you'd expect from a cloning tool.
Read MoreI love that the changes you make with EaseUS Partition Master Free aren't immediately applied to the disks. It makes it way easier to play out what will happen after you've made all the changes. I also think the overall look and feel of EaseUS Partition Master Free makes whatever you're doing with your computer's partitions easy.
Read MoreRelated Articles
Fixed: SFC scannow There Is A System Repair Pending | 2025🔥
![]() Cici/2025/04/28
Cici/2025/04/28
How to Resize/Move/Clone BitLocker Partition on Windows 11/10 Without Decryption
![]() Cedric/2025/04/28
Cedric/2025/04/28
How to Reset Forgotten Password in Windows 11 [2025 Tutorial]
![]() Cici/2025/04/28
Cici/2025/04/28
Hard Drive Keeps Losing Disk Space
![]() Jean/2025/04/28
Jean/2025/04/28
EaseUS Partition Master

Manage partitions and optimize disks efficiently
Your best companion for disk partitioning, MBR to GPT/GPT to MBR conversion,even OS migration
CHOOSE YOUR REGION
Start Your Free Trial!
Sign up to our newsletter, stay updated on news and exclusive offers from EaseUS. Don't worry, if you change your mind, you can unsubscribe at any time, free of charge. We value your privacy (Privacy Policy).
Start Your Free Trial!
Sign up to our newsletter, stay updated on news and exclusive offers from EaseUS. Don't worry, if you change your mind, you can unsubscribe at any time, free of charge. We value your privacy (Privacy Policy).