Start Your Free Trial!
Sign up to our newsletter, stay updated on news and exclusive offers from EaseUS. Don't worry, if you change your mind, you can unsubscribe at any time, free of charge. We value your privacy (Privacy Policy).
Page Table of Contents
Why Does the Mac Migration Assistant Take so LongHOT
How to Speed up Migration AssistantHOT
Migration Assistant Slow? Here are the AlternativesHOT
ConclusionHOT
FAQs on Migration Assistant SlowHOT
About the Author
Hot Topics
Updated on Apr 28, 2025

Some users have reported slowdown or even stuck when using Migration Assistant for disk cloning or data transfer. Below is an example of what Mac users have encountered when using Migration Assistant.
There are various reasons for the problem. If you are experiencing something similar, congratulations on finding this page. Here, EaseUS will provide you with some effective solutions to Migration Assistant slow and offer an alternative.
Migration Assistant slow is common on Mac devices, and many factors can contribute to this. Such as:
Now that you understand why Migration Assistant on your Mac is transferring slowly. Let's find out what we can do to fix the problem below!
Both Macs should be connected to the same Wi-Fi network, and you can make sure they are positioned close to minimize interference. If possible, run a speed test to confirm your connection's stability.
If the speed is still slow, use an Ethernet cable instead of Wi-Fi for a faster and more reliable transfer. This can significantly reduce transfer time compared to wireless connections.
If your network is not the problem, then make sure both Macs are running the latest version of macOS. Here's how to perform Mac Software Update:
Step 1. On both Macs, go to Spotlight in the menu bar and search for and open Software Update.
Step 2. Then, Software Update should automatically begin checking for new software. Click "Upgrade Now" if new software is available.

Step 3. Enter your Mac administrator password if you're prompted.
Step 4. Wait for the update to complete.
Mac Software Update Not Working: Possible Causes and Solutions
Do you want to find out why the Mac software update is not working? Check this article and you will get more information about this issue and 6 practical fixes to resolve it.

If you still feel that the Migration Assistant is slow after performing the above actions, then use an alternative solution to complete your data transfer or disk cloning.
If you are looking for a way to transfer all data from one Mac to another, a disk cloning tool should be your first option.EaseUS Partition Master for Mac is one of the best, and it ensures that the whole disk can be cloned onto another Mac device.
To proceed with the operation, you should first prepare an external storage disk like an SSD, HDD, or USB drive.
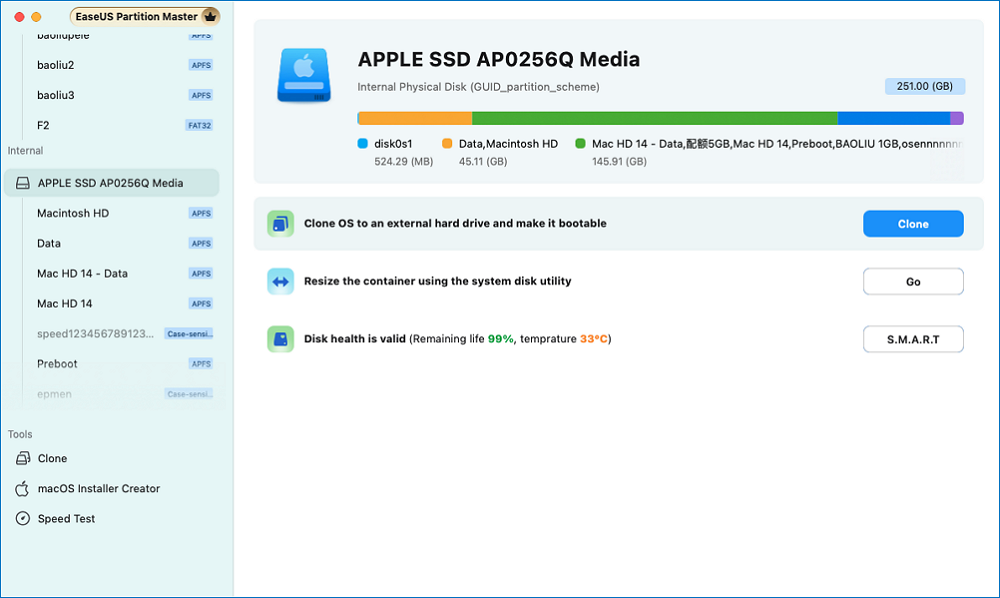
Step 1. Install and connect another new disk to Mac computer, run EaseUS Partition Master for Mac, then, click "Clone" under the Abilities section. Click the "+" icon to browse and locate the macOS disk and target new disk.

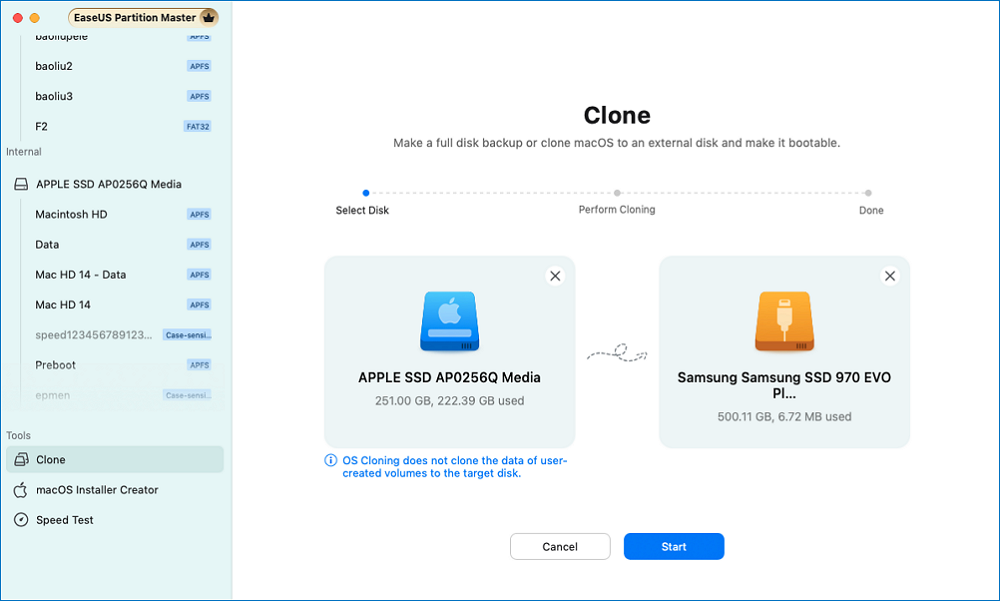
Step 2. Select the Source and the Destination disk and click "Select" to confirm.

Step 3. Confirm if you've selected the correct macOS OS disk and the new target disk you'd like to clone and upgrade the macOS disk to. Then, click "Start" and click "Yes" to confirm if EaseUS Partition Master for Mac requests you to confirm the operation.

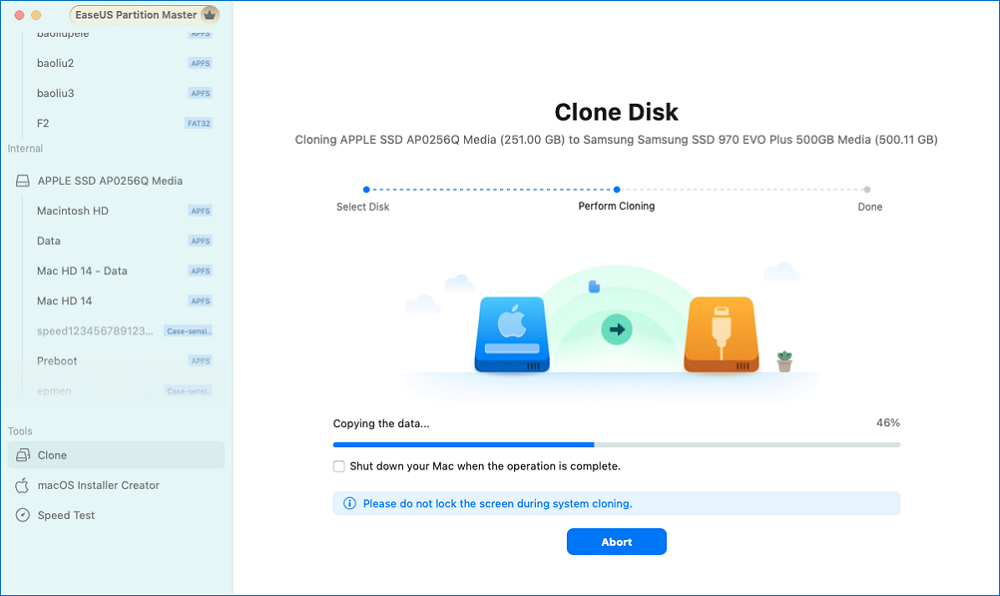
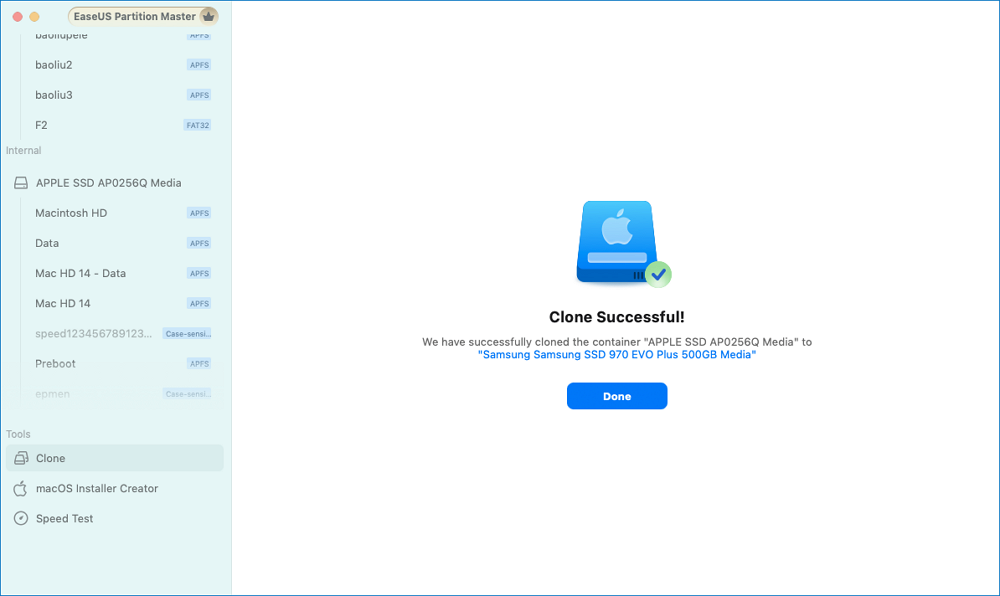
Step 4. Wait patiently and let EaseUS Partition Master for Mac to complete cloning the old macOS disk to the new target disk.

After cloning the Mac drive to your external disk, follow the instructions below to restore it on another device.
Step 1. Connect the external drive to the other Mac.
Step 2. Boot your Mac into Recovery Mode:
Step 3. Then, go to "Options" > "Disk Utility."

Step 4. In Disk Utility, select your Mac drive and click on the "Restore" button.
Step 5. Choose to "Restore from" the external hard drive and click "Restore."
Step 6. Wait patiently until it's done.
If Migration Assistant is still slow, you might want to use Target Disk Mode, which allows one Mac to act as an external hard drive for the other one. This method can offer you a faster data transfer.
Step 1. Connect the two Macs using a Thunderbolt, USB-C, or USB-A cable.
Step 2. Boot your target Mac into Target Disk Mode:
Step 3. On the host Mac, you should be able to see the target Mac's disk icon appear on the desktop.
Step 4. Drag and drop files between the two Macs according to your own needs.
Step 5. Once you are done, control-click the target Mac drive in the Finder sidebar, then choose "Eject [volume]" to eject the target Mac.
Step 6. On the target Mac, push the power button to shut it down and disconnect them.
If this article has helped you, please don't forget to share this useful knowledge with other users.
Migration Assistant may be slow due to factors like a poor Wi-Fi connection, the amount of data, the type of connection, or outdated software. Luckily, this page offers workable solutions and practical alternatives for users who are looking for a way to enhance the transfer speed.
For people who want to clone a Mac to another Mac, EaseUS Partition Master for Mac, with its disk cloning feature, can ensure you a smooth and fast data cloning experience.
Below are some related Q&A that you might be interested in.
1. How long should a Migration Assistant take?
It depends on the data volume and size, the connection method, and network stability. The time typically ranges from a few minutes for smaller amounts of data (20-30 GB) to several hours for larger transfers (100 GB or more).
2. How can I migrate my Mac to Mac faster?
Use a Thunderbolt 3 cable instead of Wi-Fi or Ethernet can speed up the data migration significantly.
3. How long does Migration Assistant take for 100GB?
It might take several hours, depending on the connection method and data complexity, with estimates ranging from 1 to 3 hours under optimal conditions.
How Can We Help You
Oliver is an EaseUS professional writer who dares explore new areas. With a passion for solving tech issues with straightforward guides for common users, Oliver keeps honing his writing craft by developing in-depth solutions for disk and partition management, computer boot-up issues, file transfer, etc.
It won't hot image your drives or align them, but since it's coupled with a partition manager, it allows you do perform many tasks at once, instead of just cloning drives. You can move partitions around, resize them, defragment, and more, along with the other tools you'd expect from a cloning tool.
Read MoreI love that the changes you make with EaseUS Partition Master Free aren't immediately applied to the disks. It makes it way easier to play out what will happen after you've made all the changes. I also think the overall look and feel of EaseUS Partition Master Free makes whatever you're doing with your computer's partitions easy.
Read MorePartition Master Free can Resize, Move, Merge, Migrate, and Copy disks or partitions; convert to local, change label, defragment, check and explore partition; and much more. A premium upgrade adds free tech support and the ability to resize dynamic volumes.
Read MoreIt won't hot image your drives or align them, but since it's coupled with a partition manager, it allows you do perform many tasks at once, instead of just cloning drives. You can move partitions around, resize them, defragment, and more, along with the other tools you'd expect from a cloning tool.
Read MoreI love that the changes you make with EaseUS Partition Master Free aren't immediately applied to the disks. It makes it way easier to play out what will happen after you've made all the changes. I also think the overall look and feel of EaseUS Partition Master Free makes whatever you're doing with your computer's partitions easy.
Read MoreRelated Articles
Best Solution to Resize FAT32 Partition Without Losing Data
![]() Cici/2025/04/28
Cici/2025/04/28
How Do I Use DiskPart to Delete All Partitions in Windows? Your 2025 Guide Is Here
![]() Tracy King/2025/04/28
Tracy King/2025/04/28
How Do I Securely Erase Hard Drive/SSD, Wipe Confidential Data? Your Reliable Guide Is Here
![]() Tracy King/2025/04/28
Tracy King/2025/04/28
[Solved] Secure Boot Violation Invalid Signature Detected
![]() Oliver/2025/04/28
Oliver/2025/04/28
EaseUS Partition Master

Manage partitions and optimize disks efficiently
Your best companion for disk partitioning, MBR to GPT/GPT to MBR conversion,even OS migration
CHOOSE YOUR REGION
Start Your Free Trial!
Sign up to our newsletter, stay updated on news and exclusive offers from EaseUS. Don't worry, if you change your mind, you can unsubscribe at any time, free of charge. We value your privacy (Privacy Policy).
Start Your Free Trial!
Sign up to our newsletter, stay updated on news and exclusive offers from EaseUS. Don't worry, if you change your mind, you can unsubscribe at any time, free of charge. We value your privacy (Privacy Policy).