- Video Recovery
- SD Card Recovery
- Recycle Bin Recovery
- Recover Data from USB
- Recover Deleted Emails
- Hard Drive Not Showing Up in Windows
- Recover Unsaved Word Documents
- Recover Deleted Files in Windows 10
- Recover Files from Virus Infected Hard Drive
- Best Free Photo Recovery Software
- Recover Files from Formatted Hard Drive
RAID 1 (Redundant Array of Independent Disks) is a popular disk configuration that provides data redundancy by mirroring data across two or more drives. If one drive fails, the other retains a complete copy of the data, ensuring data integrity. However, RAID arrays sometimes fail or require rebuilding due to drive errors, corruption, or hardware issues.
How to Rebuild RAID 1 Array from Apple Disk Utility
Rebuilding a RAID 1 array in macOS is a straightforward process using Apple Disk Utility. Follow these steps to rebuild your RAID 1 array:
Step 1. Before rebuilding the RAID array, ensure you have a data backup. While RAID 1 provides redundancy, rebuilding the array can still pose a risk of data loss.
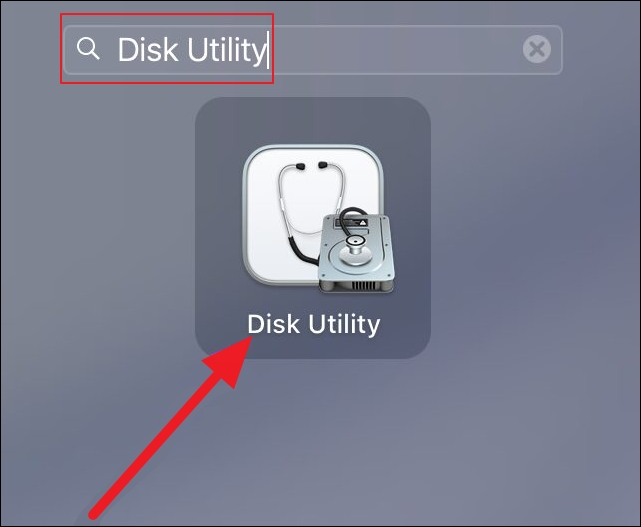
Step 2. Go to "Applications" > "Utilities" > "Disk Utility". Alternatively, press Command + Space, type Disk Utility, and press Enter.
Step 3. In Disk Utility, select the RAID set from the sidebar. It will typically be labeled as RAID Volume or RAID Set. Check the status of the RAID set. If one of the drives has failed, it will be marked as Offline or Missing.

Step 4. If a drive has failed, replace it with a new drive of equal or larger capacity.
Step 5. In Disk Utility, select the RAID set and click the Rebuild button. Follow the on-screen instructions to add the new drive to the RAID set.
Disk Utility will begin rebuilding the RAID array. This process may take some time, depending on the size of the drives and the amount of data.
Once the rebuild is complete, check the status of the RAID set in Disk Utility.
LEARN MORE
Still curious? Click here to learn about Review of the Best RAID Recovery Software on Mac.
How to Recover Data from RAID Hard Drives on Mac
If your RAID array has failed and you're unable to rebuild it, you may need to recover data from the drives. Here's how to do it.
EaseUS Data Recovery Wizard for Mac can help you properly recover RAID data on your Mac. EaseUS, the best RAID recovery software available, can also assist you in recovering lost data from any RAID hard disk as long as your computer can read and recognize it. This includes RAID 0, RAID 1, RAID 5, and RAID 10.
Step 1. Search for lost files
Select the disk location to search for lost files (it can be an internal HDD/SSD or a removable storage device) on macOS Sierra, High Sierra, Mojave, Catalina, Big Sur, Monterey, Ventura, and the latest Sonoma. Click the "Search for lost files" button.

Step 2. Go through the scanning results
EaseUS Data Recovery Wizard for Mac will immediately scan your selected disk volume and display the scanning results.

Step 3. Select the file(s) and recover
In the scan results, select the file(s) to preview and click the "Recover" button to have them back.

How to Repair a Mac Disk with Disk Utility
If your RAID array or individual drives are experiencing issues, you can use Disk Utility to repair them.
Step 1. Open Disk Utility
- Go to "Applications" > "Utilities" > "Disk Utility".
- Alternatively, press Command + Space, type Disk Utility, and press Enter.
Step 2. Select the Disk or Volume
In Disk Utility, select the disk or volume you want to repair from the sidebar.
Step 3. Run First Aid
- Click the First Aid button in the toolbar.
- Click Run to start the repair process.
- Disk Utility will check for errors and attempt to repair them. This process may take some time.

Step 4. Verify the Repair
- Once the repair is complete, check the status of the disk or volume.
- If the issue persists, you may need to reformat the disk or seek professional assistance.
Conclusion
Rebuilding a RAID 1 array in macOS is a manageable task with the right tools and knowledge. Following the steps outlined in this guide, you can rebuild your RAID array, recover lost data, and repair disk issues using Apple Disk Utility. Regular backups and maintenance can help prevent data loss and ensure the longevity of your RAID setup.
How to Rebuild the RAID 1 in macOS FAQs
If you still have some questions about Mac disk utility rebuild raid, check the quick answers below to help yourself out:
1. What is RAID 1?
RAID 1 is a disk configuration that mirrors data across two or more drives, providing redundancy and data protection.
2. Can I rebuild a RAID 1 array if one drive fails?
Yes, you can rebuild a RAID 1 array by replacing the failed drive and using Disk Utility to rebuild the array.
3. How long does it take to rebuild a RAID 1 array?
The time required to rebuild a RAID 1 array depends on the size of the drives and the amount of data. It can take several hours or more.
4. Can I recover data from a failed RAID array?
You can recover data from a failed RAID array using data recovery software or consulting a professional data recovery service.
Was This Page Helpful?
Jaden is one of the editors of EaseUS, who focuses on topics concerning PCs and Mac data recovery. Jaden is committed to enhancing professional IT knowledge and writing abilities. She is always keen on new and intelligent products.
-
EaseUS Data Recovery Wizard is a powerful system recovery software, designed to enable you to recover files you’ve deleted accidentally, potentially lost to malware or an entire hard drive partition.
Read More -
EaseUS Data Recovery Wizard is the best we have seen. It's far from perfect, partly because today's advanced disk technology makes data-recovery more difficult than it was with the simpler technology of the past.
Read More -
EaseUS Data Recovery Wizard Pro has a reputation as one of the best data recovery software programs on the market. It comes with a selection of advanced features, including partition recovery, formatted drive restoration, and corrupted file repair.
Read More
Related Articles
-
Can't Empty Trash Because Disk Is Full | Fixed in 5 Solutions
![author icon]() Jaden/Feb 25, 2025
Jaden/Feb 25, 2025 -
macOS Update VS. Clean Install: How to Choose
![author icon]() Jean/Feb 25, 2025
Jean/Feb 25, 2025 -
How to Recover Data from a Mac with a Broken Screen [Reliable Solutions]
![author icon]() Dany/Feb 25, 2025
Dany/Feb 25, 2025 -
How to Transfer Data from a Broken Mac to a New Mac [5 Workable Methods]
![author icon]() Dany/Feb 25, 2025
Dany/Feb 25, 2025